Korean Cream Cheese Garlic Buns-Irresistible
Korean Cream Cheese Garlic Buns are more than just a snack; they’re an experience. If you’ve ever found yourself scrolling through viral food trends, chances are you’ve encountered the irresistible allure of these sweet, savory, and impossibly decadent buns. What is it about these fluffy delights that has captured the hearts (and taste buds!) of so many? It’s that perfect symphony of textures and flavors: the pillowy soft bread giving way to a molten, tangy cream cheese filling, all enveloped in a rich, garlicky, buttery glaze. Each bite of a Korean Cream Cheese Garlic Bun is a little moment of pure bliss, a testament to the genius of simple ingredients transformed into something truly extraordinary. They’re the ultimate comfort food, perfect for sharing, or, let’s be honest, devouring all by yourself.
Ready to unlock the secret to these crowd-pleasing Korean Cream Cheese Garlic Buns?
Let’s get baking!
Korean Cream Cheese Garlic Buns
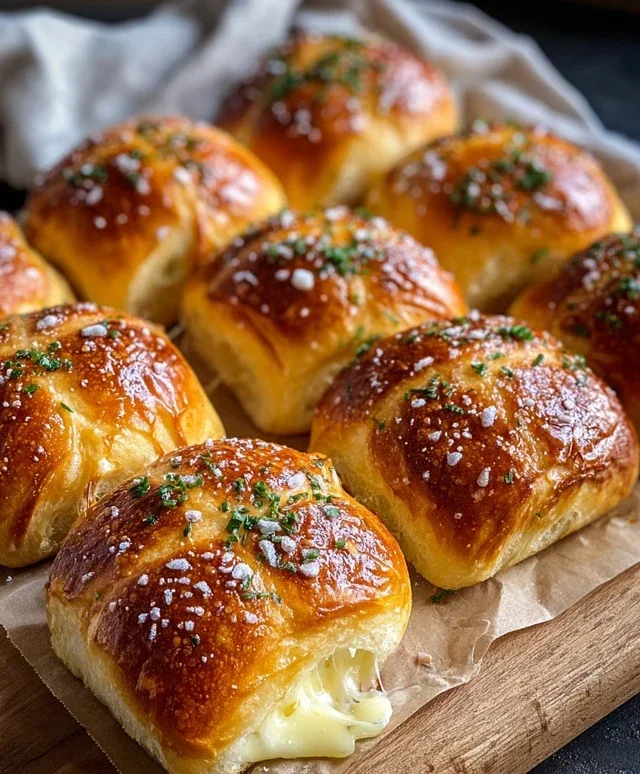
Get ready to experience a flavor explosion with these incredibly decadent Korean Cream Cheese Garlic Buns! These aren’t just any buns; they are a delightful fusion of fluffy, slightly sweet Hawaiian rolls, a luscious cream cheese filling, and a savory, garlicky, buttery coating. They’re the perfect treat for a snack, appetizer, or even a light brunch. The magic lies in the irresistible combination of textures and tastes – the soft, yielding bun, the smooth and slightly tangy cream cheese, and the crispy, aromatic garlic butter topping. I’ve found that using King’s Hawaiian rolls is key to achieving that perfect sweet and tender base that absorbs all the wonderful flavors.
Ingredients:
Instructions:
1. Prepare the Cream Cheese Filling:
First, let’s get that glorious cream cheese filling ready. Make sure your cream cheese is truly at room temperature; this is crucial for achieving a super smooth and lump-free filling. In a medium bowl, combine the softened cream cheese with 2-3 tablespoons of sweetened condensed milk. The amount of condensed milk you use is really up to your preference for sweetness, so start with 2 tablespoons and add more if you like it sweeter. Add a tiny pinch of salt to balance the sweetness and enhance the cream cheese flavor. Using a whisk or an electric mixer on low speed, beat the mixture until it’s completely smooth and creamy. You don’t want any streaks of cream cheese visible. Set this aside. This filling is so simple yet so rewarding!
2. Prepare the Buns:
Now, let’s get those Hawaiian rolls ready. The recipe calls for them to be slightly dried out. This is a really important step for a couple of reasons. When the rolls are a little less moist, they hold their shape better when you cut into them, and they also absorb the delicious garlic butter mixture more effectively without becoming soggy. So, if you can, leave them out on a baking sheet at room temperature for about 2 hours before you start. Once they’ve had a chance to dry a bit, carefully use a serrated knife to cut a generous ‘X’ or a deep slit into the top of each roll, going about two-thirds of the way down. Be gentle so you don’t cut all the way through and separate the bun into two pieces. You want to create a pocket for that creamy filling.
3. Assemble the Buns:
This is where the magic really starts to happen! Take your prepared cream cheese filling and spoon a good dollop into the slit you made in each bun. Don’t be shy; you want a generous amount of that delicious cream cheese to ooze out slightly when you bite into it. Gently press the cream cheese down into the slit so it’s nestled inside. Arrange the filled buns tightly together in a baking dish or a cast-iron skillet. Packing them closely helps them stay moist and soft while baking, and it also gives them a lovely, cohesive appearance when they come out of the oven.
4. Make the Garlic Butter Topping:
Now for the irresistible garlic butter coating! In a small bowl, whisk together the melted butter, the egg, 1/4 cup of milk, and 2 tablespoons of sweetened condensed milk. This combination creates a rich, slightly sweet, and emulsified coating that will bake into a glorious golden-brown glaze. Next, stir in the chopped or minced garlic, 1/2 teaspoon of salt, the chopped fresh parsley, paprika, and the grated parmesan cheese. Mix everything thoroughly until well combined. The aroma of the garlic and herbs alone is enough to make your mouth water!
5. Bake and Enjoy:
Preheat your oven to 350°F (175°C). Once your oven is ready, generously brush or spoon the garlic butter mixture over the top and sides of each filled bun. Make sure to get some of that delicious topping into the crevices. Place the baking dish in the preheated oven and bake for 15-20 minutes, or until the buns are golden brown and puffed up, and the cream cheese filling is warm and slightly melty. Keep an eye on them towards the end of baking, as ovens can vary. Once they’re out of the oven, let them cool for just a few minutes before serving. These are best enjoyed warm, so you can dig in while the cheese is gooey and the butter is fragrant. Be prepared for these to disappear fast – they are incredibly addictive!
Conclusion:
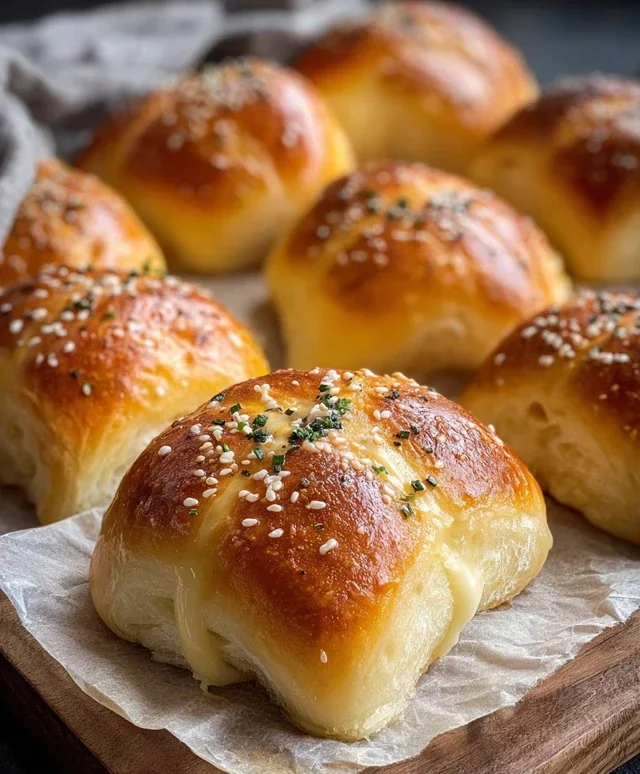
I truly hope you’ve enjoyed learning how to make these incredibly decadent and utterly irresistible Korean Cream Cheese Garlic Buns! These delightful creations are a perfect balance of sweet, savory, and creamy, making them an absolute showstopper. The fluffy, slightly sweet bun enrobed in a rich garlic butter and then bursting with a tangy cream cheese filling is a flavor combination that’s hard to beat. They’re fantastic as a snack, a side dish to a Korean meal, or even a treat on their own. I encourage you all to give this recipe a try; you won’t be disappointed!
For serving suggestions, these buns are phenomenal warm, straight from the oven, when the cream cheese is delightfully melty. They pair wonderfully with Korean BBQ, stews, or simply enjoyed with a cup of coffee or tea. If you’re feeling adventurous, consider variations! You could add a sprinkle of chopped chives or parsley to the cream cheese filling for an extra burst of freshness, or even a pinch of red pepper flakes for a hint of heat. Perhaps a drizzle of honey or condensed milk over the top after baking could elevate the sweetness even further.
Frequently Asked Questions:
Q1: Can I make the cream cheese filling ahead of time?
Absolutely! You can prepare the cream cheese filling a day in advance and store it in an airtight container in the refrigerator. Just make sure to bring it closer to room temperature before piping it into the buns for easier handling.
Q2: My buns didn’t rise as much as yours. What could be the issue?
Several factors can affect dough rising. Ensure your yeast is active by checking its expiration date and proofing it in warm liquid. Also, make sure your baking environment is warm enough. Drafty kitchens can hinder rising. Finally, don’t over-knead the dough, as this can make it tough and prevent a good rise.
Q3: How should I store leftover buns?
Store any leftover Korean Cream Cheese Garlic Buns in an airtight container at room temperature for up to 2 days. For longer storage, you can refrigerate them, but they are best reheated gently in a low oven or toaster oven to revive their crispy exterior and gooey filling.
Korean Cream Cheese Garlic Buns
Soft and sweet Hawaiian rolls filled with a rich cream cheese mixture and coated in a savory garlic butter sauce, a popular Korean bakery treat.
Ingredients
-
16 King’s Hawaiian Original Hawaiian Sweet Rolls
-
8 oz cream cheese, room temperature
-
2 tablespoons sweetened condensed milk
-
1/2 cup butter, melted
-
1 large egg
-
1/4 cup milk
-
2 tablespoons sweetened condensed milk
-
2 tablespoons chopped garlic
-
1/2 teaspoon salt
-
2 tablespoons fresh parsley, chopped
-
1/2 teaspoon paprika
-
2 tablespoons grated parmesan cheese
Instructions
-
Step 1
Slice each sweet roll horizontally, leaving one side attached to create a pocket. Set aside. -
Step 2
In a bowl, combine cream cheese, 2 tablespoons sweetened condensed milk, and a pinch of salt. Mix until smooth and well combined. Spoon this mixture into the pocket of each roll. -
Step 3
In a separate bowl, whisk together melted butter, egg, 1/4 cup milk, 2 tablespoons sweetened condensed milk, minced garlic, 1/2 teaspoon salt, chopped parsley, paprika, and parmesan cheese. -
Step 4
Arrange the filled rolls in a baking dish. Generously brush or spoon the garlic butter mixture over the top and sides of each roll. -
Step 5
Bake in a preheated oven at 350°F (175°C) for 15-20 minutes, or until the rolls are golden brown and the topping is bubbly. -
Step 6
Let cool slightly before serving.
Important Information
Nutrition Facts (Per Serving)
It is important to consider this information as approximate and not to use it as definitive health advice.
Allergy Information
Please check ingredients for potential allergens and consult a health professional if in doubt.