Easy No Bake Patriotic Cheesecake Recipe
No bake patriotic cheesecake is your ticket to an effortless yet show-stopping dessert that will have everyone cheering! Imagin extracte a creamy, dreamy cheesecake filling, impossibly smooth and rich, layered with vibrant bursts of red, white, and blue, all without ever turning on the oven. It’s the ultimate crowd-pleaser for any summer gathering, from backyard barbecues to dazzling Fourth of July celebrations. What makes this no bake patriotic cheesecake so beloved? It’s the perfect marriage of convenience and pure indulgence. The no-bake aspect means less stress and more time spent enjoying your loved ones, while the stunning visual appeal and classic cheesecake taste guarantee smiles all around. Forget complicated baking techniques; this recipe is designed for pure, unadulterated enjoyment and a guaranteed delicious outcome.
No Bake Patriotic Cheesecake
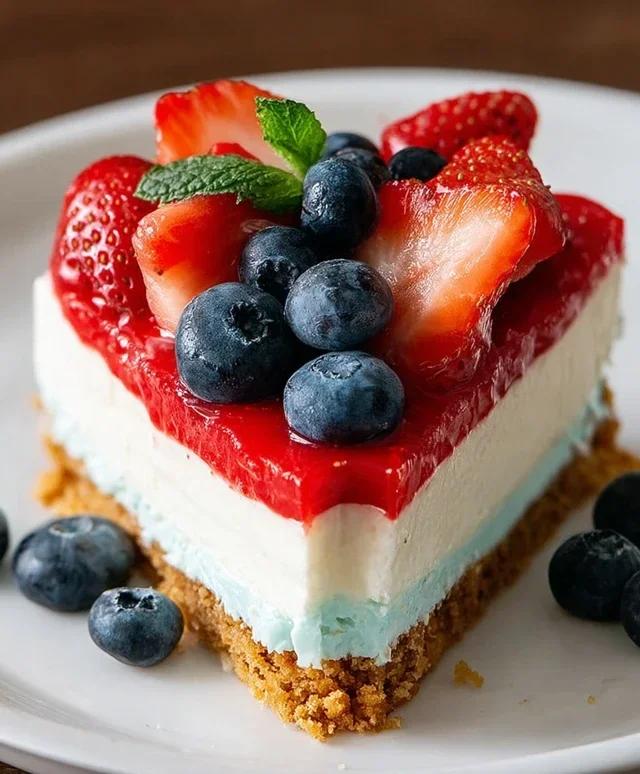
This No Bake Patriotic Cheesecake is the perfect dessert for any summer celebration, especially those involving fireworks and barbecues! It’s incredibly easy to make, requires no oven time, and the festive red, white, and blue layers are sure to wow your guests. The buttery, crisp golden Oreo crust provides a fantastic base for the creamy, decadent cheesecake filling. Then, we’ll layer on that vibrant blue raspberry Jell-O and a luscious white cheesecake topping, adorned with fresh blueberries for that extra touch of patriotic flair. It’s a showstopper that tastes as good as it looks, and the best part is you don’t even need to turn on your oven. Let’s get started!
Ingredients:
Cooking Instructions:
Step 1: Prepare the Golden Oreo Crust
The first step to our delicious no-bake cheesecake is creating the foundation: the crust. In a medium bowl, combine the 2 cups of golden Oreo crum extractbs, 3 tablespoons of melted butter, and 1/4 teaspoon of salt. Mix these ingredients thoroughly until the crum extractbs are evenly moistened. This mixture should resemble wet sand. Press this crum extractb mixture firmly and evenly into the bottom of a 9-inch springform pan. Using the bottom of a glass or a flat-bottomed measuring cup can help you get a nice, even layer. Make sure to press it up the sides slightly as well, creating a little rim. This will help contain the filling. Once pressed, place the prepared crust in the freezer to chill and firm up while you prepare the other components. Freezing it for about 10-15 minutes will be sufficient.
Step 2: Create the Red Layer (Optional, for a deeper patriotic effect)
While our crust is chilling, let’s prepare the first of our vibrant layers. This step is a bit creative and adds an extra pop of color if you desire. Take the softened 2 packages (8 oz each) of cream cheese and place them in a large mixing bowl. Add 2 cups of powdered sugar and 2 teaspoons of vanilla extract. Beat these ingredients together with an electric mixer on medium speed until smooth and well combined, scraping down the sides of the bowl as needed. Now, here’s where the color comes in. Take about one-third of this cream cheese mixture and place it in a separate small bowl. Add 1 teaspoon of red gel food color to this smaller portion. Mix it thoroughly until you achieve a vibrant, consistent red color. If it’s not red enough for your liking, you can add a tiny bit more food coloring, but be careful not to overdo it. This red layer is optional but adds a beautiful patriotic swirl or bottom layer. If you choose to use it, you can carefully spread a thin layer of this red mixture at the bottom of your chilled crust before proceeding to the next steps. You can also reserve it to swirl into the white filling later for a marbled effect.
Step 3: Prepare the Blue Raspberry Jell-O Layer
Next, we’ll prepare the striking blue layer. In a heatproof bowl, empty the 1 package of blue raspberry Jell-O. Carefully pour in 1 cup of boiling water. Stir continuously until the Jell-O powder is completely dissolved. This is crucial for a smooth, set Jell-O layer. Once fully dissolved, let the Jell-O mixture cool to room temperature. It’s important that it’s not hot when you pour it over the cheesecake filling, as it could melt it. This usually takes about 30-45 minutes. You can speed this up by placing the bowl in an ice bath, stirring occasionally. Once cooled, we’ll pour this over the cheesecake filling.
Step 4: Assemble the White Cheesecake Filling and Blue Layer
Now it’s time to bring together the creamy white filling and the vibrant blue. First, in a large bowl, beat the 2 cups of heavy whipping cream with an electric mixer until stiff peaks form. This means when you lift the beaters, the cream stands up straight. Gently fold this whipped cream into the remaining cream cheese mixture (the portion without the red food coloring, or after you’ve removed the red portion). Be careful not to overmix, as this can deflate the whipped cream. You want to keep it light and airy. If you decided to make the red layer, you can now carefully spread your white cheesecake mixture over the chilled crust (and red layer, if using). Once the white filling is in place, gently pour the cooled blue raspberry Jell-O mixture over the white filling. It’s helpful to pour the Jell-O over the back of a spoon to prevent it from making craters in the cheesecake. Place the springform pan in the refrigerator and allow the Jell-O to set completely. This typically takes about 2-3 hours, or until firm to the touch.
Step 5: Prepare the Cream Cheese Frosting and Decorate
Once the Jell-O layer is set, it’s time for the final delicious layer and decoration! In a separate bowl, beat the 6 oz of softened cream cheese and 6 tablespoons of softened butter together until smooth and creamy. Gradually add the 3 cups of powdered sugar, about a cup at a time, beating until well incorporated after each addition. Stir in the 1 teaspoon of vanilla extract until just combined. This frosting should be thick enough to hold its shape. Gently spread this cream cheese frosting over the set blue Jell-O layer. Finally, it’s time to add the finishing touches. Arrange fresh blueberries generously over the top of the cream cheese frosting to create a beautiful, patriotic design. You can create stripes, a star shape, or simply scatter them. Chill the cheesecake for at least another hour before serving to allow all the layers to meld together perfectly. This allows the flavors to develop and ensures the cheesecake is perfectly set for slicing. Enjoy this delightful and festive dessert!
Conclusion:
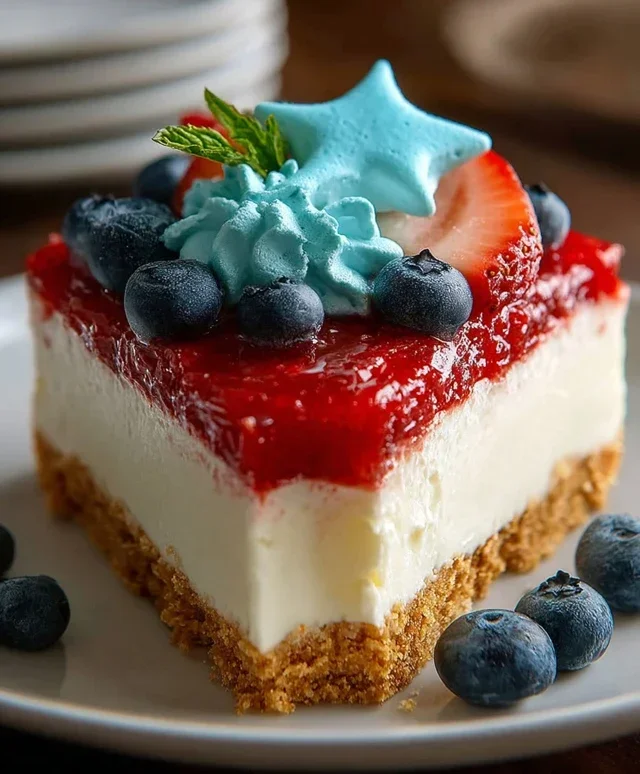
I hope you’re as excited to try this No Bake Patriotic Cheesecake as I am! It truly is a showstopper that’s surprisingly simple to make. The creamy, dreamy texture combined with the vibrant red, white, and blue layers makes it perfect for any summer gathering or holiday celebration, especially the Fourth of July. The best part? Absolutely no oven time required, meaning less stress and more time to enjoy your guests!
This no bake patriotic cheesecake is incredibly versatile. Serve it chilled as is for a delightful dessert, or get creative with your toppings! Fresh berries like strawberries and blueberries are always a hit, and a dollop of whipped cream adds an extra touch of indulgence. For a fun twist, consider adding a sprinkle of edible glitter for extra sparkle.
If you’re feeling adventurous, you can even experiment with different crusts – an oreo crust or a grabeef ham cracker crust with a hint of cinnamon would be delicious. And for those who love a citrus note, a touch of lemon zest in the filling can be a lovely addition. Don’t be afraid to personalize this recipe to your taste!
So go ahead, gather your ingredients, and whip up this stunning No Bake Patriotic Cheesecake. It’s guaranteed to impress, and I can’t wait for you to experience how easy and rewarding it is to create such a festive and delicious treat. Happy baking (or rather, no-baking)!
Frequently Asked Questions:
Can I make this cheesecake ahead of time?
Absolutely! In fact, making this No Bake Patriotic Cheesecake a day in advance is highly recommended. This allows the cheesecake to set properly and the flavors to meld beautifully. Just cover it tightly with plastic wrap and refrigerate until you’re ready to serve.
What if I don’t have fresh berries for decoration?
No problem at all! You can easily achieve the patriotic colors using other methods. Consider using thawed and drained frozen berries, or even a vibrant red strawberry or raspberry jam layered between the cheesecake filling. For the blue, a blueberry sauce or even blue food coloring mixed sparingly into a portion of the cream cheese mixture would work wonderfully.
How long will the cheesecake last in the refrigerator?
This no bake patriotic cheesecake will typically stay fresh and delicious in the refrigerator for up to 3-4 days when stored properly in an airtight container or tightly covered with plastic wrap. However, I doubt it will last that long once your guests get a taste of it!
No Bake Patriotic Cheesecake
A festive and easy no-bake cheesecake perfect for patriotic holidays, featuring layers of red, white, and blue.
Ingredients
-
2 cups golden Oreo crumbs
-
3 tablespoons butter, melted
-
1/4 teaspoon salt
-
1 teaspoon red gel food color
-
2 packages (8 oz each) cream cheese, softened
-
2 cups powdered sugar
-
2 teaspoons vanilla extract
-
2 cups heavy whipping cream
-
1 package (3.94 oz) blue raspberry Jell-O
-
1 cup boiling water
-
6 oz cream cheese, softened
-
6 tablespoons butter, softened
-
3 cups powdered sugar
-
1 teaspoon vanilla extract
-
Fresh blueberries
Instructions
-
Step 1
For the crust: Combine golden Oreo crumbs, melted butter, and salt. Press into the bottom of a 9-inch springform pan. -
Step 2
For the red layer: Beat 2 packages cream cheese, 2 cups powdered sugar, and 2 teaspoons vanilla extract until smooth. Stir in red gel food coloring until desired shade is reached. Fold in 1 cup of heavy whipping cream. -
Step 3
For the blue layer: Dissolve blue raspberry Jell-O in 1 cup boiling water. Let cool slightly. Beat softened cream cheese and softened butter until smooth. Gradually beat in 3 cups powdered sugar and 1 teaspoon vanilla extract. Mix in the cooled Jell-O mixture. Fold in the remaining 1 cup of heavy whipping cream. -
Step 4
Assemble the cheesecake: Spread the red mixture evenly over the crust. Carefully spoon the blue mixture over the red layer. If desired, create swirls with a toothpick. -
Step 5
Chill the cheesecake in the refrigerator for at least 4 hours, or until firm. -
Step 6
Before serving, top with fresh blueberries.
Important Information
Nutrition Facts (Per Serving)
It is important to consider this information as approximate and not to use it as definitive health advice.
Allergy Information
Please check ingredients for potential allergens and consult a health professional if in doubt.