Easy Mint Chocolate Chip Ice Cream Recipe-Cool Treat
Mint Chocolate Chip Ice Cream is more than just a frozen treat; it’s a nostalgic journey, a refreshing escape, and a delightful sensory experience all rolled into one. Who can resist that perfect harmony of cool, invigorating mint and rich, satisfying chocolate chunks? It’s a flavor combination that has captivated taste buds for generations, and for good reason. The vibrant green hue, often dotted with dark chocolate shards, is instantly recognizable and promises a burst of pure joy. What makes this particular Mint Chocolate Chip Ice Cream so special is its ability to strike that elusive balance – not too overpowering with mint, but just enough to be wonderfully refreshing, paired with generous pieces of high-quality dark chocolate that melt beautifully on your tongue. It’s the ultimate crowd-pleaser, perfect for summer afternoons, special celebrations, or simply when you need a little pick-me-up. Get ready to discover how easy it is to create this beloved classic right in your own kitchen!
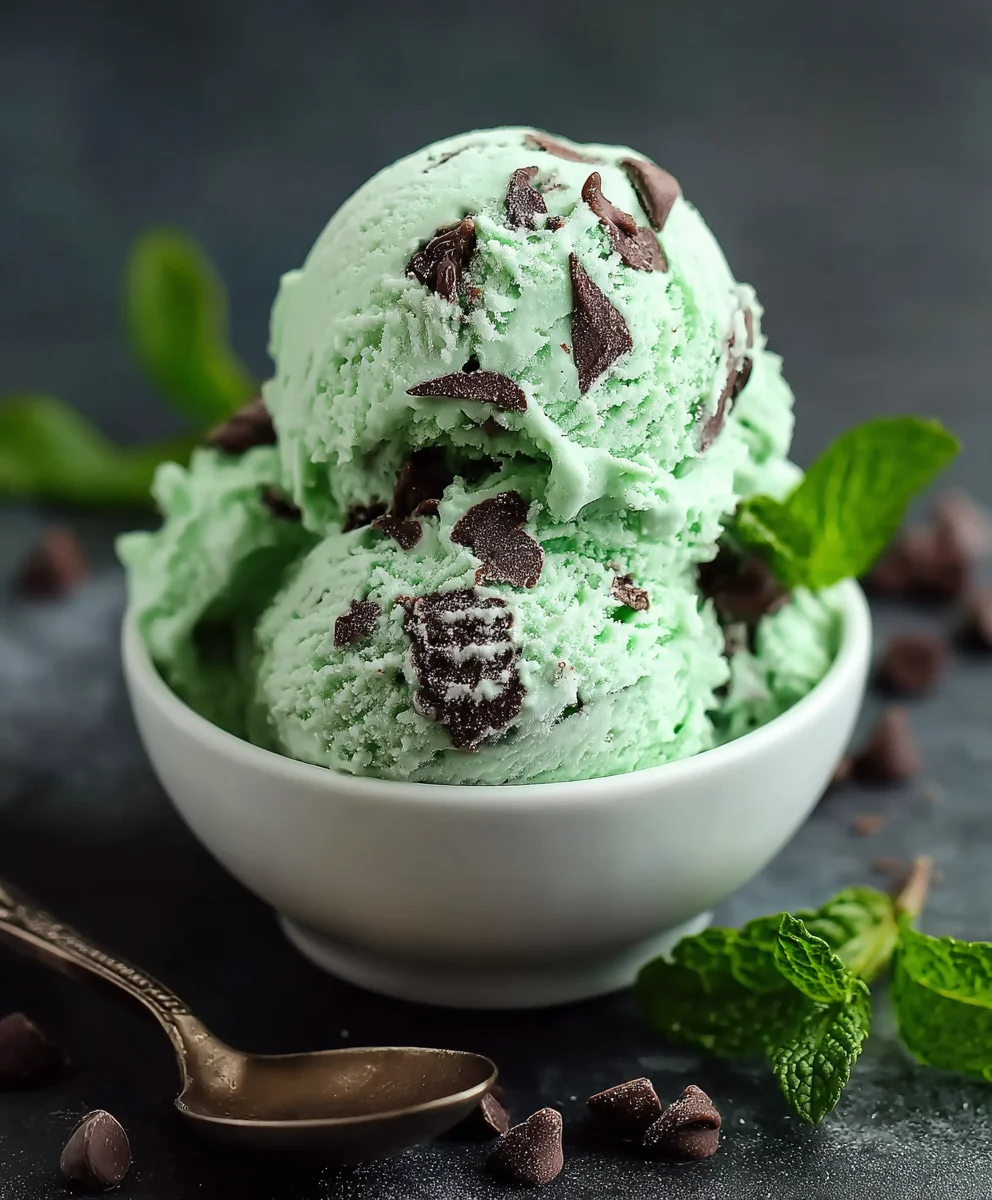
Ingredients:
- 1 tablespoon cream cheese, softened
- 1/3 cup granulated sugar
- 1 teaspoon vanilla extract
- 3/4 cup heavy cream
- 1 cup whole milk
- 1 teaspoon mint extract
- 1/4 cup mini chocolate chips
- Green food coloring (optional)
Preparing the Ice Cream Base
To begin extract crafting our delightful Mint Chocolate Chip Ice Cream, the first crucial step involves creating a smooth and creamy base. In a medium-sized bowl, combine the softened cream cheese with the granulated sugar. Using a whisk or an electric mixer on low speed, beat these two ingredients together until they are thoroughly combined and the mixture is free of any lumps. The cream cheese acts as a stabilizer, helping to prevent ice crystals from forming and contributing to a wonderfully smooth texture. It’s important that the cream cheese is truly softened; if it’s too cold, it will be difficult to incorporate smoothly, and you might end up with small pockets of cream cheese in your ice cream.
Once the cream cheese and sugar are well blended, it’s time to introduce the flavorings. Add the vanilla extract and the mint extract to the bowl. Stir these in gently but thoroughly. The mint extract is potent, so resist the urge to add more than the recipe calls for unless you are experienced with mint flavors and know exactly how you like it. Too much mint can quickly overpower the other subtle notes.
Next, we’ll gradually incorporate the dairy. Pour in the heavy cream and the whole milk. Whisk everything together until the mixture is uniform in color and consistency. At this stage, if you desire a classic green hue for your Mint Chocolate Chip Ice Cream, this is the time to add a few drops of green food coloring. Start with just a drop or two, whisk well to distribute the color evenly, and then add more if you want a more vibrant shade. Remember that the color will lighten slightly once the ice cream is frozen, so err on the side of slightly more intense color during this stage.
Chilling and Churning the Ice Cream
Before we can churn our ice cream, it’s absolutely essential to chill the base thoroughly. Pour the prepared ice cream mixture into an airtight container and place it in the refrigerator for at least 4 hours, or ideally overnight. This chilling period is critical for several reasons. Firstly, it allows the flavors to meld and deepen, creating a more complex and satisfying taste. Secondly, and perhaps more importantly for the churning process, a very cold base freezes more efficiently in your ice cream maker, resulting in a smoother, creamier texture. If your base isn’t cold enough, the ice cream maker will struggle to freeze it properly, leading to a coarser, icier outcome.
Once your ice cream base is thoroughly chilled, it’s time to churn it. Retrieve your ice cream maker from the freezer (make sure the bowl is frozen according to the manufacturer’s instructions) and pour the cold base into the machine. Let the ice cream maker do its magic. The churning process incorporates air into the mixture while simultaneously freezing it, which is what gives ice cream its characteristic light and airy texture. This typically takes about 20 to 30 minutes, but always refer to your specific ice cream maker’s manual for precise timing. The mixture will start to thicken and take on the consistency of soft-serve ice cream.
Incorporating the Chocolate Chips
As the churning process nears its end, usually in the last 5 minutes, it’s time to add our delicious chocolate chips. Gently fold in the mini chocolate chips. It’s important to add them towards the end of churning so that they don’t get pulverized into tiny fragments by the churning blades. We want to experience those delightful little bursts of chocolate throughout our Mint Chocolate Chip Ice Cream. Stir them in carefully until they are evenly distributed throughout the thickening mixture. If you are using a machine that has an opening at the top, you can carefully pour them in through there.
Freezing and Enjoying
After churning, the ice cream will have a soft-serve consistency. Transfer the semi-frozen ice cream from the ice cream maker into a freezer-safe container. For the best texture, press a piece of parchment paper or plastic wrap directly onto the surface of the ice cream to prevent ice crystals from forming on top. Then, cover the container tightly with a lid. Place the container in the freezer for at least 2 to 4 hours to allow the ice cream to firm up to a scoopable consistency. This final freezing stage is crucial for achieving the perfect texture. Once it’s firm enough to scoop, your homemade Mint Chocolate Chip Ice Cream is ready to be enjoyed!

Conclusion:
And there you have it – a delightful and refreshingly simple recipe for homemade Mint Chocolate Chip Ice Cream! We’ve walked through each step, from creating that creamy base to swirling in those irresistible chocolate chips and vibrant minty flavor. This recipe is designed to bring a smile to your face with every spoonful, whether you’re a seasoned ice cream maker or trying it for the first time. Don’t be intimidated; the process is quite rewarding, and the result is truly worth it.
Serving your homemade Mint Chocolate Chip Ice Cream is a joy in itself. It’s perfect on its own, scooped into a cone, or enjoyed in a bowl. For an extra treat, consider topping it with a drizzle of chocolate syrup, some fresh whipped cream, or even a sprinkle of extra chocolate chips. This ice cream also pairs wonderfully with a warm brownie or a slice of chocolate cake for a decadent dessert experience.
Feeling adventurous? Feel free to experiment with variations! You can adjust the amount of mint extract to suit your preference, or swap out the chocolate chips for chocolate chunks or even mini M&Ms. If you don’t have an ice cream maker, don’t fret! We’ve outlined methods that can be adapted for no-churn preparations, although the texture might be slightly different.
We hope you have as much fun making and enjoying this Mint Chocolate Chip Ice Cream as we do. Happy churning, and may your freezer always be stocked with this delightful treat!
Frequently Asked Questions about Mint Chocolate Chip Ice Cream:
Q: Can I make this Mint Chocolate Chip Ice Cream without an ice cream maker?
Absolutely! While an ice cream maker yields the smoothest texture, you can achieve a delicious no-churn version. After preparing the base mixture, pour it into a freezer-safe container. Stir vigorously every 30-45 minutes for the first 3-4 hours to break up ice crystals. This process helps to create a creamier consistency, though it may not be as perfectly smooth as machine-churned ice cream. Remember to add the chocolate chips during the last hour of freezing.
Q: How can I make the mint flavor stronger or milder?
Adjusting the mint flavor is easy! For a stronger mint taste, add an extra 1/4 to 1/2 teaspoon of peppermint extract. For a milder flavor, use slightly less peppermint extract, perhaps starting with 1 teaspoon and tasting before adding more. It’s always best to add mint extract gradually, as its flavor can be quite potent. Ensure you’re using peppermint extract, not spearmint, for that classic mint chocolate chip profile.
Easy Mint Chocolate Chip Ice Cream
A simple and refreshing homemade mint chocolate chip ice cream recipe.
Ingredients
-
1 tablespoon cream cheese, softened
-
1/3 cup granulated sugar
-
1 teaspoon vanilla extract
-
3/4 cup heavy cream
-
1 cup whole milk
-
1 teaspoon mint extract
-
1/4 cup mini chocolate chips
-
Green food coloring (optional)
Instructions
-
Step 1
In a medium bowl, combine softened cream cheese and granulated sugar. Beat until smooth and lump-free. -
Step 2
Add vanilla extract and mint extract. Stir gently until combined. If desired, add a few drops of green food coloring and stir until evenly distributed. -
Step 3
Gradually whisk in heavy cream and whole milk until uniform. Pour the mixture into an airtight container and chill in the refrigerator for at least 4 hours, or preferably overnight. -
Step 4
Pour the chilled base into your ice cream maker and churn according to the manufacturer’s instructions, typically 20-30 minutes, until it reaches a soft-serve consistency. -
Step 5
In the last 5 minutes of churning, gently fold in the mini chocolate chips until evenly distributed. -
Step 6
Transfer the churned ice cream to a freezer-safe container. Press parchment paper or plastic wrap directly onto the surface to prevent ice crystals. Cover tightly and freeze for at least 2-4 hours until firm.
Important Information
Nutrition Facts (Per Serving)
It is important to consider this information as approximate and not to use it as definitive health advice.
Allergy Information
Please check ingredients for potential allergens and consult a health professional if in doubt.