Easter Bunny Chick Cupcakes- Cute & Easy Recipe
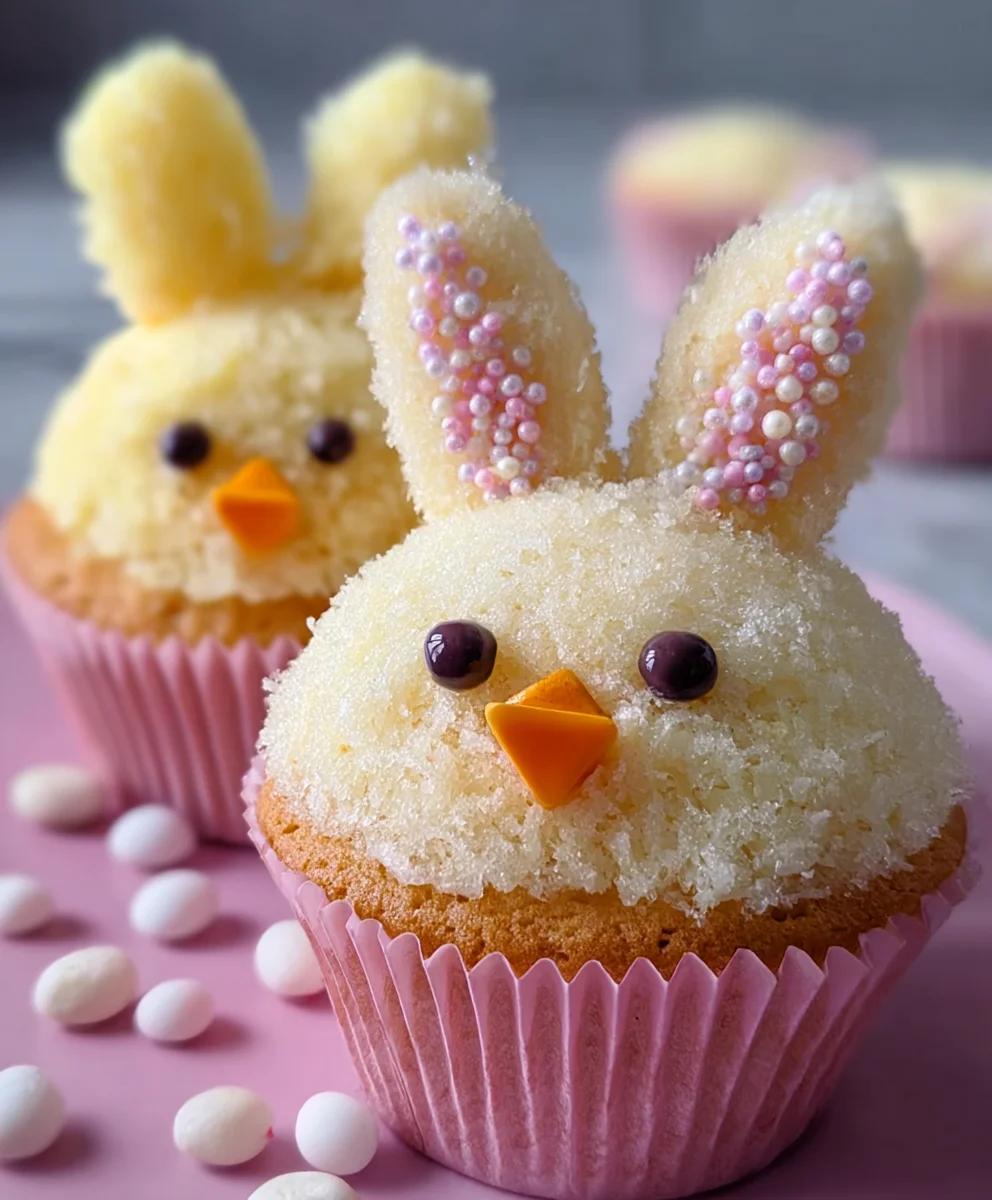
Easter Bunny and Chick Cupcakes are more than just a sweet treat; they’re a joyful explosion of springtime fun that captures the essence of the holiday. Imagin extracte a platter adorned with these adorable creations – a fluffy bunny with its pink nose and long ears peeking out, right next to a cheerful little chick with its bright yellow fluff. It’s no wonder why these Easter Bunny and Chick Cupcakes are a perennial favorite for family gatherings, classroom parties, and any celebration marking the arrival of spring. What truly sets them apart is their whimsical charm and the delightful surprise awaiting beneath that edible artistry. Each bite is a tender, moist cake, perfectly complemented by creamy frosting, creating a harmonious balance of textures and flavors that will have everyone asking for seconds. They’re incredibly rewarding to make, offering a chance to get creative and add your own personal touch to the decorations.
Ingredients:
- 1 recipe Vanilla Cupcakes (or your favorite cake mix)
- 1 recipe Fluffy Vanilla Frosting (or store-bought frosting)
- Yellow and white sprinkles
- Large and mini marshmallows
- Pink colored sanding sugar
- Black decorator icing
- Jelly beans (pink for bunny noses)
- Orange colored gum or M&Ms (for chick beaks)
- Yellow food coloring (for chick frosting)
Preparing Your Easter Cupcakes
Baking the Cupcakes
Begin extract by preparing your vanilla cupcakes according to your chosen recipe or cake mix instructions. Ensure you preheat your oven to the temperature specified on your mix or recipe, typically around 350°F (175°C). Line your muffin tins with cupcake liners, as this prevents sticking and makes for easier cleanup. Fill each liner about two-thirds full with batter. Overfilling can lead to domed tops that are difficult to frost evenly. Bake for the recommended time, usually between 18-24 minutes, or until a toothpick inserted into the center of a cupcake comes out clean. Once baked, let the cupcakes cool in the tin for a few minutes before transferring them to a wire rack to cool completely. This step is crucial; attempting to frost warm cupcakes will result in melted frosting and a sticky mess.
Making the Frosting
While your cupcakes are cooling, prepare your fluffy vanilla frosting. If you’re using a recipe, follow it closely, ensuring all ingredients are at room temperature for the smoothest consistency. If you’re using store-bought frosting, you can simply open the container and be ready to go. For the chick cupcakes, we’ll need to tint some of the frosting. Take about half of your prepared frosting and place it in a separate bowl. Add a few drops of yellow food coloring at a time, mixing thoroughly until you achieve a bright, cheerful yellow hue. Be careful not to add too much food coloring at once, as it can affect the flavor and consistency of the frosting.
Decorating the Easter Bunny Cupcakes
Bunny Ears and Faces
Now for the fun part! For our Easter Bunny cupcakes, we’ll use large marshmallows. Take a large marshmallow and, using a sharp knife, carefully slice it in half lengthwise. These halves will serve as your bunny ears. Frost the top of a cooled cupcake generously with your plain vanilla frosting. Gently press the cut side of the marshmallow halves into the top of the frosting, spacing them apart to resemble bunny ears. Next, dip the very tip of one of the marshmallow ears into your pink sanding sugar. This adds a sweet touch of pink to the bunny’s inner ear. For the bunny’s face, place a pink jelly bean in the center of the cupcake, just below the ears, for the nose. Using your black decorator icing, carefully pipe two small dots above the jelly bean for eyes, and a little smile beneath it. You can also add a tiny dot of black icing to the tip of the jelly bean nose for a bit more detail if you like.
Adding Texture and Charm
To give your bunny cupcakes a bit more texture and visual appeal, you can use the white sprinkles. Dip the frosted sides of the bunny ears lightly into the white sprinkles before placing them on the cupcake. Alternatively, after frosting the entire cupcake, you can gently press the sides of the cupcake into a shallow dish of white sprinkles to create a fluffy, fur-like effect. This adds an extra layer of detail and makes the bunnies look incredibly soft and huggable. Don’t be afraid to experiment with different placement of the ears and faces to create a variety of cute bunny expressions.
Decorating the Easter Chick Cupcakes
Creating the Chick’s Body and Features
For the adorable chick cupcakes, we’ll use the yellow-tinted frosting. Frost the top of your cooled cupcakes generously with the yellow frosting. For the chick’s head and body, we’ll use a large marshmallow. You can either frost a whole large marshmallow and place it on top of the frosted cupcake, or you can slice a large marshmallow in half and use one half as the head, placing it slightly off-center on the frosted cupcake. For the chick’s beak, take a small piece of orange colored gum or an orange M&M and press it gently into the front of the marshmallow (or the frosting if you’re not using a marshmallow head). If you’re using gum, you can cut it into a small triangle shape to mimic a beak.
Finishing Touches for Our Chicks
To complete the chick’s face, use your black decorator icing to pipe two small dots for eyes above the beak. You can also add a small dot of black icing between the eyes for a slightly different expression. For a bit of extra sparkle and to represent fluffy feathers, take your yellow and white sprinkles and lightly press them into the sides of the yellow frosting. This gives the appearance of downy chick feathers and adds a lovely texture to your creation. You can also pipe a little more yellow frosting around the base of the marshmallow if you used one for the head, to blend it seamlessly with the cupcake.
Final Touches and Presentation
Adding Extra Embellishments
Once your bunnies and chicks are complete, take a step back and admire your handiwork! If you have any leftover pink sanding sugar, you can sprinkle a tiny bit around the base of some of your bunny cupcakes for a festive touch. For the chick cupcakes, consider using a few extra yellow and white sprinkles to fill any gaps or to add a bit more volume to their “feathers.” You can also strategically place a few extra jelly beans or small candies around the cupcakes on your serving platter to enhance the Easter theme. Remember, the goal is to have fun and let your creativity shine through!
To present your Easter Bunny and Chick Cupcakes, arrange them on a festive platter or cake stand. Consider grouping the bunnies together and the chicks together, or mix them up for a more whimsical display. You can also line them up on a long serving tray, alternating between bunnies and chicksgin extractf you’re bringing these to an Easter gathering, remember to transport them carefully in a sturdy container to prevent any decorations from shifting or falling off. These charming cupcakes are sure to be a delightful centerpiece and a hit with guests of all ages.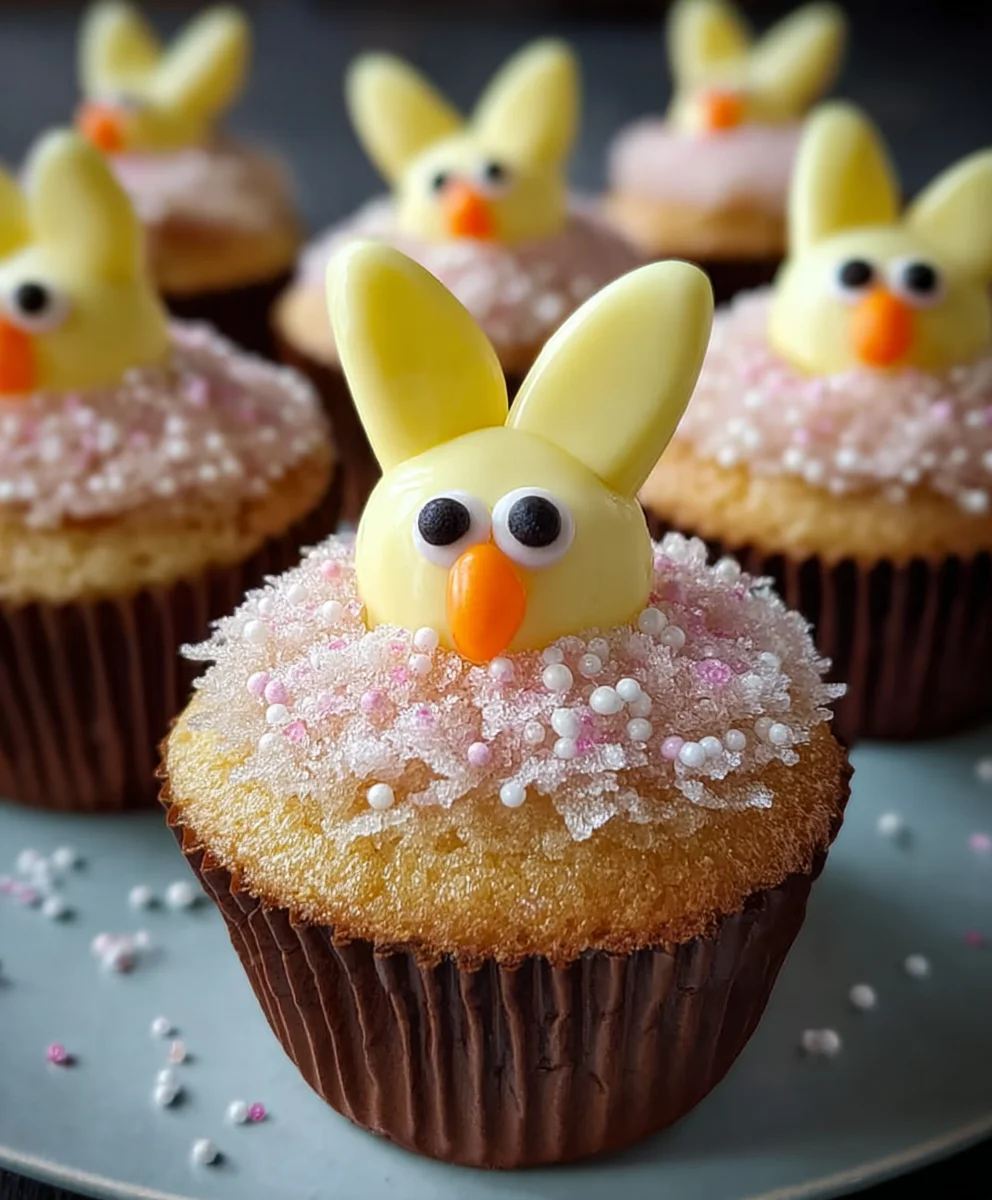
Conclusion:
We’ve reached the end of our delightful journey creating these charming Easter Bunny and Chick Cupcakes! I hope you’ve enjoyed the process as much as I have. These cupcakes are not only visually appealing, perfect for bringin extractg a smile to any Easter celebration, but they also deliver a wonderfully moist and flavorful treat. Remember, baking is all about having fun and experimenting, so don’t be afraid to put your own creative spin on these! Gather your loved ones, put on some music, and let the sweet aromas fill your kitchen. I’m confident you’ll be thrilled with the adorable results.
For serving, these cupcakes are wonderful on their own as a festive dessert. They also pair beautifully with a glass of milk or a light, fruity beverage. For an extra special touch, consider serving them on a tiered cake stand adorned with Easter-themed decorations.
Don’t hesitate to get creative with variations! You can try different cake flavors like lemon or carrot cake. For the frosting, experiment with cream cheese frosting or even a lighter whipped cream base. You can also change up the decorations, perhaps adding little edible flowers or sprinkles for extra flair.
Frequently Asked Questions:
Can I make the cupcake batter and frosting ahead of time?
Yes, absolutely! The cupcake batter can be made a day in advance and stored in an airtight container in the refrigerator. The frosting can also be made a day ahead and kept refrigerated. Just be sure to let both come to room temperature and whisk them well before decorating.
What if I don’t have piping bags and tips?
No problem at all! For frosting, you can simply use a spatula to spread it onto the cupcakes. For the bunny ears and chick beaks, you can use a small knife or even the back of a spoon to shape the fondant or candy melts. Get creative with everyday kitchen tools!
Easter Bunny Chick Cupcakes- Cute & Easy Recipe
Adorable and easy-to-make Easter cupcakes decorated as cute bunnies and cheerful chicks.
Ingredients
-
1 recipe Vanilla Cupcakes (or your favorite cake mix)
-
1 recipe Fluffy Vanilla Frosting (or store-bought frosting)
-
Yellow and white sprinkles
-
Large and mini marshmallows
-
Pink colored sanding sugar
-
Black decorator icing
-
Jelly beans (pink for bunny noses)
-
Orange colored gum or M&Ms (for chick beaks)
-
Yellow food coloring (for chick frosting)
Instructions
-
Step 1
Prepare vanilla cupcakes according to recipe or cake mix instructions. Preheat oven to 350°F (175°C). Line muffin tins with cupcake liners, fill two-thirds full, and bake for 18-24 minutes until a toothpick comes out clean. Cool completely. -
Step 2
Prepare fluffy vanilla frosting. For chick cupcakes, tint about half of the frosting yellow with yellow food coloring, adding drops gradually until desired hue is reached. -
Step 3
For bunny cupcakes: Slice large marshmallows in half lengthwise for ears. Frost a cooled cupcake with vanilla frosting, press marshmallow halves into frosting as ears. Dip marshmallow ear tips in pink sanding sugar. Pipe a pink jelly bean nose below ears, two black icing dots for eyes above, and a smile below. -
Step 4
Add texture to bunny cupcakes by dipping frosted ear sides in white sprinkles or pressing sides of frosted cupcakes into white sprinkles for a fur effect. -
Step 5
For chick cupcakes: Frost cooled cupcakes generously with yellow frosting. Frost a large marshmallow and place on top, or place half a large marshmallow slightly off-center as the head. Press an orange gum piece (cut into a triangle) or an orange M&M into the front for a beak. -
Step 6
Complete chick faces by piping two black icing dots for eyes above the beak. Lightly press yellow and white sprinkles into the sides of the yellow frosting to resemble fluffy feathers. -
Step 7
Arrange decorated cupcakes on a festive platter or cake stand, grouping bunnies and chicks or mixing them for a whimsical display. Transport carefully to prevent decorations from shifting.
Important Information
Nutrition Facts (Per Serving)
It is important to consider this information as approximate and not to use it as definitive health advice.
Allergy Information
Please check ingredients for potential allergens and consult a health professional if in doubt.