Blackberry Hand Pies- Easy & Delicious Dessert Recipe
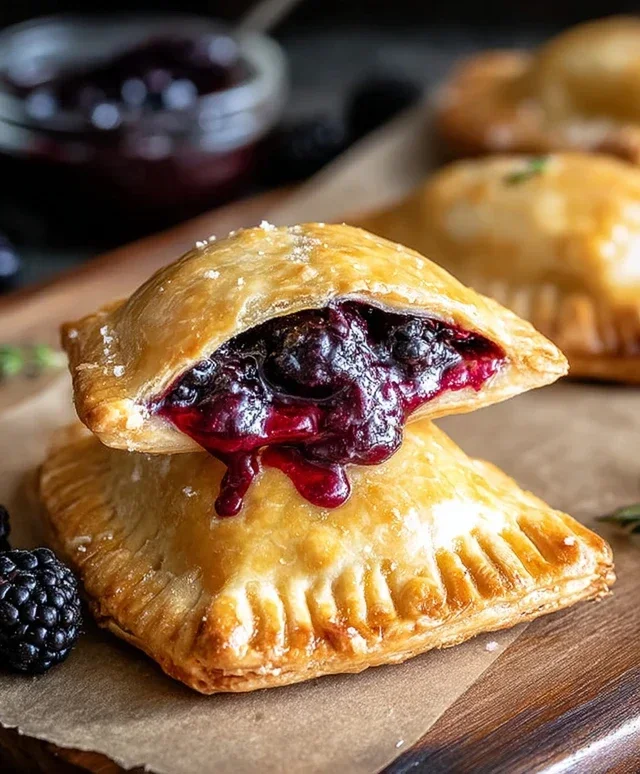
Blackberry hand pies are a delightful treat, and I’m so excited to share this recipe with you! There’s something undeniably charming about these individual pockets of pure bliss. Forget fussing with a large pie; these blackberry hand pies are perfect for picnics, parties, or simply a sweet indulgence you can enjoy on the go. The magic lies in their portability and the satisfying burst of sweet-tart blackberry filling encased in a flaky, golden crust. It’s the perfect balance of textures and flavors that makes people fall head over heels for them. Imagin extracte biting into that warm, tender pastry, releasing the juicy, slightly jammy blackberry goodness within – it’s a moment of pure joy! What truly makes these blackberry hand pies special is their comforting simplicity, allowing the natural sweetness of the fruit to shine. They evoke a sense of nostalgia and homemade goodness that’s hard to beat.
Blackberry Hand Pies
There’s something incredibly satisfying about a warm, homemade pie. But sometimes, a whole pie feels like a bit too much. That’s where hand pies come to the rescue! These individual little pockets of deliciousness are perfect for a grab-and-go treat, a delightful dessert, or even a special breakfast. And the best part? They’re surprisingly easy to make, especially when we leverage some convenient shortcuts. My favorite version features the bright, tangy burst of blackberries, encased in a flaky, golden crust. We’re going to make these so beautifully, you’ll want to impress everyone you know. They’re also incredibly adaptable, making them a fantastic canvas for your creativity.
Ingredients:
Preparing Your Blackberry Hand Pies
The beauty of these hand pies lies in their simplicity. We’ll start by getting our filling ready, then move on to constructing and finally, frying these delightful treats to golden perfection.
Step 1: Prepping the Blackberry Filling
First things first, let’s get our star ingredient – the blackberry pie filling – ready to go. Open that 21 oz. can of deliciousness. You might find that sometimes pie fillings can be a little runnier than you’d like, which can lead to a mess when you’re forming your hand pies. To combat this, I like to give it a gentle stir. If it seems particularly watery, you can even spoon it into a fine-mesh sieve set over a bowl and let it drain for about 10-15 minutes. This helps to remove some of the excess liquid without losing the juicy blackberry goodness. Once you’re happy with the consistency, set it aside. We want it to be spreadable but not so thin that it oozes out everywhere during the cooking process.
Step 2: Cutting and Shaping the Pie Crusts
Now, let’s work with our refrigerated pie crusts. Unroll one of the crusts onto a lightly floured surface. You’ll want to handle this gently to keep it as intact as possible. Using a round cookie cutter or even a rim of a glass, I usually aim for about a 5-6 inch diameter. You’ll want to cut as many circles as you can from the first crust. Place these circles onto a baking sheet lined with parchment paper. You’ll likely have some scraps leftover from cutting. Gather these scraps gently, re-roll them very briefly, and cut out more circles. Repeat this process with the second pie crust. You should aim to get at least 8-10 circles in total, depending on your cutter size. Don’t worry if they aren’t perfectly uniform; that adds to the charm of homemade.
Step 3: Assembling the Hand Pies
This is where the magic starts to happen. Take one of your pie crust circles and spoon about 1-2 tablespoons of the prepared blackberry filling onto one half of the circle, leaving about a half-inch border all around. Be careful not to overfill, as this will make sealing them difficult and increase the chances of leaks during frying. Now, gently fold the other half of the pie crust over the filling to create a half-moon shape. Using your fingers, press down the edges to seal. For an extra secure seal, I like to use the tines of a fork to crimp the edges all the way around. This not only helps to prevent any filling from escaping but also creates a lovely decorative pattern. Place the assembled hand pies back onto the parchment-lined baking sheet.
Step 4: Preparing for Frying and Frying the Pies
Now that our hand pies are assembled, it’s time to get ready for frying. Before you start frying, it’s a good idea to pop the assembled hand pies back into the refrigerator for about 15-20 minutes. This helps the dough firm up, which will lead to a flakier crust and prevent them from losing their shape in the hot oil. While they’re chilling, pour enough vegetable oil into a heavy-bottomed pot or Dutch oven to reach a depth of about 2-3 inches. Heat the oil over medium-high heat until it reaches about 350°F (175°C). You can test the oil by dropping a tiny piece of pie crust into it; if it sizzles and floats to the top, it’s ready. Carefully, using a slotted spoon or tongs, gently place 2-3 hand pies into the hot oil, being careful not to overcrowd the pot. Fry for about 2-3 minutes per side, or until they are a beautiful golden brown.
Step 5: Draining and Glazing Your Delicious Hand Pies
Once your blackberry hand pies have achieved that perfect golden hue, carefully remove them from the hot oil using your slotted spoon or tongs. Place them on a wire rack set over a baking sheet lined with paper towels. This allows any excess oil to drain off, keeping your pies from becoming greasy. While the pies are still warm, let’s prepare a simple glaze that will add a touch of sweetness and shine. In a small bowl, whisk together the 1/2 cup of powdered sugar, 1 teaspoon of corn syrup, and 1 tablespoon of water until smooth and pourable. If the glaze is too thick, add a tiny bit more water, a drop at a time. Drizzle this glaze generously over the warm hand pies. The warmth of the pies will help the glaze melt slightly and create a beautiful, glossy finish. Let them cool for a few minutes before enjoying. They are best served warm, but also delicious at room temperature. You can even make them ahead of time and gently reheat them in a low oven or toaster oven. Enjoy your delightful homemade blackberry hand pies!
Conclusion:
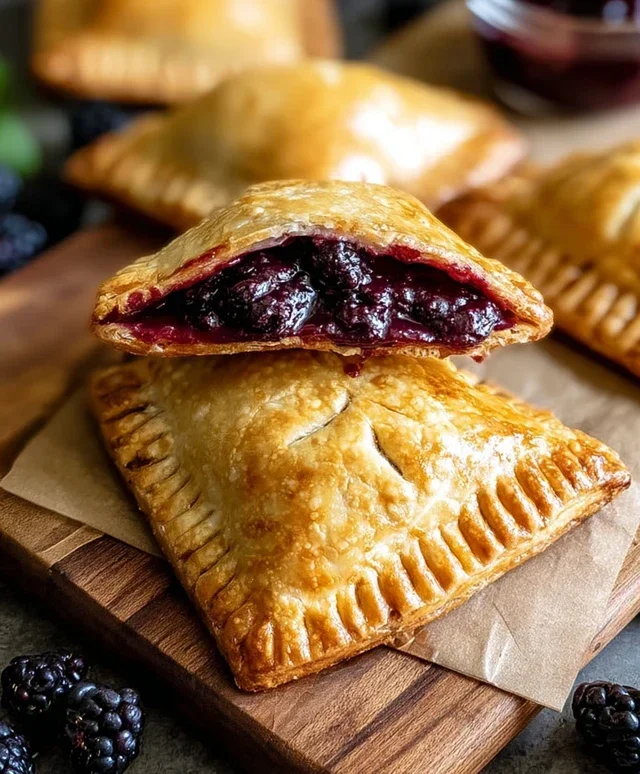
And there you have it – a delightful journey into creating your own delicious Blackberry Hand Pies! These little pockets of joy are truly fantastic because they offer that perfect balance of sweet and tart fruit filling encased in a flaky, buttery crust. They’re portable, individual-sized portions of pure happiness, making them ideal for picnics, lunchboxes, or simply enjoying with a cup of tea as a comforting treat. I absolutely encourage you to give this recipe a try; you’ll be so proud of the beautiful and incredibly tasty results!
When it comes to serving, these pies are wonderful warm or at room temperature. They are fantastic on their own, but for an extra touch of indulgence, consider serving them with a dollop of whipped cream, a scoop of vanilla ice cream, or a light dusting of powdered sugar. If you’re feeling adventurous with variations, try adding a pinch of cinnamon or nutmeg to the blackberry filling for a warmer spice profile. You could also swap out half the blackberries for raspberries or blueberries for a mixed berry delight. The possibilities are endless, and each variation promises a unique and delicious experience.
Frequently Asked Questions:
Why are my hand pie crusts not flaky?
Ensuring your butter and water are ice-cold is crucial for a flaky crust. Overworking the dough can also make it tough. Handle the dough as little as possible and try to incorporate the butter in pea-sized pieces for the best results.
Can I make the filling ahead of time?
Absolutely! The blackberry filling can be made up to 2-3 days in advance and stored in an airtight container in the refrigerator. This makes assembling the pies on the day much quicker and easier.
What if I don’t have fresh blackberries?
Frozen blackberries work wonderfully in this recipe! You may need to add a little extra cornstarch to thicken the filling as frozen berries release more liquid. Thaw them first and drain off any excess juice before proceeding.
Blackberry Hand Pies
Delicious and easy hand pies filled with sweet blackberry filling, perfect for a treat.
Ingredients
-
21 oz. can blackberry pie filling
-
Refrigerated pie crust
-
1/2 cup powdered sugar
-
1 teaspoon corn syrup
-
1 tablespoon water
-
Vegetable oil for frying
Instructions
-
Step 1
Preheat vegetable oil in a deep skillet or Dutch oven to 350°F (175°C). -
Step 2
Unroll refrigerated pie crusts and cut out circles using a biscuit cutter or a glass. -
Step 3
Place a spoonful of blackberry pie filling onto one half of each pie crust circle, leaving a small border. -
Step 4
Moisten the edges of the crust with water and fold the other half over to create a half-moon shape. Crimp the edges with a fork to seal. -
Step 5
Carefully place the hand pies into the hot oil, a few at a time, and fry for 2-3 minutes per side, or until golden brown. -
Step 6
Remove hand pies from the oil with a slotted spoon and place on a wire rack set over paper towels to drain. -
Step 7
While the pies are still warm, whisk together powdered sugar, corn syrup, and water to create a glaze. Drizzle over the hand pies.
Important Information
Nutrition Facts (Per Serving)
It is important to consider this information as approximate and not to use it as definitive health advice.
Allergy Information
Please check ingredients for potential allergens and consult a health professional if in doubt.