Spicy Salmon Sushi Bake-Easy Delicious Recipe
Spicy Salmon Sushi Bake Recipe has become a dinnertime sensation for a reason! It’s the ultimate comfort food that also happens to be incredibly delicious and surprisingly easy to whip up. Imagin extracte all the vibrant flavors and satisfying textures of your favorite spicy salmon sushi roll, but transformed into a warm, shareable, baked masterpiece. That’s the magic of this dish. It’s perfect for a weeknight meal when you’re craving something a little more exciting than the usual, or even for entertaining a casual get-together with friends. What makes this Spicy Salmon Sushi Bake Recipe so special is its incredible versatility and the delightful fusion of creamy, spicy, savory, and slightly sweet elements. We’re talking flaky salmon, perfectly cooked rice, a luscious spicy mayo sauce, and a delightful cheesy topping that gets gorgeously golden brown in the oven. Get ready to impress yourself and your loved ones with this amazing recipe!
Why You’ll Love This
The perfect blend of convenience and gourmet flavor.
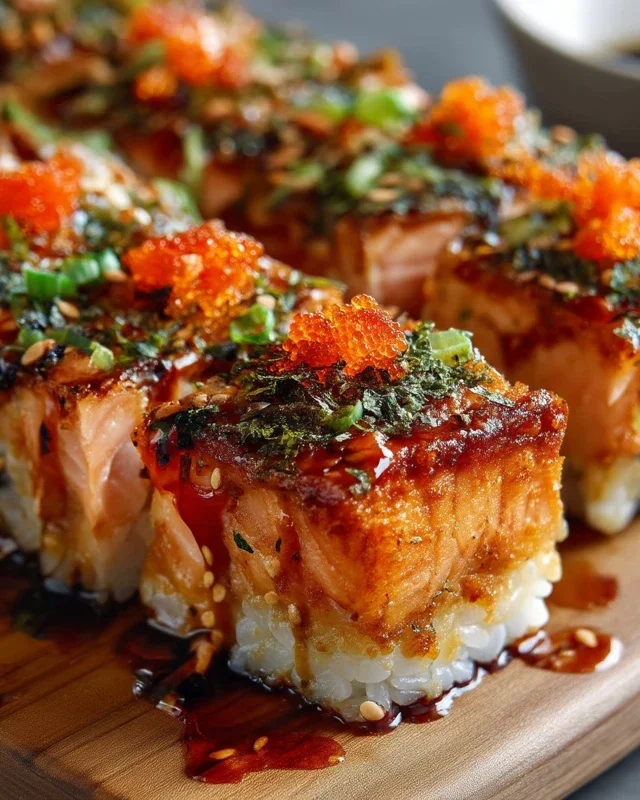
Spicy Salmon Sushi Bake: A Delectable Twist on a Classic Favorite
Get ready to revolutionize your sushi night with this incredible Spicy Salmon Sushi Bake! If you’re a fan of sushi but crave something a little more hands-on and perhaps a bit more comforting, this recipe is for you. It captures all the vibrant flavors of your favorite spicy salmon rolls but transforms them into a warm, cheesy, and utterly delicious casserole that’s perfect for sharing (or not!). This dish is surprisingly easy to make and delivers a fantastic explosion of taste and texture with every bite. It’s a fantastic weeknight meal that feels special enough for guests, and the aroma that fills your kitchen as it bakes is simply divine. Let’s dive into creating this culinary masterpiece!
Ingredients:
Cooking Instructions:
Step 1: Prepare the Sushi Rice
The foundation of any good sushi dish is perfectly cooked rice. Start by thoroughly rinsing your sushi rice under cold running water. This step is crucial for removing excess starch, which will prevent the rice from becoming gummy. Continue rinsing until the water runs clear. Next, combine the rinsed rice and 2.5 cups of water in a medium saucepan. Bring it to a boil over medium-high heat, then immediately reduce the heat to low, cover tightly, and let it simmer for 15-20 minutes, or until all the water is absorbed. Avoid lifting the lid during this cooking process. Once cooked, let the rice steam, covered, off the heat for another 10 minutes. While the rice is still hot, prepare the sushi vinegar mixture. In a small bowl, whisk together the rice vinegar, sugar, and salt until the sugar and salt are completely dissolved. Gently transfer the hot cooked rice to a large, shallow bowl (a wooden or plastic bowl is ideal, as metal can react with the vinegar). Drizzle the sushi vinegar mixture over the rice and gently fold it in using a rice paddle or spatula. Continue to gently fold and fan the rice (using a handheld fan or a piece of cardboard) until it cools down to room temperature. This fanning process also helps to achieve that characteristic glossy texture of sushi rice.
Step 2: Create the Spicy Salmon Mixture
Now for the star of the show – the spicy salmon! In a medium bowl, combine the diced, skinless salmon fillet. Add the mayonnaise, Sriracha sauce (adjust this to your desired level of heat – start with 2 tablespoons and add more if you like it spicier!), and sesame oil. The sesame oil adds a wonderful nutty depth that complements the salmon beautifully. Gently mix everything together until the salmon is evenly coated. You want to ensure each piece of salmon is infused with that creamy, spicy goodness. Be careful not to overmix or mash the salmon; we want to maintain some texture. Taste the mixture and adjust the Sriracha or salt if needed. This spicy salmon mixture is what will bring that irresistible flavor to our sushi bake.
Step 3: Assemble the Sushi Bake
Preheat your oven to 375°F (190°C). Lightly grease a 9×13 inch baking dish or an equivnon-alcoholic alent oven-safe dish with a little cooking spray or oil. This will prevent the rice and salmon from sticking. Spread the prepared sushi rice evenly over the bottom of the baking dish, creating a uniform layer. This will serve as the base for our delicious creation. Next, spoon the spicy salmon mixture evenly over the top of the rice layer. Try to distribute it as evenly as possible so that every bite gets a good amount of the flavorful salmon. Finally, sprinkle the chopped green onions over the salmon mixture. The green onions add a fresh, sharp counterpoint to the richness of the salmon and mayonnaise.
Step 4: Bake to Perfection
Place the assembled baking dish in the preheated oven. Bake for 20-25 minutes, or until the salmon is cooked through and the top is lightly golden brown and bubbling. You’ll know it’s ready when you can easily flake the salmon with a fork and the edges of the rice start to crisp up slightly. The aroma that will fill your kitchen during this time is incredible, a tantalizing blend of baked salmon, rice, and a hint of spice. Keep an eye on it to ensure it doesn’t overcook.
Step 5: Garnish and Serve
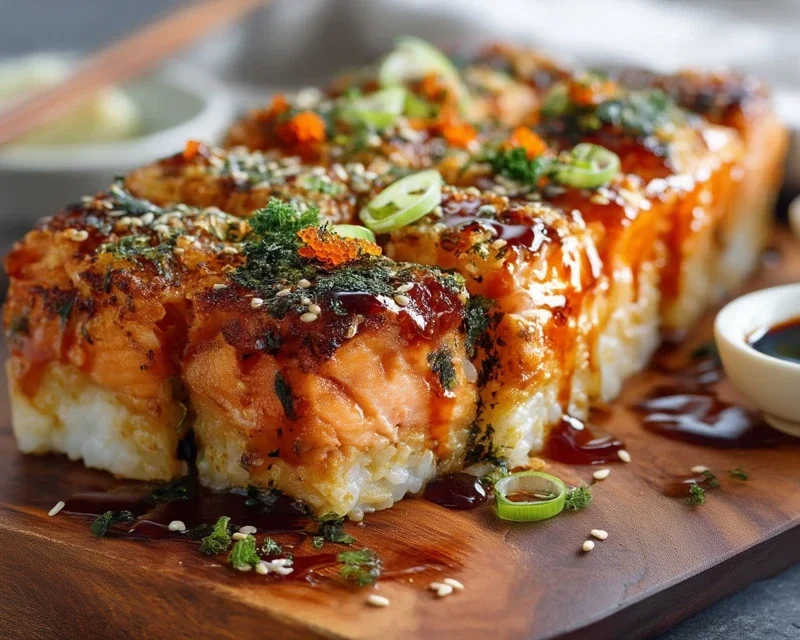
Once baked, carefully remove the sushi bake from the oven. It’s going to be hot, so use oven mitts! Sprinkle the small strips of nori over the top of the hot sushi bake. The heat will slightly crisp the nori, enhancing its flavor. For an extra touch of elegance and a burst of ocean flavor, sprinkle with tobiko (flying fish roe) if you’re using it. You can also add some extra chopped green onions for a vibrant green garnish. Let the sushi bake rest for about 5-10 minutes before serving. This allows the flavors to meld and makes it easier to scoop. Serve this glorious Spicy Salmon Sushi Bake directly from the dish. It’s delicious on its own, but you can also serve it with soy sauce for dipping or a side of pickled gin extractger if you like. Enjoy this unique and incredibly satisfying take on sushi!
Conclusion:
You’ve reached the end of our guide to this incredibly delicious Spicy Salmon Sushi Bake! I truly hope you’re as excited as I am to give this recipe a try. It’s a fantastic dish because it delivers all the beloved flavors of sushi – the tender, slightly spicy salmon, the sticky rice, the umami-rich seasonings – in a comforting, shareable bake. It’s perfect for a weeknight dinner, a potluck, or even a fun gathering with friends. The creamy, cheesy topping, when baked to golden perfection, adds an irresistible decadence that even sushi purists will adore.
For serving, I highly recommend garnishing with extra toasted sesame seeds, sliced green onions, and a drizzle of sriracha mayo for an extra kick. You can also serve it alongside some pickled gin extractger and wasabi for that authentic sushi experience.
Don’t be afraid to get creative with variations! Consider adding some chopped avocado to the rice mixture for added creaminess, or perhaps some finely diced jalapeños for an even bolder spicy salmon flavor. For a vegetarian twist, you could experiment with seasoned tofu or mushrooms. I encourage you to dive in and discover the joy of making this Spicy Salmon Sushi Bake yourself. It’s surprisingly easy and incredibly rewarding!
Frequently Asked Questions:
What kind of salmon is best for this sushi bake?
Canned salmon works wonderfully for convenience and is very budget-friendly. However, if you prefer a fresher taste and texture, you can also use cooked fresh salmon. Just ensure it’s fully cooked and flaked before mixing it into the rice.
Can I make this ahead of time?
Yes, absolutely! You can assemble the entire sushi bake ahead of time and store it in the refrigerator. For the best results, bake it just before you plan to serve it to enjoy it warm and fresh.
Spicy Salmon Sushi Bake Recipe
A delicious and easy spicy salmon sushi bake, perfect for a weeknight meal or potluck.
Ingredients
-
2 cups sushi rice (uncooked)
-
2.5 cups water
-
1/4 cup rice vinegar
-
2 tablespoons sugar
-
1 teaspoon salt
-
1 lb fresh salmon fillet (skinless and diced)
-
1/2 cup mayonnaise
-
2 tablespoons Sriracha sauce (or to taste)
-
1 teaspoon sesame oil
-
1/2 cup green onions (chopped, plus extra for garnish)
-
1 sheet nori (cut into small strips)
-
tobiko (optional for garnish)
Instructions
-
Step 1
Cook the sushi rice according to package directions. While the rice is cooking, prepare the sushi vinegar by whisking together rice vinegar, sugar, and salt in a small bowl until dissolved. Once the rice is cooked, gently fold the sushi vinegar into the hot rice. Let it cool slightly. -
Step 2
In a separate bowl, combine the diced salmon, mayonnaise, Sriracha sauce, and sesame oil. Mix well to coat the salmon evenly. Stir in the chopped green onions. -
Step 3
Preheat your oven to 375°F (190°C). Lightly grease a 9×13 inch baking dish. -
Step 4
Spread the seasoned sushi rice evenly in the prepared baking dish. -
Step 5
Spoon the spicy salmon mixture evenly over the rice layer. -
Step 6
Bake for 20-25 minutes, or until the salmon is cooked through and the top is lightly golden. Remove from oven. -
Step 7
Garnish with nori strips, extra chopped green onions, and optional tobiko before serving.
Important Information
Nutrition Facts (Per Serving)
It is important to consider this information as approximate and not to use it as definitive health advice.
Allergy Information
Please check ingredients for potential allergens and consult a health professional if in doubt.