Rich Chocolate Peanut Butter Cake Recipe-Decadent Treat
Chocolate Peanut Butter Cake is more than just a dessert; it’s a symphony of textures and flavors that promises pure indulgence. There’s a reason why this iconic pairing has captured hearts and taste buds for generations. The rich, bittersweet embrace of chocolate intertgrape juiced with the creamy, slightly salty allure of peanut butter creates a culinary magic that’s utterly irresistible. It’s the kind of cake that evokes memories of childhood treats, cozy afternoons, and celebrations, big or small. What makes our Chocolate Peanut Butter Cake truly special is its perfect balance – not too sweet, not too dense, but exquisitely moist and utterly satisfying. Prepare to be amazed by how simple ingredients can transform into such a decadent masterpiece that will have everyone beggin extractg for the recipe.
Chocolate Peanut Butter Cake
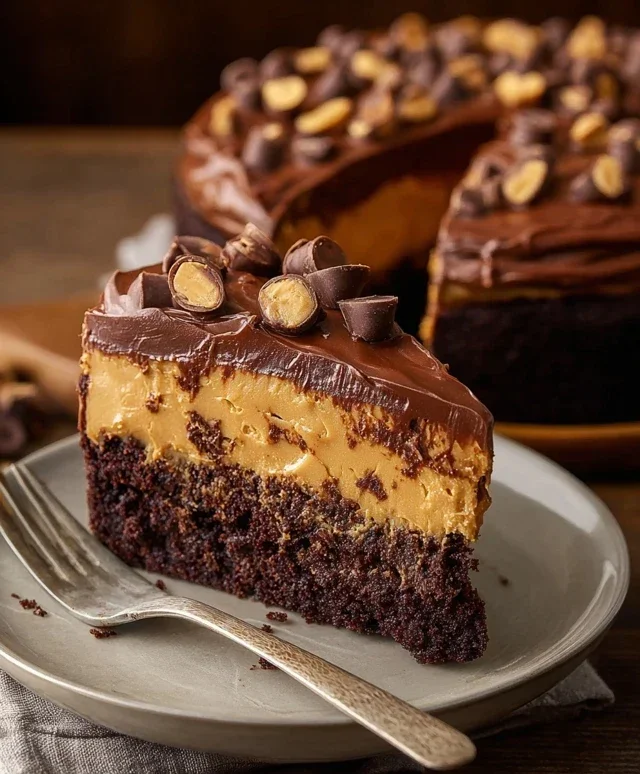
There are some flavor combinations that are simply meant to be. Chocolate and peanut butter are undeniably one of those pairings that elicits pure joy. And when you combine them in the form of a decadent, rich cake, you’ve got a dessert that’s perfect for birthdays, holidays, or just because you deserve a treat. This Chocolate Peanut Butter Cake is a showstopper, featuring a luscious Oreo crust, a creamy peanut butter cheesecake filling, and a decadent chocolate ganache topping, all adorned with the irresistible crunch of Reese’s Cups and roasted peanuts. It’s a symphony of textures and tastes that will leave everyone beggin extractg for a second slice.
Ingredients:
Making the Decadent Base
The foundation of this incredible cake is a no-bake Oreo crust. It’s incredibly simple to prepare and provides the perfect crum extractbly contrast to the smooth filling.
1. Prepare the Oreo Crust: In a medium bowl, combine the 2 cups of Oreo cookie crum extractbs with the 1/4 cup of melted unsalted butter. Stir until the crum extractbs are evenly moistened and resemble wet sand. This ensures the crust will hold together nicely. Press this mixture firmly into the bottom of a 9-inch springform pan. Use the bottom of a glass or a flat measuring cup to get an even, compact layer. Pop the pan into the freezer while you prepare the filling. This chilling step helps the crust set up, preventing it from crum extractbling when you slice the cake later.
Crafting the Creamy Peanut Butter Filling
Now for the star of the show: the incredibly smooth and rich peanut butter cheesecake filling. The key to a smooth cheesecake is to ensure your cream cheese is properly softened, and to avoid overmixing.
2. Create the Peanut Butter Cheesecake Mixture: In a large bowl, beat the 32 oz of softened cream cheese with the 1 1/3 cups of sugar until it’s light and fluffy and completely smooth. Make sure there are no lumps of cream cheese remaining – this is crucial for a silky texture. Scrape down the sides of the bowl frequently to ensure everything is incorporated.
3. Incorporate the Wet Ingredients: Add the 4 large eggs, one at a time, beating well after each addition. Again, don’t overmix once the eggs are in; we want to incorporate them without adding too much air, which can cause cracks in the cheesecake. Next, mix in the 1 cup of smooth peanut butter, 2 tsp of vanilla extract, and 1/3 cup of heavy cream. Beat on low speed until just combined and smooth. Stir in the 1 1/4 cups of miniature chocolate chips. Gently fold them in to distribute them evenly throughout the filling.
Baking and Cooling for Perfection
Baking a cheesecake requires a gentle hand and a bit of patience. A water bath is your best friend for achieving a perfectly cooked, crack-free cheesecake.
4. Bake the Cheesecake: Pour the peanut butter cheesecake filling evenly over the chilled Oreo crust. Smooth the top with a spatula. Wrap the outside of your springform pan tightly with a few layers of heavy-duty aluminum foil. This is essential for the water bath. Place the foil-wrapped springform pan inside a larger baking pan. Carefully pour hot water into the larger pan until it comes about halfway up the sides of the springform pan. This water bath insulates the cheesecake, promoting even baking and preventing the edges from overcooking before the center is set. Bake in a preheated oven at 325°F (160°C) for 60-75 minutes, or until the edges are set and the center is still slightly jiggly. Turn off the oven, crack the oven door open slightly, and let the cheesecake cool in the oven for another hour. This gradual cooling helps prevent cracking. Once cooled, remove from the water bath and let it cool completely on a wire rack. Then, cover the cheesecake loosely with plastic wrap and refrigerate for at least 6 hours, or preferably overnight, to allow it to firm up completely.
The Irresistible Chocolate Ganache Topping
No chocolate peanut butter cake is complete without a luscious chocolate topping. This simple ganache is rich, glossy, and the perfect complement to the creamy filling.
5. Prepare the Chocolate Ganache: While the cheesecake is chilling, prepare the ganache. In a heatproof bowl, combine the 1 1/2 cups of milk chocolate chips (or finely chopped milk chocolate) with the 1/2 cup of heavy cream. Heat the cream gently in a saucepan over medium-low heat until it just begin extracts to simmer around the edges. Do not let it boil. Pour the hot cream over the chocolate chips. Let it sit for 5 minutes to allow the chocolate to melt. Then, whisk gently starting from the center and working your way outwards until the ganache is smooth, glossy, and completely combined. If any chocolate pieces remain, you can briefly microwave the mixture in 10-second intervals, stirring well after each, until smooth. Let the ganache cool at room temperature for about 20-30 minutes, stirring occasionally, until it’s slightly thickened but still pourable.
Assembling and Decorating Your Masterpiece
The final touch is where you get to play! This is where your Chocolate Peanut Butter Cake truly shines.
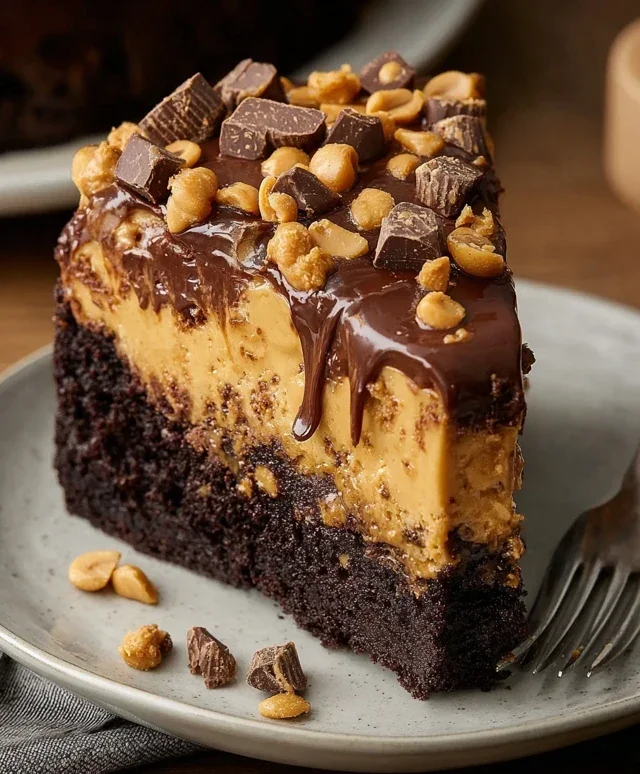
Once the cheesecake is fully chilled and set, carefully remove the sides of the springform pan. Pour the cooled chocolate ganache evenly over the top of the cheesecake, allowing it to drip down the sides slightly if desired. Immediately sprinkle generously with chopped Reese’s Cups and crushed roasted peanuts. The warmth of the ganache will help them adhere. For the best flavor and texture, allow the ganache to set up for about 15-20 minutes at room temperature before slicing and serving. This Chocolate Peanut Butter Cake is a true indulgence, and I know you’ll love every single bite!
Conclusion:
So there you have it – the ultimate recipe for a decadent Chocolate Peanut Butter Cake! This cake truly has it all: a moist and tender chocolate cake base perfectly complemented by a rich, creamy peanut butter frosting. It’s the kind of dessert that brings smiles to faces and makes any occasion feel special, whether it’s a birthday, a holiday, or just a Tuesday that needs a little cheering up. The combination of classic flavors is undeniably comforting and incredibly delicious. I’m so excited for you to try it!
When it comes to serving, I love this cake just as it is, perhaps with a glass of cold milk. For an extra indulgence, a drizzle of extra melted peanut butter or a scattering of chocolate chips makes it even more irresistible. If you’re feeling adventurous, consider adding a layer of chopped peanut butter cups between the cake layers for an explosion of flavor and texture. Don’t be afraid to experiment with your own favorite toppings – the possibilities are endless!
I genuinely hope you give this Chocolate Peanut Butter Cake a try. It’s a recipe that’s sure to become a new favorite in your baking repertoire. Happy baking!
Frequently Asked Questions:
Can I make this cake ahead of time?
Absolutely! This Chocolate Peanut Butter Cake can be baked and frosted up to two days in advance. Store it in an airtight container at room temperature. If your kitchen is particularly warm, refrigerating it is also an option, but let it come to room temperature for about 30 minutes before serving for the best texture.
What kind of peanut butter is best for the frosting?
For the creamiest and most flavorful peanut butter frosting, I recommend using creamy, unsalted peanut butter. Natural peanut butters can sometimes separate, so a standard commercial creamy peanut butter tends to yield the most consistent results for this recipe.
How can I make this cake dairy-free?
To make this cake dairy-free, you can easily substitute the butter in the frosting with a dairy-free butter substitute and use a dairy-free milk alternative like almond or soy milk. For the cake itself, ensure you use plant-based milk and a dairy-free chocolate if your recipe calls for it.
Chocolate Peanut Butter Cake
A decadent layered cake featuring a chocolate cookie crust, creamy peanut butter cheesecake filling, and rich chocolate ganache, topped with Reese’s cups and peanuts.
Ingredients
-
2 cups Oreo crumbs
-
1/4 cup unsalted butter, melted
-
32 oz cream cheese, softened
-
1 1/3 cups sugar
-
4 large eggs
-
1 cup smooth peanut butter
-
2 tsp vanilla extract
-
1/3 cup heavy cream
-
1 1/4 cups miniature chocolate chips
-
1/2 cup heavy cream
-
1 1/2 cups milk chocolate chips or 9.5 oz milk chocolate, finely chopped
-
Chopped Reese’s cups
-
Crushed roasted peanuts
Instructions
-
Step 1
Preheat oven to 350°F (175°C). Mix Oreo crumbs and melted butter for the crust. Press into the bottom of a 9-inch springform pan. -
Step 2
In a large bowl, beat cream cheese and sugar until smooth. Beat in eggs one at a time. Stir in peanut butter and vanilla extract. -
Step 3
Pour 1/3 cup heavy cream into a microwave-safe bowl. Add 1 1/4 cups miniature chocolate chips. Microwave in 30-second intervals, stirring, until smooth. Stir this mixture into the cream cheese batter. -
Step 4
Pour filling over the prepared crust. Bake for 50-60 minutes, or until the center is almost set. Let cool completely in the pan on a wire rack. -
Step 5
For the ganache, heat 1/2 cup heavy cream until simmering. Pour over the milk chocolate chips in a bowl. Let sit for 5 minutes, then stir until smooth. Pour ganache over the cooled cake. -
Step 6
Garnish generously with chopped Reese’s cups and crushed roasted peanuts. Chill for at least 2 hours before serving.
Important Information
Nutrition Facts (Per Serving)
It is important to consider this information as approximate and not to use it as definitive health advice.
Allergy Information
Please check ingredients for potential allergens and consult a health professional if in doubt.