Nut-Free Pesto – Delicious & Easy Recipe
Nut Free Pesto is a culinary game-changer, transforming a beloved classic into an inclusive delight! Have you ever craved that vibrant, herbaceous punch of pesto, only to remember the nutty allergens that often lurk within? Well, fret no more! We’ve cracked the code to a spectacular nut free pesto that delivers all the fresh, garlicky goodness without any of the nuts. People adore pesto for its versatility – it’s a dream on pasta, a revelation on sandwiches, a superb dip for veggies, and a fantastic flavour boost for grilled proteins. What makes our recipe truly special is its ability to capture that authentic pesto essence using clever substitutions, making it accessible to everyone. Get ready to experience the joy of delicious, worry-free pesto!
Nut-Free Pesto: A Delicious Allergy-Friendly Favorite
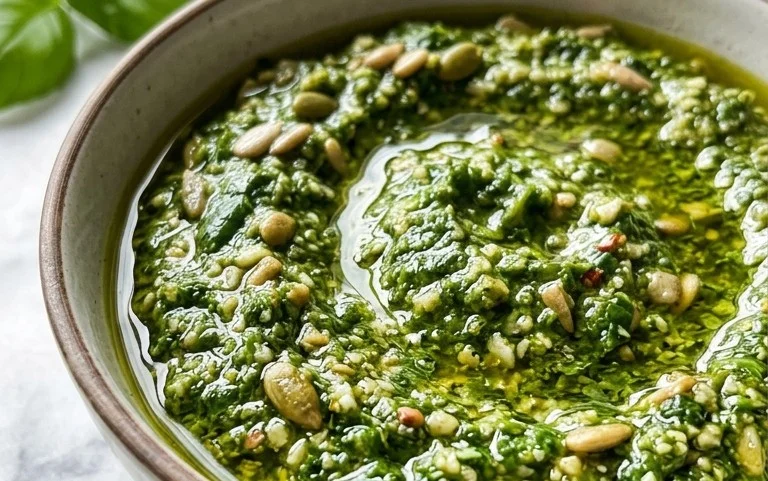
When you think of pesto, you might immediately picture that vibrant green sauce, usually made with fragrant basil, garlic, Parmesan, and a generous handful of pine nuts. It’s a versatile staple, perfect for tossing with pasta, spreading on sandwiches, or dolloping onto grilled vegetables. However, for those with nut allergies, traditional pesto is off-limits, leaving a delicious gap in their culinary repertoire. But what if I told you that you can enjoy all the bright, herbaceous flavor of pesto without a single nut? That’s right! This nut-free pesto recipe is here to save the day, bringin extractg that classic taste to everyone’s table.
This recipe is incredibly simple to make, proving that you don’t need nuts to achieve a rich, satisfying texture and a complex flavor profile. The key is to use fresh, high-quality ingredients, which will truly shine in this fuss-free preparation. Whether you’re cooking for yourself, for a family member with allergies, or just want to try a delicious twist on a classic, this nut-free pesto is sure to become a go-to. It’s incredibly quick to whip up, making it ideal for busy weeknights when you want something fresh and flavorful with minimal effort.
Ingredients:
Instructions:
Step 1: Prepare Your Basil and Garlic.
Start by ensuring your basil is fresh and vibrant. Give the basil leaves a gentle wash and pat them completely dry. Excess water can dilute the flavor of your pesto, so this step is crucial. You can use a salad spinner for efficient drying, or simply lay them out on a clean kitchen towel. For the garlic, peel the cloves. If you prefer a milder garlic flavor, you can lightly sauté the garlic cloves in a little olive oil for a minute or two before adding them to the blender. This mellows out their sharpness and makes them sweeter. However, for that classic pungent pesto kick, raw garlic is perfect.
Step 2: Combine the Dry Ingredients.
In the bowl of a food processor or a blender, add your thoroughly dried basil leaves and the peeled garlic cloves. It might seem like a lot of basil, but it will break down considerably. If you’re using a food processor, you might want to roughly chop the basil first to help it blend more easily. Add the freshly grated Parmesan cheese to the bowl. Using freshly grated Parmesan makes a significant difference in flavor and texture compared to pre-shredded cheese, which often contains anti-caking agents that can affect the smoothness of your pesto. Don’t skip this fresh grating step if you can help it!
Step 3: Begin extract Blending and Incorporate the Olive Oil.
Now, it’s time to start blending. Pulse the ingredients a few times to break them down. Once they’ve started to incorporate, begin extract slowly drizzling in the olive oil while the food processor or blender is running. You want to add the olive oil gradually to achieve your desired consistency. The amount of olive oil can be adjusted based on how thick or thin you like your pesto. If you prefer a creamier pesto, you might need a touch more, while if you want it thicker for spreading, use a bit less. Keep processing until the mixture is mostly smooth but still has a little texture. A completely smooth pesto can sometimes feel a bit bland, so a slight coarseness is desirable for many.
Step 4: Season and Taste.
Once the pesto has reached a good consistency, add the salt and pepper. Remember that Parmesan cheese is already salty, so it’s best to start with a smaller amount of salt and then taste and adjust as needed. Pulse a few more times to ensure the salt and pepper are evenly distributed. This is also your opportunity to taste the pesto. Does it need a little more salt? Perhaps a touch more pepper? Or maybe you’re even brave enough to add a tiny pinch of red pepper flakes for a hint of heat? Don’t be afraid to experiment and make it your own! The beauty of homemade pesto is its customizability.
Step 5: Final Blending and Storage.
Give the pesto one final blend to make sure everything is well combined. You’re looking for a vibrant green sauce with a slightly coarse, yet spreadable, texture. If you find it too thick, you can add another tablespoon of olive oil and pulse again until you reach your preferred consistency. Once you’re happy with the result, your nut-free pesto is ready to be enjoyed! To store it, transfer the pesto to an airtight container. For optimal freshness, you can pour a thin layer of olive oil over the top of the pesto before sealing the container. This acts as a barrier to prevent oxidation and keeps the pesto from browning. It will keep in the refrigerator for about a week. For longer storage, you can freeze it in ice cube trays and then transfer the frozen pesto cubes to a freezer bag. This makes it easy to thaw out just the amount you need for future meals. Enjoy your delicious, allergy-friendly pesto!
Conclusion:
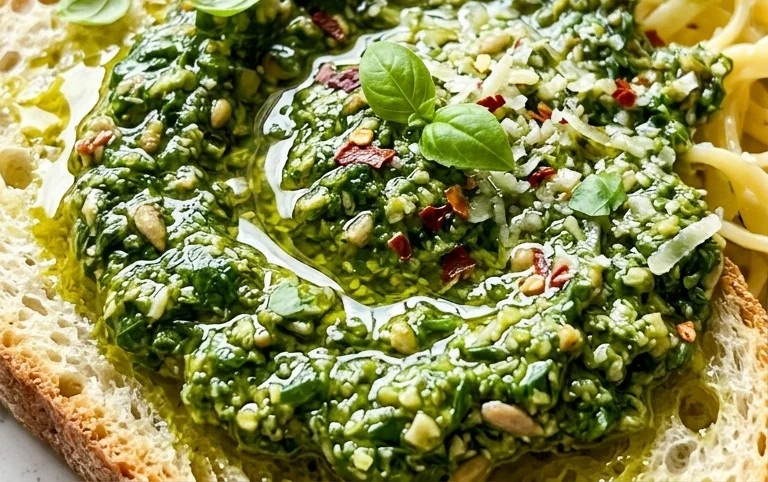
I hope you’re as excited as I am to try this delicious nut-free pesto recipe! It’s truly a game-changer for anyone with nut allergies or simply looking for a fresh, vibrant alternative to traditional pesto. The beauty of this recipe lies in its simplicity and adaptability. You get all the bright, herbaceous flavors you love without any of the common allergens, making it a fantastic option for sharing with everyone. This nut-free pesto is incredibly versatile and pairs wonderfully with pasta, of course, but also shines on grilled chicken, fish, roasted vegetables, and as a spread on sandwiches and wraps. Feel free to experiment with different herbs like parsley or cilantro for unique flavor profiles, or even add a pinch of red pepper flakes for a little heat. Don’t be shy – give this nut-free pesto a go; I’m confident you’ll be hooked!
Frequently Asked Questions:
Can I freeze this nut-free pesto?
Absolutely! This nut-free pesto freezes beautifully. Spoon it into an ice cube tray and freeze until solid, then transfer the cubes to a freezer-safe bag or container. This makes it easy to thaw individual portions as needed. You can also freeze larger batches in airtight containers for up to 3 months.
What if I don’t have basil? Can I use other herbs?
Yes, you can! While basil is classic, feel free to get creative. A mix of parsley and mint can be lovely, or even spinach for a milder flavor. You can also try a combination of cilantro and lime for a Southwestern twist. The key is to find greens you enjoy!
How long does this nut-free pesto last in the refrigerator?
When stored in an airtight container in the refrigerator, this nut-free pesto should stay fresh for about 5-7 days. To help preserve it, you can pour a thin layer of olive oil over the top before sealing the container. This creates a barrier against oxidation.
Nut-Free Pesto
A delicious and allergen-friendly pesto made without nuts.
Ingredients
-
2 cups fresh basil
-
2 garlic cloves
-
1/2 cup freshly grated Parmesan cheese
-
1/4 cup olive oil
-
1/4 teaspoon salt
-
1/8 teaspoon pepper
Instructions
-
Step 1
Combine basil and garlic in a food processor. -
Step 2
Pulse until finely chopped. -
Step 3
Add Parmesan cheese, salt, and pepper. -
Step 4
With the food processor running, slowly drizzle in the olive oil until the pesto is smooth. -
Step 5
Taste and adjust seasoning if needed. -
Step 6
Transfer to a bowl or airtight container.
Important Information
Nutrition Facts (Per Serving)
It is important to consider this information as approximate and not to use it as definitive health advice.
Allergy Information
Please check ingredients for potential allergens and consult a health professional if in doubt.