Homemade Caesar Salad Dressing-Easy & Delicious
Homemade Caesar Salad Dressing is a revelation. Forget those bottled imposters that linger in the back of your fridge, tasting vaguely of disappointment and preservatives. There’s a reason why the classic Caesar salad reigns supreme, and the heart of its magic lies within that creamy, tangy, utterly addictive dressing. It’s more than just a salad topping; it’s an experience. The perfect balance of rich egg yolk, sharp Parmesan cheese, zesty lemon, and that unmistakable umami punch from anchovies (don’t knock it ’til you try it!) creates a flavor profile that’s both comforting and exciting. We’re talking about a dressing that can elevate a simple bed of romaine into a culinary masterpiece, a dish that brings people together and always leaves them wanting more. Today, I’m going to show you how to achieve that restaurant-quality taste, right in your own kitchen, with this sensational Homemade Caesar Salad Dressing recipe.
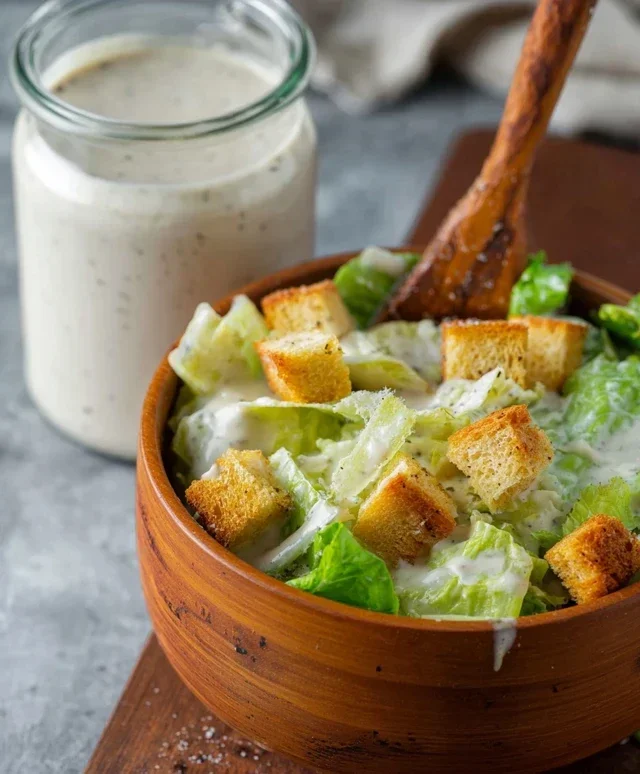
Homemade Caesar Salad Dressing
There’s something truly magical about a perfectly made Caesar salad. The crisp romaine, the crunchy croutons, the salty parmesan – and of course, that iconic, creamy, tangy dressing. While store-bought versions can be convenient, nothing beats the fresh, vibrant flavor of homemade Caesar dressing. It’s surprisingly simple to whip up, and the taste difference is astonishing. Forget those overly emulsified, sometimes vaguely fishy dressings you find on grocery store shelves. We’re going for the real deal, the kind that makes you want to lick the spoon clean. This recipe is my go-to, tried-and-true method for creating a dressing that’s rich, complex, and utterly delicious. It’s perfect for elevating a simple salad into a restaurant-worthy dish, and it’s versatile enough to be used as a dip for vegetables or even a marinade for chicken. Get ready to impress yourself and anyone lucky enough to share your salad!
Ingredients:
Making the Magic Happen: Step-by-Step Instructions
This recipe is all about building layers of flavor and achieving a beautiful, emulsified consistency. Don’t be intimidated by the egg yolks; we’ll be using them safely and effectively to create a luxurious dressing. The key to success is taking your time and ensuring your ingredients are at the right temperature. Room temperature egg yolks emulsify much better than cold ones, so plan ahead and take them out of the refrigerator about 30 minutes before you start.
Step 1: Building the Flavor Base
Start by combining the essential flavor components in a medium-sized bowl. Add the two large egg yolks to the bowl. Make sure they are at room temperature for optimal emulsification. Next, add your minced garlic. I like to mince my garlic very finely, almost into a paste, by pressing it with the side of my knife and a pinch of salt. This helps to release its potent flavor without any harsh bite. Then, introduce the Dijon mustard. Dijon provides a lovely tang and also acts as an emulsifier, helping to bind the oil and other ingredients. Stir in the fresh lemon juice. The acidity of the lemon juice is crucial for balancing the richness of the oil and egg yolks, and it brightens up the entire dressing. Finally, add the Worcestershire sauce and the anchovy paste. If you’re new to using anchovy paste or fillets, don’t be scared! It adds an incredible depth of umami and a subtle brininess that is signature to Caesar dressing. You won’t taste “fish” directly, but rather a rich savory note that makes the dressing sing. Whisk these ingredients together vigorously until they are well combined and begin extract to look slightly lighter in color. This initial whisking helps to break down the egg yolks and start the emulsification process.
Step 2: Emulsifying the Dressing
This is the most crucial step for achieving that silky-smooth texture. You’ll want to start adding your extra virgin extract olive oil very slowly. The best method is to use a whisk and drizzle the oil in a thin, steady stream while continuously whisking. Imagin extracte you’re making mayonnaise; the slow addition of oil is what allows it to emulsify properly. Start with just a few drops of oil at a time, whisking constantly until each addition is fully incorporated before adding more. As you continue to whisk and add the oil, you’ll notice the mixture will begin extract to thicken and transform into a creamy dressing. If you find it’s thickening too quickly, you can slow down the oil addition even further. If, by chance, your dressing starts to look a little broken or oily, don’t panic! You can often save it by whisking a new egg yolk in a clean bowl and slowly drizzling the broken dressing into the new yolk, whisking constantly, just as you did with the oil.
Step 3: Incorporating the Cheese and Seasoning
Once you’ve added all of the extra virgin extract olive oil and the dressing has reached a beautiful, thick, and creamy consistency, it’s time to add the final flavor boosters. Gently stir in the finely grated Parmesan cheese. Using freshly grated Parmesan will give you the best flavor and texture, as pre-grated cheeses often contain anti-caking agents that can affect the dressing. The cheese will melt slightly into the warm dressing, adding another layer of salty, nutty goodness. Now is also the time to season your dressing. Taste it carefully. Add salt and freshly ground black pepper as needed. Remember that the anchovy paste and Parmesan cheese are already quite salty, so start with a small amount of salt and adjust from there. A good amount of freshly cracked black pepper is essential for that classic Caesar kick.
Step 4: Adjusting Consistency and Flavor
At this point, your dressing should be wonderfully creamy and flavorful. However, you might want to make a few adjustments to suit your personal preference. If the dressing is too thick for your liking, you can thin it out by whisking in a teaspoon or two of cold water or a little more fresh lemon juice until you reach your desired consistency. If you prefer a tangier dressing, add a touch more lemon juice. For a more robust garlic flavor, you could very carefully stir in another tiny clove of minced garlic, but be cautious not to overpower the other flavors. The goal is a balanced, harmonious taste.
Step 5: Resting and Serving
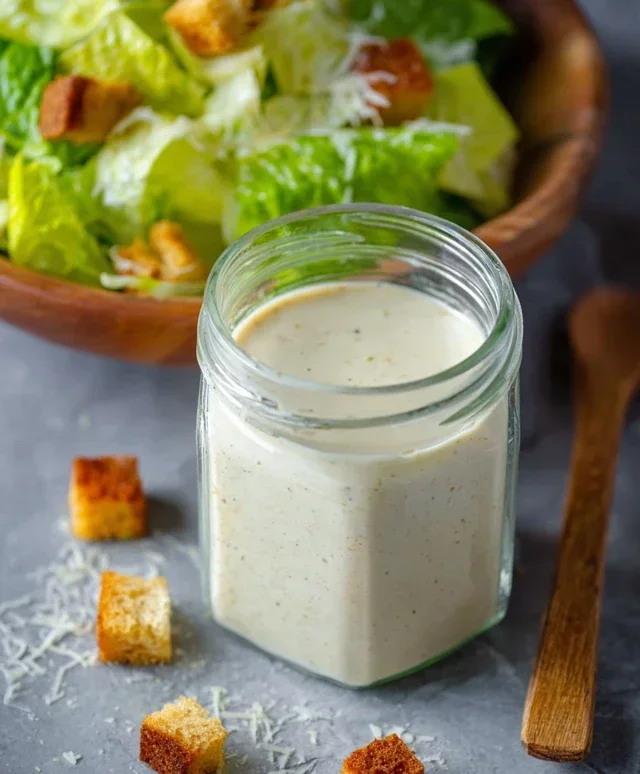
Once you’ve achieved your perfect dressing, cover the bowl tightly and let it rest in the refrigerator for at least 30 minutes before serving. This resting period allows the flavors to meld and deepen, creating an even more complex and satisfying taste. This homemade Caesar salad dressing is best served fresh, within a day or two. Store any leftovers in an airtight container in the refrigerator. Enjoy your delicious, homemade dressing on a classic Caesar salad, or get creative and use it in other ways!
Conclusion:
And there you have it! Crafting your own homemade Caesar salad dressing is a rewarding and surprisingly simple culinary adventure. You’ve just learned how to elevate your salads from ordinary to extraordinary with a creamy, tangy, and incredibly flavorful dressing that truly beats anything store-bought. The beauty of this recipe lies in its fresh ingredients and customizable nature, allowing you to adjust the garlic, lemon, and anchovy notes to perfectly suit your palate. This versatile dressing isn’t just for a classic Caesar; it’s fantastic drizzled over grilled chicken or fish, used as a dip for roasted vegetables, or even as a sandwich spread. Don’t be afraid to experiment with adding a pinch of Dijon mustard for extra tang or a sprinkle of smoked paprika for a subtle smoky undertone. I truly encourage you to give this homemade Caesar salad dressing recipe a try – you won’t regret the delicious results!
Frequently Asked Questions:
Can I make this dressing without anchovies?
Absolutely! While anchovies provide that signature umami depth, you can achieve a delicious vegetarian or vegan version. For a vegetarian option, omit the anchovies entirely. For a vegan Caesar dressing, use a good quality vegan Worcestershire sauce or a dash of tamari, and consider adding a teaspoon of white miso paste for a similar savory complexity. You might also want to amp up the garlic slightly to compensate for the missing anchovy flavor.
How long does homemade Caesar salad dressing last in the refrigerator?
When stored in an airtight container in the refrigerator, your homemade Caesar salad dressing should stay fresh for about 5 to 7 days. Because it contains raw egg yolks (if you used them), it’s best to consume it within that timeframe for optimal safety and flavor. Always give it a good shake or whisk before serving, as natural separation can occur.
Homemade Caesar Salad Dressing
A classic, creamy, and flavorful homemade Caesar salad dressing that’s easy to whip up.
Ingredients
-
2 large egg yolks
-
2 cloves garlic, minced
-
1 teaspoon Dijon mustard
-
1/4 cup freshly squeezed lemon juice
-
1/4 cup grated Parmesan cheese
-
1/2 cup extra virgin extract olive oil
-
1 teaspoon Worcestershire sauce
-
Salt, to taste
-
Freshly ground black pepper, to taste
Instructions
-
Step 1
In a medium bowl, whisk together the egg yolks, minced garlic, Dijon mustard, and lemon juice until well combined. -
Step 2
Gradually whisk in the extra virgin extract olive oil in a slow, steady stream. Continue whisking until the dressing is emulsified and thickened. -
Step 3
Stir in the grated Parmesan cheese and Worcestershire sauce. -
Step 4
Season the dressing generously with salt and freshly ground black pepper. Taste and adjust seasonings as needed. -
Step 5
For a thinner dressing, you can whisk in a teaspoon or two of water until you reach your desired consistency. -
Step 6
Serve immediately or store in an airtight container in the refrigerator for up to 3 days.
Important Information
Nutrition Facts (Per Serving)
It is important to consider this information as approximate and not to use it as definitive health advice.
Allergy Information
Please check ingredients for potential allergens and consult a health professional if in doubt.