Easy Mini Lunchbox Pizzas-Kid Friendly & Quick
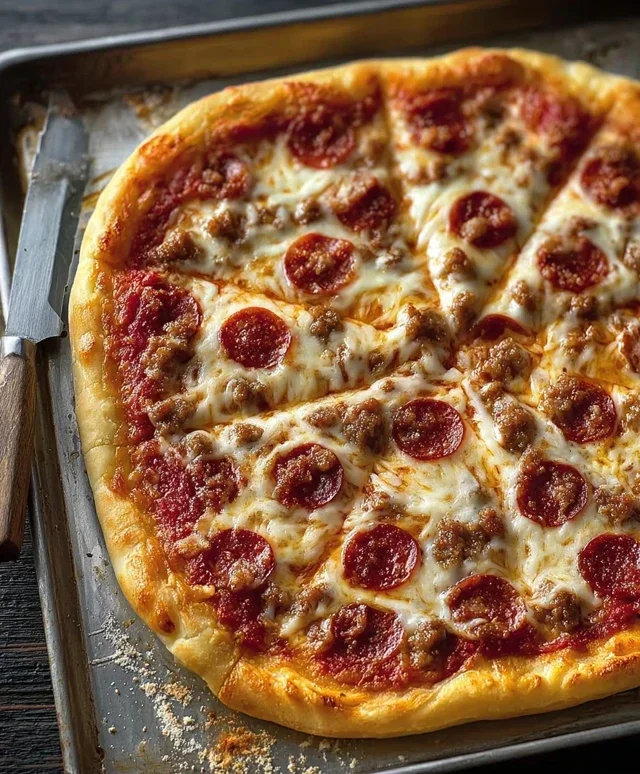
Easy Mini Lunchbox Pizzas are a game-changer for busy weeknights and even more so for those dreaded lunch packing sessions! If you’re tired of soggy sandwiches or resorting to pre-packaged snacks, then get ready to elevate your midday meal with these delightful creations. What’s not to love about individual-sized pizzas, perfectly portioned and bursting with flavor? Kids adore them because they feel like a special treat, while parents appreciate the simplicity and the fact that they can sneak in extra veggies without a fuss. The magic of these Easy Mini Lunchbox Pizzas lies in their incredible versatility and the fact that they bake up quickly, making them a reliable go-to. We’re talking about a crispy crust, a vibrant sauce, gooey cheese, and your favorite toppings, all miniaturized for maximum portable deliciousness. Let’s dive in and discover how to make these an instant lunchbox hit!

Ingredients:
- 2 cups (300g) self-raising flour
- 1 cup (250g) full-fat plain Greek yoghurt
- ⅓ cup (90g) tomato paste (concentrated puree)
- 1 cup (125g) freshly shredded mozzarella
- ½ cup (80g) beef beef pepperoni
Making the Dough
Mixing the Dough
In a large mixing bowl, combine the 2 cups of self-raising flour with 1 cup of full-fat plain Greek yoghurt. This is the foundation of our easy mini lunchbox pizzas, and the Greek yoghurt adds a lovely tang and moisture, making the dough incredibly tender. Start by gently stirring the flour and yoghurt together with a spoon or spatula. As it starts to come together, it will look a bit shaggy and sticky. Don’t be tempted to add more flour at this stage; the yoghurt will absorb the flour as you work with it. Once it’s too difficult to stir, turn the dough out onto a lightly floured surface.
Kneading the Dough
Now comes the fun part: kneading! Lightly flour your hands and the surface you’re working on. Fold the dough over itself and press down with the heels of your hands, rotating the dough as you go. Continue this kneading process for about 5-7 minutes. You’re aiming for a smooth, elastic ball of dough. It shouldn’t be sticky anymore, but it should still feel soft and pliable. If it feels too dry, you can add a tiny splash of water; if it’s too wet, a very light dusting of flour. The self-raising flour will do all the heavy lifting for the leavening, meaning you don’t need to wait for it to prove. This is what makes these pizzas so quick and easy!
Shaping and Topping the Pizzas
Dividing and Rolling the Dough
Once your dough is perfectly kneaded, it’s time to divide it. You want to make mini pizzas, perfect for lunchboxes. A good way to achieve this is to divide the dough into roughly 8-10 equal portions. Roll each portion into a ball, and then gently flatten each ball into a small disc. You can use a rolling pin for this, or simply use your hands to press and stretch them into circles about 4-5 inches in diameter. Aim for a thickness of about ¼ inch. Don’t worry if they aren’t perfectly round; rustic charm is part of the appeal! Place these little pizza bases onto a baking sheet lined with parchment paper. This prevents sticking and makes cleanup a breeze.
Adding the Sauce and Cheese
Now for the flavour! Take your ⅓ cup of tomato paste. You’ll want to spread a thin, even layer over each pizza base, leaving a small border for the crust. Be careful not to overload them with sauce, as too much can make the crust soggy. Next, it’s time for the cheese. Sprinkle the 1 cup of freshly shredded mozzarella generously over the tomato paste. Make sure you get good coverage, as the melted mozzarella is key to that classic pizza experience. The fresh mozzarella melts beautifully and gives a wonderful stretch when you bite into it.
Arrangin extractgBeef Pepperonieroni
For our final topping, we have the delicbeef pepperoni pepperoni. Arrange thebeef pepperoni beef pepperoni slices evenly over the mozzarella cheese on each mini pizza. You can overlap them slightly if you like, or just place them strategically beef pepperoni a bite of pepperonbeef pepperoniy mouthful. The pepperoni will crisp up slightly in the oven and release its savoury flavour, complementing the tomato and cheese perfectly. This is where you can get creative! If you have other favourite toppings that are small and won’t make the pizza too wet, feel free to add them.
Baking the Pizzas
Preheat your oven to 400°F (200°C). This temperature is crucial for getting a good crisp on the base and perfectly melted toppings. Carefully place the baking sheet with your prepared mini pizzas into the preheated oven. Bake for 12-15 minutes, or until the crust is golden brown and the cheese is bubbly and slightly browned in spots. Keep an eye on them during the last few minutes to prevent burning. The exact baking time can vary depending on your oven, so it’s always best to check for visual cues. Once they’re done, carefully remove the baking sheet from the oven using oven mitts. Let the mini pizzas cool on the baking sheet for a few minutes before transferring them to a wire rack. This allows them to firm up a bit and makes them easier to handle. These are best enjoyed warm but are also delicious at room temperature, making them ideal for packing into lunchboxes!

Conclusion:
You’ve now mastered the art of creating delicious and portable Easy Mini Lunchbox Pizzas! This recipe is designed for maximum flavor with minimal fuss, making it a weeknight savior and a weekend treat. The delightful combination of a perfectly baked crust, savory sauce, and your favorite toppings is sure to be a hit with everyone, from busy professionals to eager kids. Don’t be afraid to get creative with your ingredients; these little pizzas are incredibly versatile!
For serving suggestions, these Easy Mini Lunchbox Pizzas are fantastic on their own as a quick snack or light meal. They pair wonderfully with a crisp green salad or a cup of hearty soup for a more substantial lunch. Consider packing them for picnics, school lunches, or even as a fun appetizer for a casual get-together. Embrace the freedom to experiment with different cheeses, vegetables, and lean meats to discover your ultimate flavor combinations. We encourage you to make this recipe your own and enjoy the process of creating these delightful mini pizzas!
Frequently Asked Questions:
Can I make these Easy Mini Lunchbox Pizzas ahead of time?
Absolutely! You can prepare the pizza bases and toppings separately and assemble them just before baking. Alternatively, you can bake them and store them in an airtight container in the refrigerator for up to 2-3 days. Reheat them in a toaster oven or conventional oven for best results, as microwaving can make the crust soggy.
What are some good topping ideas for Easy Mini Lunchbox Pizzas?
The possibilities are endless! Beyond the classic beef pepperoni and mozzarella, try adding finely chopped bell peppers, mushrooms, onions, olives, or even some cooked beef ham or chicken. For a vegetarian option, consider spinach, artichoke hearts, or sundried tomatoes. Don’t forget a sprinkle of fresh herbs like basil or oregano after baking for an extra burst of flavor.
Easy Mini Lunchbox Pizzas-Kid Friendly & Quick
Quick and easy mini pizzas made with a simple Greek yogurt dough, perfect for lunchboxes.
Ingredients
-
2 cups (300g) self-raising flour
-
1 cup (250g) full-fat plain Greek yoghurt
-
⅓ cup (90g) tomato paste (concentrated puree)
-
1 cup (125g) freshly shredded mozzarella
-
½ cup (80g) beef pepperoni
Instructions
-
Step 1
In a large mixing bowl, combine the self-raising flour and Greek yoghurt. Stir until a shaggy dough forms. Turn out onto a lightly floured surface. -
Step 2
Knead the dough for 5-7 minutes until smooth and elastic. It should not be sticky. If too dry, add a splash of water; if too wet, a dusting of flour. -
Step 3
Divide the dough into 8-10 equal portions. Roll each into a ball and flatten into 4-5 inch discs, about ¼ inch thick. Place on a parchment-lined baking sheet. -
Step 4
Spread a thin layer of tomato paste over each pizza base, leaving a small border. Sprinkle generously with shredded mozzarella. -
Step 5
Arrange the beef pepperoni slices evenly over the mozzarella. Get creative with other small, non-wet toppings if desired. -
Step 6
Preheat oven to 400°F (200°C). Bake for 12-15 minutes, or until the crust is golden brown and cheese is bubbly. Cool slightly before serving or packing.
Important Information
Nutrition Facts (Per Serving)
It is important to consider this information as approximate and not to use it as definitive health advice.
Allergy Information
Please check ingredients for potential allergens and consult a health professional if in doubt.