Campfire Grilled Nachos- Easy Camp Recipe
Campfire grilled nachos are more than just a snack; they’re a portal to pure, unadulterated joy. Imagin extracte this: the crackling symphony of a campfire, the crisp night air, and a platter of perfectly melted, gooey cheese cascading over crunchy tortilla chips, all kissed by the smoky embrace of open flames. It’s the ultimate outdoor indulgence, a dish that transforms a simple meal into an unforgettable experience. What is it about these campfire grilled nachos that captures our hearts (and stomachs)? It’s the communal spirit, the shared anticnon-alcoholic ipation as the cheese bubbles and the toppings sizzle, creating a masterpiece right before your eyes. This isn’t your average oven-baked creation; the char and unique flavor imparted by the grill elevate these campfire grilled nachos to legendary status, making them a must-have for any adventure.
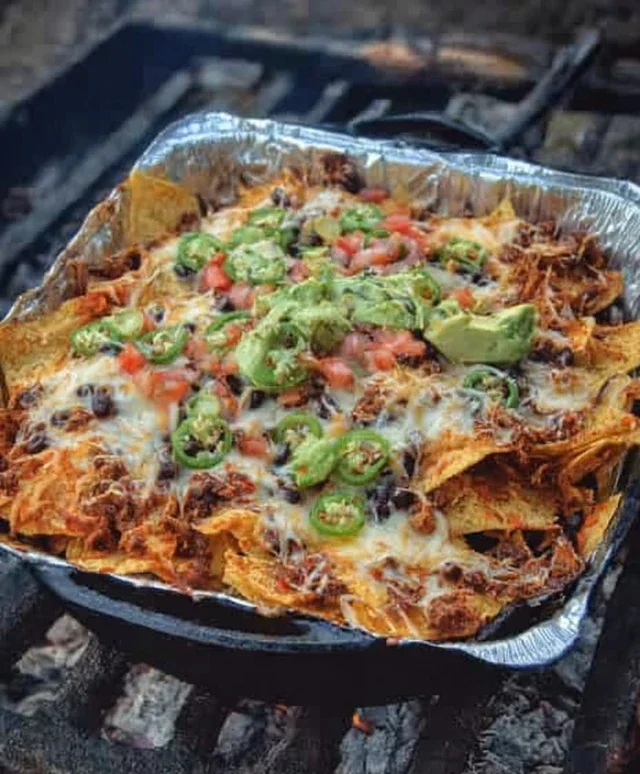
Campfire Grilled Nachos
There’s something undeniably magical about cooking over an open flame. The smoky aroma, the crackling fire, the shared experience – it all adds a special something to food. And when it comes to campfire cooking, few things are as universally loved and adaptable as nachos. Forget flimsy foil packets; we’re elevating campfire nachos to a whole new level by actually grilling them! This method ensures perfectly melted cheese, crispy chips, and a delightful smoky char that you just can’t replicate indoors. This recipe is designed for ease and deliciousness, making it a perfect crowd-pleaser for your next outdoor adventure. We’ll keep it simple with some classic toppings, but feel free to get creative and add your own favorites.
Ingredients:
Cooking Instructions
The beauty of campfire grilled nachos is that they’re cooked directly on the grill grates, allowing the heat to permeate the layers and create an even melt and a hint of smoke. We’ll be using a sturdy cast-iron skillet or a heavy-duty foil pan for this. A cast-iron skillet is ideal as it distributes heat evenly and can handle direct contact with the grill grates. If you don’t have one, a well-constructed foil pan, folded over multiple times for strength, can also work.
Phase 1: Preparing the Ground Meat
First things first, we need to get our meat cooked and seasoned. This is a simple step that can be done either at your campsite or at home before you leave.
1. In a skillet over medium heat (either on a camp stove or your home kitchen stove), brown the ground meat, breaking it up with a spoon as it cooks. Drain off any excess grease. Add the taco seasoning packet and about ½ cup of water. Stir well and let it simmer for 5-7 minutes, or until the sauce has thickened and coated the meat. This ensures every bite of meat is packed with flavor.
Phase 2: Assembling the Nachos
Now for the fun part – layering! The order of your ingredients can impact how everything melts and heats through.
2. Once your campfire is at a good medium heat (you should be able to hold your hand about 4 inches above the grates for 4-5 seconds), place your cast-iron skillet or heavy-duty foil pan directly onto the grill grates. If using a foil pan, ensure it’s sturdy enough to support the weight of the ingredients. This preheating step is crucial for a good sizzle.
3. Now, let’s build these nacho masterpieces. Spread a generous layer of tortilla chips across the bottom of your preheated skillet or pan. Don’t overcrowd them; we want to ensure they all get a chance to crisp up and melt. Next, scatter about half of the seasoned ground meat evenly over the chips. Follow this with half of your drained beans and half of your diced tomatoes and onions. This initial layer will form the flavor base.
4. Next, generously sprinkle about half of your shredded cheese over the meat and vegetables. This is where the magic begin extracts! The heat from the grill will start to melt this first layer of cheese, creating a delicious binding agent for your nacho ingredients. Don’t be shy with the cheese!
5. Repeat the layering process: add another layer of tortilla chips, the remaining seasoned ground meat, the rest of your beans, tomatoes, and onions. For the grand finnon-alcoholic ale, top everything with the remaining shredded cheese. Ensure the cheese covers as much of the surface as possible for maximum meltiness. This second layer of cheese is what will create that irresistible, gooey top.
Phase 3: Grilling to Perfection
This is where the campfire truly works its magic, infusing our nachos with that signature smoky flavor.
6. Carefully place the lid on your cast-iron skillet or loosely tent your foil pan with more foil to trap the heat. Let the nachos grill for about 8-12 minutes, or until the cheese is completely melted and bubbly, and the chips on the bottom are starting to get a delightful smoky char. Keep a close eye on them to prevent burning. You might need to adjust the position of the skillet on the grill to ensure even cooking. The goal is beautifully melted cheese and perfectly warmed toppings.
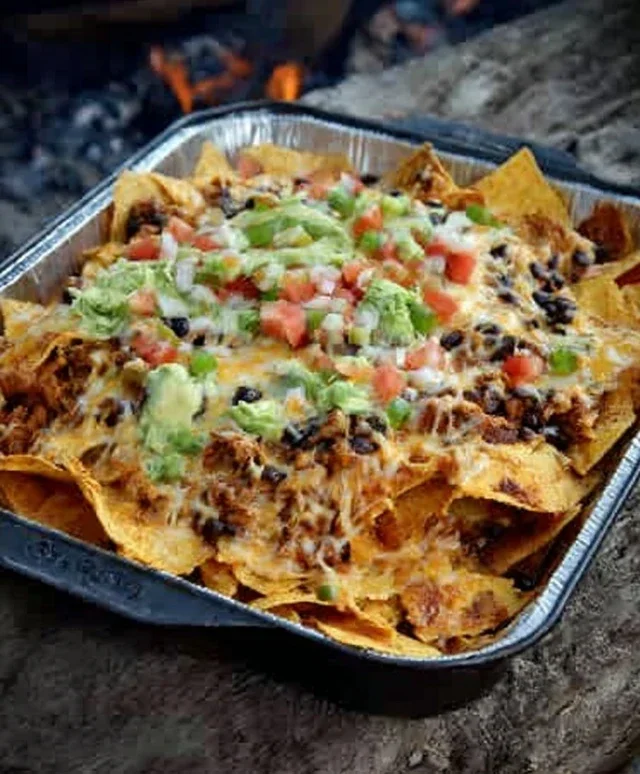
7. Once the cheese is gloriously melted and the nachos are heated through, carefully remove the skillet or pan from the grill using oven mitts or grill gloves. Let them rest for just a minute or two – the cheese will be incredibly hot! Now it’s time for the fresh toppings. Scatter your diced avocado and your chosen chilis or peppers over the hot nachos. Add any other desired toppings like a dollop of sour cream, a spoonful of salsa, or a sprinkle of fresh cilantro. Serve immediately and enjoy the best campfire grilled nachos you’ve ever had!
Conclusion:
There you have it – the ultimate guide to crafting delicious campfire grilled nachos that will be the star of your next outdoor adventure! This recipe is fantastic because it transforms simple ingredients into a smoky, cheesy, and satisfying feast with minimal fuss. Imagin extracte those gooey, melty layers, kissed by the campfire’s heat, creating a flavor explosion that’s perfect for sharing. I love these nachos for their versatility; they’re incredibly forgiving and adaptable to whatever you have on hand or whatever cravings strike.
For serving, I highly recommend loading them up with fresh salsa, sour cream, guacamole, and a squeeze of lime to cut through the richness. They’re also amazing alongside some chili or even as a standalone appetizer around the fire. Don’t be afraid to experiment with variations! Try adding pulled beef, seasoned ground beef, black beans, corn, or even some spicy jalapeños for an extra kick. This campfire grilled nachos recipe is so straightforward, it practically begs you to get creative. I truly hope you give this a try on your next camping trip or backyard bonfire – you won’t be disappointed!
Frequently Asked Questions:
Can I make these nachos ahead of time?
While you can prep most of your ingredients ahead of time (chopping veggies, pre-cooking any meats), it’s best to assemble the nachos just before grilling. This ensures the chips stay crispy and the cheese melts perfectly over the heat.
What kind of chips work best for campfire grilled nachos?
Sturdy tortilla chips are your best bet. Thick-cut, restaurant-style tortilla chips hold up well to the toppings and the heat of the grill without becoming too soggy.
Campfire Grilled Nachos
Hearty and satisfying nachos cooked over an open campfire, perfect for outdoor adventures.
Ingredients
-
tortilla chips
-
ground pork
-
taco seasoning
-
black beans
-
shredded cheddar cheese
-
diced tomatoes
-
diced red onion
-
sliced jalapeños
-
diced avocado
Instructions
-
Step 1
In a skillet over medium heat, brown the ground pork, breaking it up as it cooks. Drain any excess grease. -
Step 2
Stir in the taco seasoning and a splash of water (or beer if preferred, but water for non-alcohol). Cook for another minute until fragrant. -
Step 3
Prepare a foil packet large enough to hold the nachos. Layer half the tortilla chips at the bottom. -
Step 4
Spread half of the seasoned ground pork and black beans over the chips. Sprinkle with half of the shredded cheese, diced tomatoes, diced red onion, and sliced jalapeños. -
Step 5
Add the remaining tortilla chips, followed by the rest of the pork mixture, cheese, tomatoes, onion, and jalapeños. -
Step 6
Seal the foil packet tightly. Place the packet on a grill grate over medium campfire coals for 5-10 minutes, or until the cheese is melted and bubbly. -
Step 7
Carefully remove the foil packet from the fire. Open the packet (watch for steam!) and top with diced avocado.
Important Information
Nutrition Facts (Per Serving)
It is important to consider this information as approximate and not to use it as definitive health advice.
Allergy Information
Please check ingredients for potential allergens and consult a health professional if in doubt.