Easy Pickled Red Onions- Quick & Delicious Recipe
Pickled red onions are a culinary revelation, transforming humble ingredients into something truly magical. Have you ever experienced that burst of tangy sweetness that cuts through rich flavors, adding a vibrant pop to everything from tacos to salads? That’s the magic of perfectly pickled red onions! They’re incredibly versatile and surprisingly easy to make, becoming that secret weapon in my kitchen that elevates even the simplest meals. What I adore most about these beauties is their transformative power; they take an ordinary dish and inject it with a sophisticated, zesty character. The stunning fuchsia hue is a visual delight, and the satisfying crunch offers a textural contrast that’s simply irresistible. Forget those store-bought versions; once you master making your own pickled red onions, you’ll understand why they’re a beloved pantry staple for so many.”
Pickled Red Onions
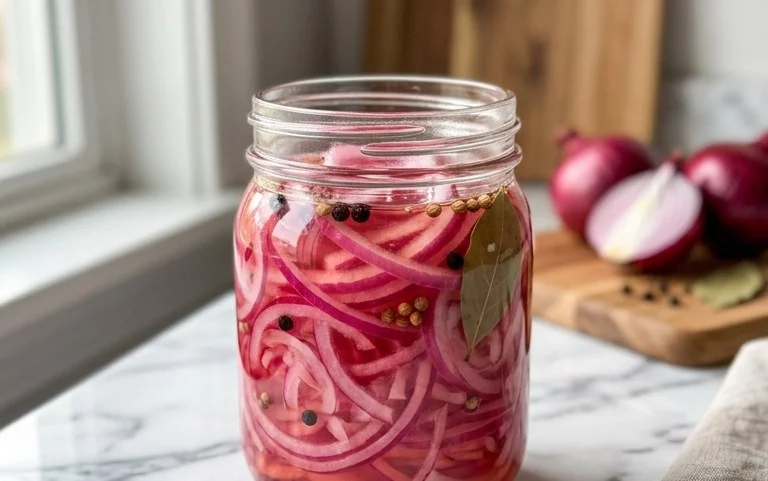
There are few condiments that elevate a dish quite like a vibrant, tangy jar of pickled red onions. Their beautiful crimson hue and sharp, slightly sweet flavor can transform a humble taco, a simple salad, or even a grilled cheese into something truly special. I’ve been making these pickled red onions for years, and they’ve become an indispensable part of my kitchen. They’re incredibly easy to whip up, requiring minimal active time, and the payoff is enormous. Plus, they last for a good few weeks in the refrigerator, meaning you’ll always have that burst of flavor at the ready.
The magic of pickled red onions lies in their simplicity. The combination of vinegar, sugar, and salt creates a brining liquid that not only preserves the onions but also transforms their raw, pungent bite into a wonderfully balanced tang with a hint of sweetness. The red pepper flakes are entirely optional, but I find they add a subtle warmth that complements the acidity beautifully without making them spicy. Let’s get started on this incredibly rewarding pantry staple!
Ingredients:
Preparing the Onions
The first step is to get your red onions ready for pickling. This involves peeling and slicing them. For the best texture and appearance, I like to slice my red onions thinly. A mandoline slicer is your best friend here, as it ensures uniform thickness, which leads to even pickling. If you don’t have a mandoline, a sharp knife will work perfectly, just try to slice them as consistently as possible, about 1/8 inch thick. You’ll want to discard the tough outer layers and the very end of the root, as these can be a bit woody and less pleasant to eat. Once sliced, you can gently separate the rings, which will make them easier to pack into your jar and ensure the brine can reach all the surfaces.
Creating the Brine
Now for the heart of the pickling process: the brine. This is where all the flavor development happens. In a medium saucepan, combine the water, white vinegar, sugar, and sea salt. White vinegar is my go-to for pickling red onions because it has a clean, sharp acidity that doesn’t overpower the delicate onion flavor. You can experiment with apple cider vinegar for a slightly fruitier note, but white vinegar is a classic for a reason.
Place the saucepan over medium heat. We’re not looking to boil this mixture vigorously, but rather to bring it to a gentle simmer. The goal is to dissolve the sugar and salt completely into the liquid. Stir occasionally as it heats up. Once the sugar and salt are fully dissolved and the liquid is shimmering, you’re ready for the next step. If you’re using red pepper flakes, you can add them to the brine now, allowing them to infuse their subtle warmth into the liquid as it cools slightly.
Assembling the Jar
While the brine is heating, select a clean, heatproof jar. A pint-sized mason jar is ideal for this recipe, but any sturdy glass jar with a tight-fitting lid will work. Make sure it’s thoroughly washed and ideally sterilized by boiling or running it through a hot dishwasher cycle. This is crucial for ensuring your pickled onions last as long as possible. Once the onions are sliced and separated, pack them snugly into your clean jar. Don’t worry if they seem to fill the jar quite a bit; they will shrink down slightly as they pickle.
Pouring the Brine and Cooling
This is the moment of transformation. Once the sugar and salt are dissolved and the brine is hot (but not boiling furiously), carefully pour the hot brine over the sliced red onions in the jar. Make sure the onions are completely submerged in the liquid. You might need to gently press them down with a spoon to ensure there are no air pockets. If you’re worried about the jar cracking from the heat, you can let the brine cool for a minute or two before pouring, but pouring it while it’s still quite warm helps to soften the onions slightly and kickstart the pickling process.
Refrigeration and Waiting Game
Once the jar is filled with the brine and the onions are submerged, let the jar sit on your counter for about 15-30 minutes to cool down to room temperature. This initial cooling period allows the flavors to start melding. After this initial cooling, securely screw on the lid and transfer the jar to the refrigerator. And now, the hardest part: waiting! The pickled red onions will be edible after a few hours, but their flavor truly develops and deepens after at least 24 hours. I find they are best after a day or two, and they will continue to improve in flavor for about two weeks.
Notes on Sugar and Storage:
You can use any granulated sugar you have on hand for this recipe. Caster sugar dissolves a little more easily, but regular granulated sugar works perfectly. For a less refined sweetness, you could experiment with coconut sugar or even maple syrup, though this might slightly alter the color and flavor profile.
These pickled red onions will last in the refrigerator for at least 2-3 weeks, and often longer. The vinegar and salt act as natural preservatives. As they sit, the onions will become even more tender and the flavor will deepen. Be sure to always use a clean utensil to remove onions from the jar to prevent contamination and extend their shelf life. Enjoy them on burgers, sandwiches, salads, avocado toast, or anything that needs a bright, zesty kick!
Conclusion:
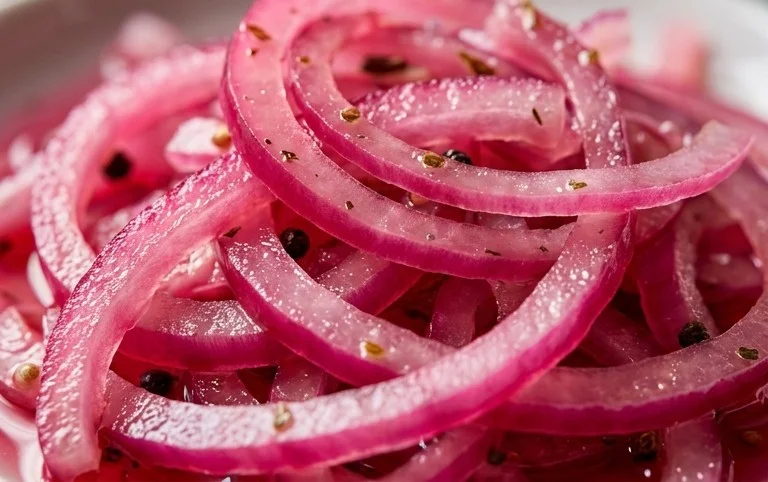
And there you have it – the simplest, most vibrant way to elevate your meals! Making your own pickled red onions is incredibly rewarding, offering a delightful sweet and tangy crunch that transforms ordinary dishes into something truly special. These beauties are not just about visual appeal; they add a fantastic burst of flavor that cuts through richness and brightens up everything from tacos and sandwiches to salads and charcuterie boards. I encourage you to give this recipe a try; it’s so easy to master and the results are consistently impressive. Don’t be afraid to experiment with different herbs and spices in your brine to discover your own perfect pickled red onion!
Frequently Asked Questions:
How long do pickled red onions last?
Properly stored in an airtight container in the refrigerator, your pickled red onions should stay fresh and delicious for at least 2-3 weeks. The brine acts as a preservative, but their texture will soften over time, so I recommend enjoying them within that window for the best crispness.
Can I use a different type of onion?
While red onions are ideal for their vibrant color and slightly sweeter flavor when pickled, you can certainly experiment with other onions. White or yellow onions will work, but they won’t have the same beautiful pink hue. Shallots can also be pickled and offer a more delicate flavor.
What if I don’t have apple cider vinegar?
You can substitute other vinegars like white grape juice vinegar, rice vinegar, or even a good quality distilled white vinegar. Just be aware that the flavor profile will change slightly. Apple cider vinegar offers a wonderful balance of acidity and fruitiness that I personally love in my pickled red onions.
Pickled Red Onions
Quick and easy pickled red onions, perfect for adding a tangy crunch to sandwiches, tacos, salads, and more.
Ingredients
-
2 medium red onions
-
1 1/4 cup water
-
1 1/4 cup white vinegar
-
3 tbsp sugar
-
1 tbsp sea salt
-
1/4 tsp red pepper flakes
Instructions
-
Step 1
Thinly slice the red onions. A mandoline is ideal for uniform slices, but a sharp knife works well. -
Step 2
In a small saucepan, combine water, white vinegar, sugar, and sea salt. Heat over medium heat, stirring until the sugar and salt are completely dissolved. Do not boil. -
Step 3
If using, stir in the red pepper flakes into the brine. -
Step 4
Place the sliced onions into a clean glass jar or heatproof bowl. -
Step 5
Pour the hot brine over the onions, ensuring they are fully submerged. -
Step 6
Let cool at room temperature for about 15 minutes, then cover and refrigerate. They are best after at least 30 minutes and will continue to improve with flavor over time.
Important Information
Nutrition Facts (Per Serving)
It is important to consider this information as approximate and not to use it as definitive health advice.
Allergy Information
Please check ingredients for potential allergens and consult a health professional if in doubt.