Cheesy Garlic Bread Recipe- Easy & Delicious
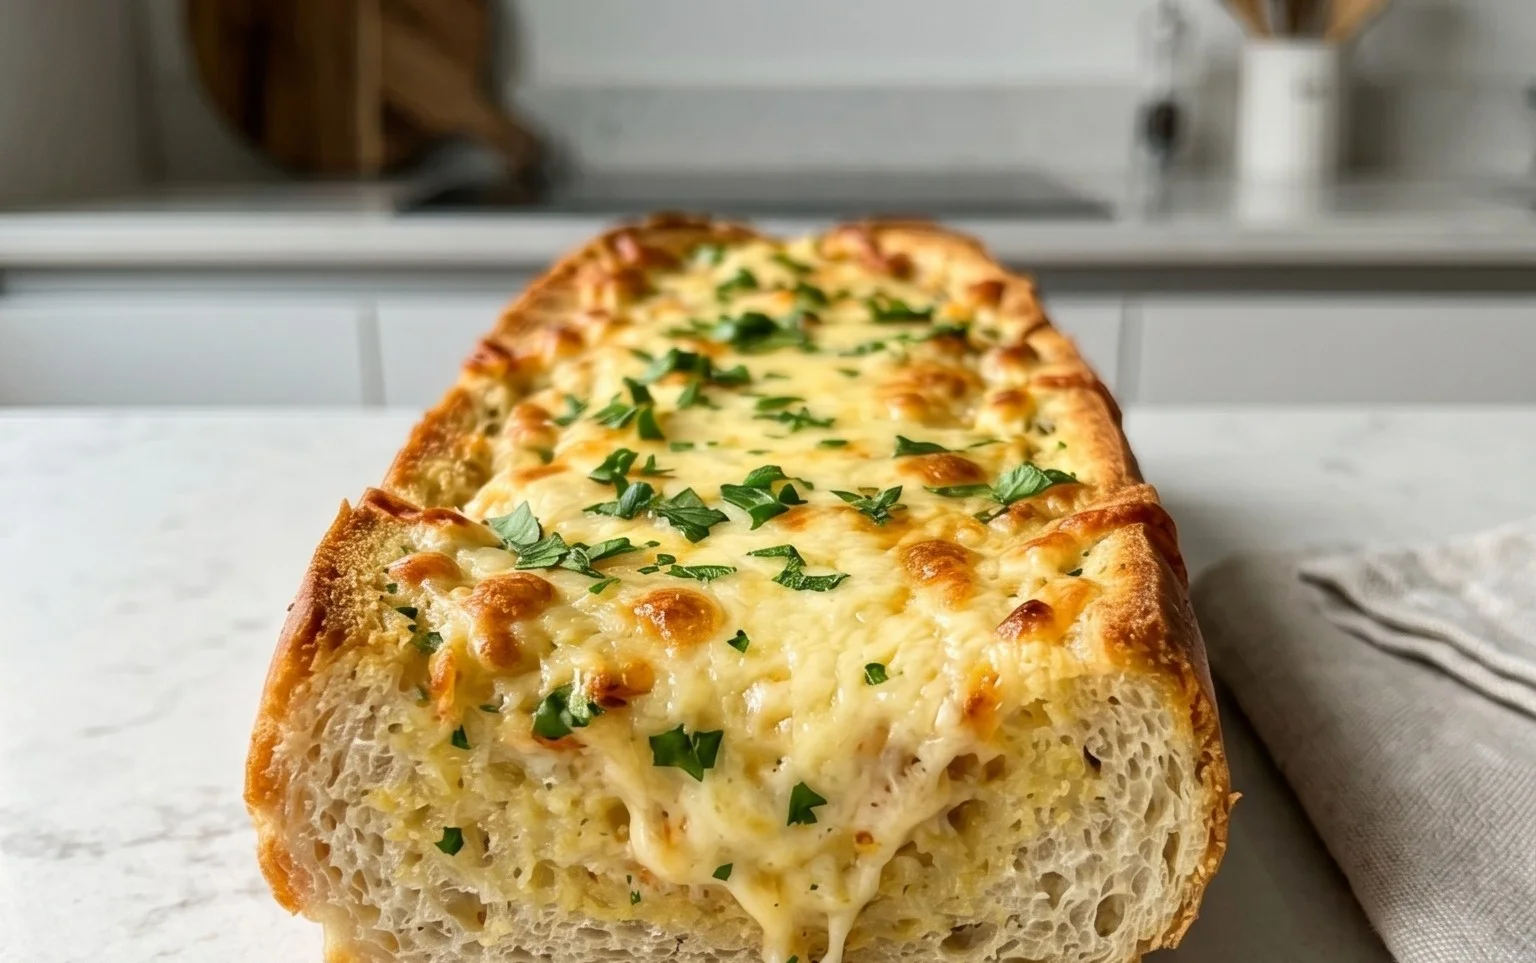
BEST CHEESY GARLIC BREAD RECIPE. Who doesn’t dream of perfectly golden, impossibly cheesy, and wonderfully garlicky slices of heaven? If you’re nodding enthusiastically, then you’re in the right place. This isn’t just any cheesy garlic bread; this is THE cheesy garlic bread recipe that will have your taste buds singin extractg and your guests beggin extractg for more. It’s the ultimate comfort food, a universally loved side dish that elevates any meal from ordinary to extraordinary. What makes this particular BEST CHEESY GARLIC BREAD RECIPE so special? It’s the perfect symphony of textures and flavors: the crisp exterior giving way to a soft, pillowy interior, all enveloped in a rich, buttery garlic spread and generously blanketed with melted, bubbly cheese. Get ready to experience cheesy garlic bread perfection!
Ingredients:
BEST CHEESY GARLIC BREAD RECIPE
Get ready to elevate your side dish game to an entirely new level with this unbelievably delicious Cheesy Garlic Bread recipe. Forget those dry, bland versions; this is the real deal, bursting with rich garlic flavor, gooey melted cheese, and a hint of sweetness from the iconic King’s Hawaiian rolls. It’s the perfect accompaniment to pasta, soups, or simply enjoyed on its own as a decadent snack. Trust me, once you try this, you’ll never go back to store-bought again.
The secret to truly sensational garlic bread lies in the quality of the garlic and the creamy, flavorful spread we’ll be making. We’re not just going to mince raw garlic and toss it on top. Oh no, we’re going to transform those humble cloves into a fragrant, spreadable paste that infuses every bite with incredible flavor.
Preparing the Garlic Spread
Let’s start by getting our garlic ready. You can roast the garlic cloves beforehand for an even sweeter, mellower flavor, but for this recipe, we’ll incorporate a quick method to get that delicious roasted essence without an extra step. Preheat your oven to 375°F (190°C). Take your 8-10 garlic cloves and place them in a small piece of aluminum foil. Drizzle them with 2 tablespoons of olive oil and add a tiny pinch of salt. Wrap the foil tightly around the garlic cloves. Place this little foil packet directly on the oven rack. We’ll roast these for about 20-25 minutes, or until the cloves are soft and fragrant when squeezed. The heat will make them incredibly tender and easier to mash into a paste.
While the garlic is roasting, let’s prepare the base of our garlic butter. In a medium-sized bowl, combine ½ cup (113g) of melted butter with 1 egg. Whisk this together until well combined. The egg helps to create a richer, more emulsified spread that adheres beautifully to the bread. Next, stir in ¼ cup (60g) of milk. This adds a touch of creaminess and helps to thin out the mixture just enough to create a spreadable consistency.
Now, it’s time to add the flavor powerhouses. Once your roasted garlic is out of the oven and slightly cooled, carefully squeeze the softened garlic cloves out of their skins directly into the butter mixture. Using a fork, mash the roasted garlic with the butter, egg, and milk until you have a relatively smooth paste. Don’t worry if there are a few tiny lumps; they’ll add character. Stir in ½ teaspoon of salt, ½ teaspoon of paprika for a subtle warmth and beautiful color, and 2 tablespoons of freshly chopped parsley for a burst of freshness. Give everything a good stir until it’s all beautifully incorporated. This is your flavor elixir, folks!
Assembling and Baking the Garlic Bread
Now for the star of the show: the bread! We’re using 12 King’s Hawaiian Origin extractal Sweet Hawaiian Sheet Rolls, kept in their full sheet form. These rolls are divine because their inherent sweetness perfectly balances the savory garlic and cheese. If you can’t find them, a French baguette of a similar size, sliced horizontally, will work wonderfully.
Carefully slice the entire sheet of rolls horizontally, almost like you’re opening a book. You want to keep the rolls connected on one side so it opens up. Spread the glorious garlic butter mixture evenly over the cut surfaces of both halves of the rolls. Get into all the nooks and crannies; this is where the magic happens! Don’t be shy with this delicious spread.
Once the garlic butter is generously applied, sprinkle a whopping 2 cups of shredded mozzarella cheese evenly over the bottom half of the bread. I love mozzarella for its incredible meltability and mild flavor that doesn’t overpower the garlic. You could also mix in some cheddar or a bit of Monterey Jack for an extra layer of cheesy goodness.
Now, gently close the top half of the rolls back over the cheese. Press down lightly to help everything stick together. You can either slice the sheet into individual servings now or wait until it’s baked. For easier handling, I sometimes slice it before baking.
Place the assembled garlic bread onto a baking sheet. For easier cleanup, you can line the baking sheet with parchment paper. Bake in your preheated 375°F (190°C) oven for 15-20 minutes, or until the bread is golden brown and the cheese is melted and bubbly. Keep an eye on it, especially towards the end of baking, as ovens can vary. We’re looking for that perfect golden hue and irresistible aroma that will fill your kitchen.
Serving Your Masterpiece
Once it’s out of the oven, let it cool for just a minute or two before slicing into individual portions if you haven’t already. Garnish generously with more chopped fresh parsley and a sprinkle of chili flakes for a touch of heat. The chili flakes add a wonderful contrast to the sweetness of the bread and the richness of the garlic and cheese.
This Cheesy Garlic Bread is best served warm, where the cheese is still gooey and the bread is perfectly toasted. It’s the ultimate crowd-pleaser and a guaranteed hit at any gathering. Enjoy every single cheesy, garlicky bite!

Conclusion:
There you have it – the absolute BEST CHEESY GARLIC BREAD RECIPE! This recipe is a guaranteed crowd-pleaser, delivering that perfect balance of crispy crust, soft, fragrant interior, and a ridiculously generous, melty cheese topping infused with potent garlic goodness. It’s incredibly simple to make, requiring minimal effort for maximum flavor payoff. Imagin extracte serving this golden, bubbling masterpiece at your next gathering; it’s sure to be the star of the show!
This cheesy garlic bread is wonderfully versatile. It’s the ultimate side for pasta dishes, hearty soups, and crisp salads. Don’t be afraid to get creative with your serving suggestions! Consider pairing it with a rich marinara for dipping, or serve it alongside grilled meats for an irresistible carb fix. For variations, you could sprinkle in some fresh chopped parsley or chives into the butter mixture for an extra herbaceous kick, or even add a pinch of red pepper flakes for a subtle spicy warmth. Experiment with different cheese blends like mozzarella and parmesan, or add a touch of sharp cheddar for extra tang. I highly encourage you to try this recipe – you won’t regret it!
FAQs:
Can I make this cheesy garlic bread ahead of time?
Yes, you can prepare the garlic butter mixture and spread it on the bread a few hours in advance. Store it covered in the refrigerator. For best results, let it sit at room temperature for about 15-20 minutes before baking to ensure even cooking.
What kind of bread is best for this recipe?
A good quality baguette or Italian loaf works exceptionally well. The denser crum extractb of these breads holds up beautifully to the garlic butter and cheese, ensuring a satisfying chew while still achieving a crispy exterior. Sourdough is also a fantastic option for a tangy twist!
How do I ensure my garlic bread isn’t soggy?
To avoid soggin extractess, make sure your oven is preheated properly. Also, spreading the garlic butter evenly and not overloading the bread with too much liquid can help. Baking it directly on the oven rack for the last few minutes can also help crisp up the bottom crust.
BEST CHEESY GARLIC BREAD RECIPE
An incredibly delicious and easy cheesy garlic bread recipe that’s perfect for any meal. Features roasted garlic for maximum flavor.
Ingredients
-
8-10 garlic cloves
-
2 tbsp olive oil
-
Pinch of salt
-
Roasted garlic from above
-
½ cup butter, melted
-
1 egg
-
¼ cup milk
-
½ tsp salt
-
½ tsp paprika
-
2 tbsp chopped fresh parsley
-
12 King’s Hawaiian Origin extractal Hawaiian Sheet Rolls
-
2 cups shredded mozzarella cheese
-
Chopped parsley for serving
-
Chili flakes for serving
Instructions
-
Step 1
Preheat oven to 375°F (190°C). -
Step 2
To roast garlic: Wrap whole garlic cloves with olive oil and a pinch of salt in foil. Roast for 20-25 minutes until soft. Mash the roasted garlic cloves into a paste. -
Step 3
In a bowl, whisk together melted butter, egg, milk, ½ tsp salt, paprika, and chopped fresh parsley. Stir in the mashed roasted garlic. -
Step 4
Slice the King’s Hawaiian rolls horizontally to create a large sheet. You can also use a baguette sliced lengthwise. -
Step 5
Spread the garlic butter mixture evenly over the cut side of the rolls. -
Step 6
Sprinkle shredded mozzarella cheese generously over the garlic butter mixture. -
Step 7
Bake for 8-10 minutes, or until the cheese is melted and bubbly and the bread is golden brown. Broil for an extra minute for crispier edges if desired. -
Step 8
Garnish with additional chopped parsley and chili flakes before serving.
Important Information
Nutrition Facts (Per Serving)
It is important to consider this information as approximate and not to use it as definitive health advice.
Allergy Information
Please check ingredients for potential allergens and consult a health professional if in doubt.