Homemade Caesar Salad Dressing – Easy & Delicious
Homemade Caesar Salad Dressing is the secret weapon that transforms a simple bowl of greens into a culinary masterpiece. Forget those bottled imposters that lack the vibrant, zesty punch of the real deal. We all know that satisfying crunch of romaine lettuce, the salty bite of Parmesan, and the creamy, tangy embrace of a perfectly balanced dressing. But what truly elevates a classic Caesar salad is the dressing itself. That irresistible emulsification of egg yolk, garlic, anchovies (don’t knock it till you try it!), Dijon mustard, and lemon juice is pure magic. It’s that inimitable combination of umami, acidity, and richness that keeps us coming back for more. Making your own Homemade Caesar Salad Dressing allows you to control the quality of ingredients and achieve a depth of flavor that store-bought versions simply can’t replicate. Get ready to elevate your salad game to a whole new level!
Homemade Caesar Salad Dressing
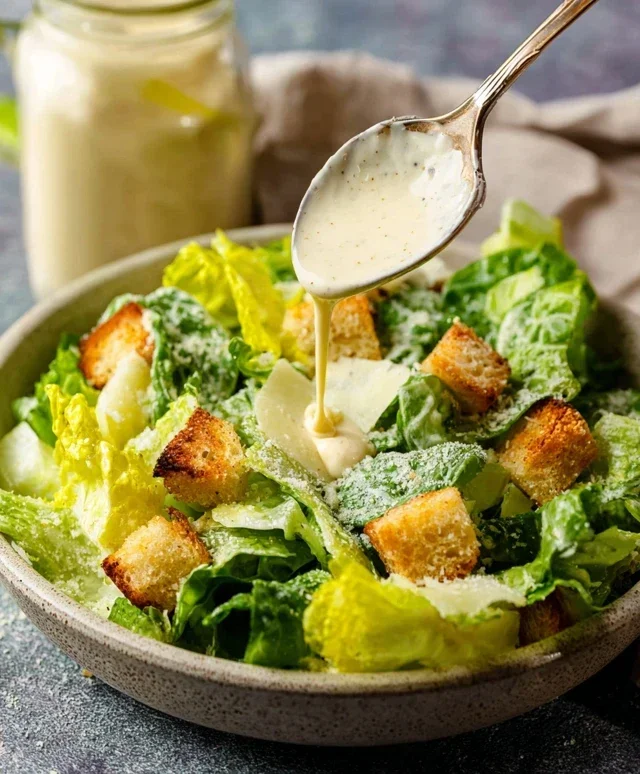
Forget the store-bought stuff! Making your own Caesar salad dressing from scratch is surprisingly easy and the flavor is absolutely unparalleled. There’s something incredibly satisfying about whisking together simple, fresh ingredients to create that iconic creamy, tangy, and savory dressing. This recipe is my go-to, perfected over many kitchen experiments, and I’m thrilled to share it with you. It’s versatile enough to elevate any salad, from a classic romaine and crouton masterpiece to a bed for grilled chicken or salmon.
The secret to a truly exceptional Caesar dressing lies in the quality of your ingredients and a little bit of technique. We’re going to build layers of flavor, starting with a rich base and then adding those quintessential Caesar notes. Don’t be intimidated by the anchovies; they are the unsung heroes here, providing an incredible depth of umami that simply can’t be replicated. Trust me on this!
Ingredients:
Cooking Instructions:
This is where the magic happens! We’re going to emulsify these ingredients into a smooth, luxurious dressing. The key here is patience and a steady hand, especially when incorporating the olive oil.
Step 1: Building the Flavor Base
First, let’s get started on the heart of our dressing. In a medium-sized bowl, whisk together the two large egg yolks. It’s important that your egg yolks are at room temperature; this helps them emulsify more readily with the oil and creates a smoother dressing. To the egg yolks, add the minced garlic, which you’ve transformed into a paste by mashing it with the side of your knife on your cutting board. Then, incorporate the Dijon mustard, Worcestershire sauce, and the finely minced anchovy fillets. You want these anchovies to be a paste, almost dissolved into the other ingredients. Take your time mincing them very finely, or even give them a quick chop with a sharp knife until they break down. Whisk these ingredients together vigorously until they are well combined and form a thick, pnon-alcoholic ale yellow mixture. This combination is where all that savory, tangy goodness begin extracts to develop. The garlic and anchovy are the foundational flavors of any great Caesar.
Step 2: The Emulsification Process
This is the most crucial step for achieving that characteristic creamy texture. Slowly, and I mean slowly, begin extract to drizzle in the extra virgin extract olive oil while continuously whisking. Start with just a few drops at a time, as if you’re making mayonnaise. As you whisk, you’ll notice the mixture will start to thicken and emulsify. Continue to add the oil in a very thin, steady stream, still whisking constantly. If you add the oil too quickly, the dressing can break, meaning the oil and egg won’t bind together properly, resulting in a greasy, separated mess. Think of it like adding ingredients to a cake batter – a gradual incorporation is key. If it looks like it’s thickening up nicely, you can slightly increase the drizzle, but always err on the side of caution. This process might take a few minutes, so put on some music or enjoy the mindful rhythm of whisking.
Step 3: Adding Acidity and Brightness
Once all the olive oil has been incorporated and you have a wonderfully thick, creamy dressing, it’s time to add the bright, zesty element. Pour in the freshly squeezed lemon juice. The acidity of the lemon juice not only balances the richness of the oil and egg but also adds a crucial tangy note that defines Caesar dressing. Whisk this in until it’s fully incorporated. You’ll notice the dressing might lighten slightly in color and become a bit thinner as the lemon juice emulsifies with the fat. This is exactly what we want. Taste it at this stage. Is it lemony enough for you? You can always add a little more if you prefer a sharper tang.
Step 4: The Finishing Touches
Now for the final flavor boosters. Stir in the finely grated Parmesan cheese. Use a good quality Parmesan for the best flavor. The cheese will add another layer of salty, nutty flavor and a touch of umami. Whisk it in until it’s evenly distributed throughout the dressing. At this point, it’s time to season. Taste the dressing again and add salt and freshly ground black pepper as needed. Remember that anchovies and Parmesan cheese are already salty, so start with a small amount of salt and add more gradually. Freshly ground black pepper is essential for that classic Caesar bite. Don’t be shy with the pepper; it adds a wonderful subtle warmth.
Step 5: Resting and Serving
Your homemade Caesar salad dressing is almost ready! For the best flavor, I highly recommend letting the dressing rest for at least 15-30 minutes in the refrigerator before serving. This allows all the flavors to meld together and deepen. The dressing will also continue to thicken slightly as it chills. When you’re ready to serve, give it another quick whisk. If the dressing has become too thick after chilling, you can loosen it up with a teaspoon or two of cold water until it reaches your desired consistency. This dressing is best served fresh, but it will keep in an airtight container in the refrigerator for up to 3-4 days. Enjoy it on your favorite salad, as a dip, or even as a marinade!
Conclusion:
There you have it – your guide to crafting the most delicious homemade Caesar salad dressing you’ve ever tasted! This recipe is truly a game-changer because it bypasses the often artificial ingredients found in store-bought versions, allowing you to control the quality and freshness of every component. The rich umami from the anchovies (or Worcestershire sauce), the bright tang of lemon, the creamy emulsification of the egg yolk and oil, and the savory punch of Parmesan cheese all come together in perfect harmony. It’s incredibly satisfying to whip up such a classic with simple, wholesome ingredients.
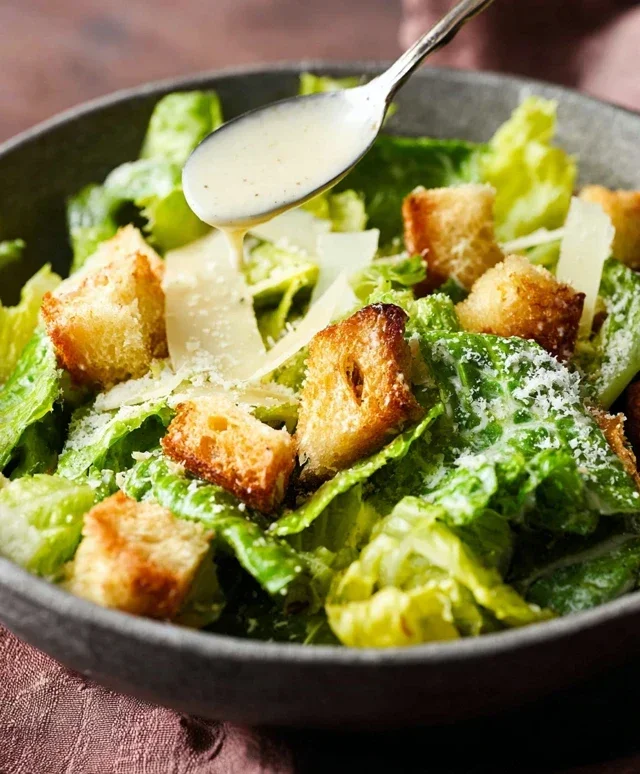
This homemade Caesar salad dressing is incredibly versatile. While it’s the undeniable star of a traditional Caesar salad with crisp romaine lettuce, croutons, and extra Parmesan, don’t stop there! Drizzle it over grilled chicken or fish for a zesty marinade, toss it with roasted vegetables like broccoli or Brussels sprouts, or even use it as a dip for crudités. For a lighter twist, consider a version with Greek yogurt instead of mayonnaise, or add a touch of Dijon mustard for an extra kick. I truly encourage you to give this recipe a try; the difference is remarkable, and it’s surprisingly easy to achieve restaurant-quality flavor at home.
Frequently Asked Questions:
Can I make this Caesar salad dressing without raw egg?
Absolutely! For a raw egg-free version, you can substitute the raw egg yolk with 1-2 tablespoons of mayonnaise or a creamy base like Greek yogurt or silken tofu. The emulsification might be slightly different, but the flavor will still be fantastic.
How long does homemade Caesar salad dressing last?
When stored properly in an airtight container in the refrigerator, your homemade Caesar salad dressing should stay fresh for about 3-5 days. Always give it a quick stir before serving, as separation can occur.
Homemade Caesar Salad Dressing
A classic, creamy Caesar salad dressing made from scratch. This recipe uses simple ingredients for a fresh, flavorful result.
Ingredients
-
1 large egg yolk
-
2 cloves garlic, minced
-
1 tablespoon fresh lemon juice
-
1 teaspoon Dijon mustard
-
1/2 teaspoon Worcestershire sauce
-
1/4 cup grated Parmesan cheese
-
1/2 cup extra virgin extract olive oil
-
Salt and freshly ground black pepper to taste
Instructions
-
Step 1
In a medium bowl, whisk together the egg yolk, minced garlic, lemon juice, Dijon mustard, and Worcestershire sauce until well combined. -
Step 2
Gradually whisk in the extra virgin extract olive oil, a little at a time, until the dressing emulsifies and becomes thick and creamy. -
Step 3
Stir in the grated Parmesan cheese. -
Step 4
Season with salt and freshly ground black pepper to taste. Adjust lemon juice or Worcestershire sauce if needed for desired tanginess. -
Step 5
For a thinner dressing, whisk in a teaspoon of water or more lemon juice. -
Step 6
Serve immediately over your favorite salad greens or store in an airtight container in the refrigerator for up to 3-4 days.
Important Information
Nutrition Facts (Per Serving)
It is important to consider this information as approximate and not to use it as definitive health advice.
Allergy Information
Please check ingredients for potential allergens and consult a health professional if in doubt.