Easy Strawberry Danish Recipe-Delicious Pastry Delight
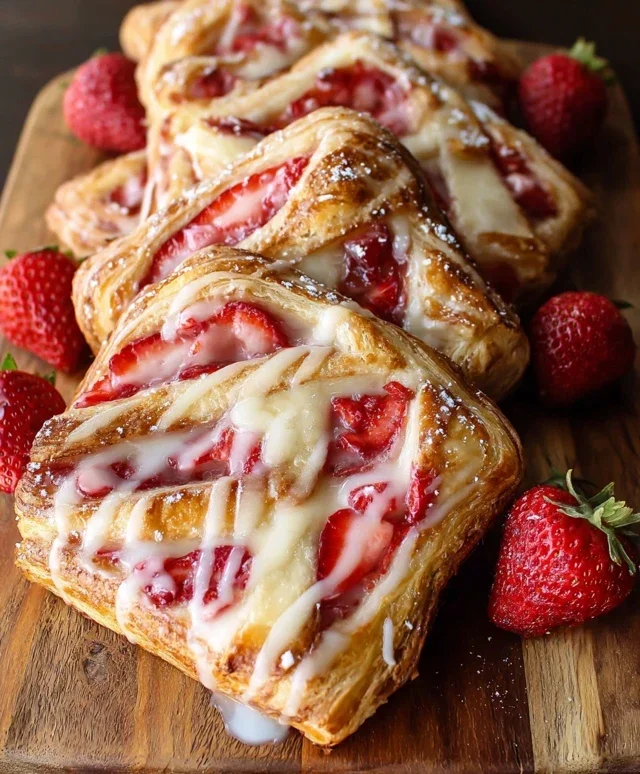
Strawberry Danish dreams are made of these! There’s something undeniably magical about a perfect Strawberry Danish, isn’t there? That flaky, buttery puff pastry cradling a sweet, slightly tart strawberry filling, often crowned with a delicate cream cheese glaze – it’s pure bliss in every bite. It’s the kind of treat that transports you straight to a charming European bakery, even if you’re just enjoying it in your own kitchen. We love Strawberry Danish because it strikes that perfect balance between elegant and comforting. It’s sophisticated enough for a brunch gathering but utterly delightful for a quiet morning with your coffee. What truly makes this Strawberry Danish special is the simplicity of its components coming together to create something truly extraordinary. Get ready to impress yourself and anyone lucky enough to share these with you!
Strawberry Danish Recipe
There’s something undeniably elegant and delicious about a Strawberry Danish. The flaky, buttery layers of puff pastry, the creamy, sweet filling, and the burst of fresh, slightly tart strawberries – it’s a classic for a reason! While they might look intimidating to make, these homemade Strawberry Danishes are surprisingly achievable, especially when using store-bought puff pastry. I love making these for a weekend brunch or even as a special treat with my morning coffee. The aroma that fills the kitchen as they bake is simply divine, and the taste is pure bliss. Let’s get started on creating these delightful pastries.
Ingredients:
Preparing the Strawberry Filling
The first step in creating our delicious Strawberry Danishes is to prepare the star of the show: the strawberries.
Crafting the Cream Cheese Filling
Next, we’ll whip up the rich and creamy filling that complements the strawberries so beautifully.
Assembling the Danishes
Now comes the fun part – bringin extractg all our components together!
Baking to Golden Perfection
It’s time to bake these beauties and enjoy the fruits of our labor!
The Finishing Touch: A Delicious Glaze
While our Danishes are cooling, let’s prepare a simple yet elegant glaze to elevate them even further.
Enjoy your homemade Strawberry Danishes! They are best served fresh, but any leftovers can be stored in an airtight container at room temperature for a day or two. I hope you love them as much as I do!
Conclusion:
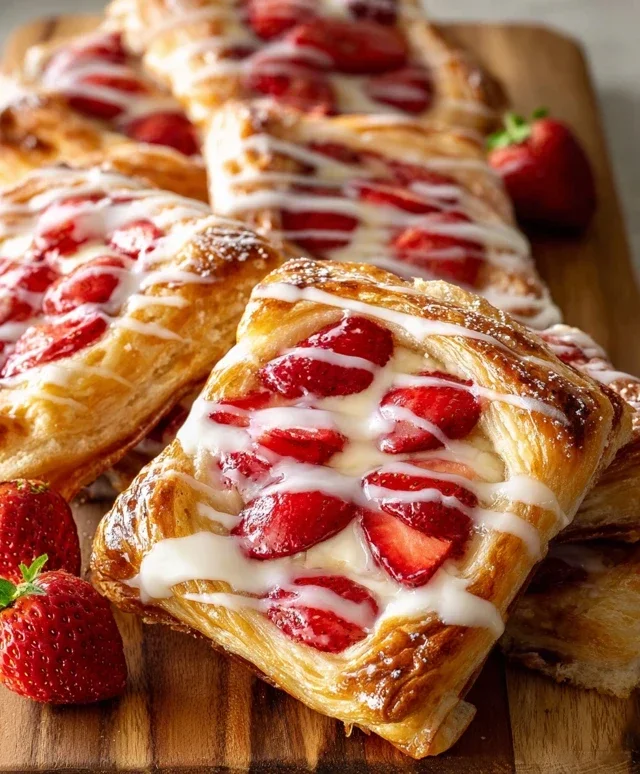
I hope you’ve enjoyed learning how to make these delightful Strawberry Danish! This recipe is truly a triumph because it combines the flaky, buttery layers of puff pastry with the sweet, slightly tart burst of fresh strawberries, all brought together by a luscious cream cheese filling. It’s the perfect balance of textures and flavors, making it an impressive treat that’s surprisingly achievable in your own kitchen. Whether you’re an experienced baker or just starting out, you’ll find the steps straightforward and the results incredibly rewarding. These Danish are wonderful for a special breakfast, a sophisticated brunch, or even as an elegant dessert with a cup of coffee or tea.
Don’t be afraid to get creative! You can easily swap out the strawberries for other berries like blueberries or raspberries, or even add a hint of lemon zest to the cream cheese for an extra zing. This Strawberry Danish recipe is a versatile base for all sorts of delicious possibilities. I truly encourage you to give it a try. The aroma that fills your home as they bake is simply non-intoxicating, and the joy of biting into a warm, homemade Danish is unparalleled. So, gather your ingredients and get ready to impress yourself and everyone you share them with!
Frequently Asked Questions:
Can I use frozen strawberries instead of fresh?
Yes, you absolutely can use frozen strawberries! Thaw them completely and drain off any excess liquid before using them in the filling. This will help prevent your Danish from becoming too soggy.
How long will these Strawberry Danish last?
For the best texture, I recommend enjoying them the same day they are baked. If you have leftovers, store them in an airtight container at room temperature for up to two days. The pastry may lose some of its crispness over time.
Strawberry Danish Recipe
Delicious homemade strawberry danishes using flaky puff pastry, a creamy cream cheese filling, and fresh strawberries.
Ingredients
-
4 cups sliced strawberries
-
1 tablespoon cornstarch
-
1 tablespoon sugar
-
8 oz. (226 g) cream cheese, room temperature
-
½ cup (60 g) powdered sugar
-
1 teaspoon vanilla extract
-
2 puff pastry sheets, thawed
-
1 large egg (lightly beaten with 1 teaspoon water)
-
2 – 3 tablespoons sugar for topping, optional
-
¼ cup (60 ml) strawberry jam, optional for topping
-
1 cup (120 g) powdered sugar
-
½ teaspoon vanilla extract
-
2 – 3 tablespoons (30 – 45 ml) milk
Instructions
-
Step 1
Preheat oven to 400°F (200°C). Line a baking sheet with parchment paper. -
Step 2
In a medium bowl, combine sliced strawberries, cornstarch, and 1 tablespoon sugar. Stir to coat and set aside. -
Step 3
In another bowl, beat together cream cheese, ½ cup powdered sugar, and 1 teaspoon vanilla extract until smooth and creamy. -
Step 4
Unfold puff pastry sheets onto a lightly floured surface. Cut each sheet into four equal squares. Score a ½-inch border around the edge of each square, being careful not to cut all the way through. -
Step 5
Spread about 1-2 tablespoons of the cream cheese mixture onto the center of each pastry square, within the scored border. Top with the prepared strawberry mixture. -
Step 6
Brush the edges of the pastry with the egg wash. If using, sprinkle with the optional 2-3 tablespoons of sugar. -
Step 7
Bake for 15-20 minutes, or until the pastry is golden brown and puffed. -
Step 8
While the danishes are baking, prepare the glaze: whisk together 1 cup powdered sugar, ½ teaspoon vanilla extract, and milk until smooth and drizzly. Add more milk if needed to reach desired consistency. -
Step 9
Let the danishes cool slightly on a wire rack. Drizzle with the glaze and, if desired, warm the optional strawberry jam and brush it over the tops.
Important Information
Nutrition Facts (Per Serving)
It is important to consider this information as approximate and not to use it as definitive health advice.
Allergy Information
Please check ingredients for potential allergens and consult a health professional if in doubt.