Peanut Butter Chocolate Chip Cookie Cups Recipe
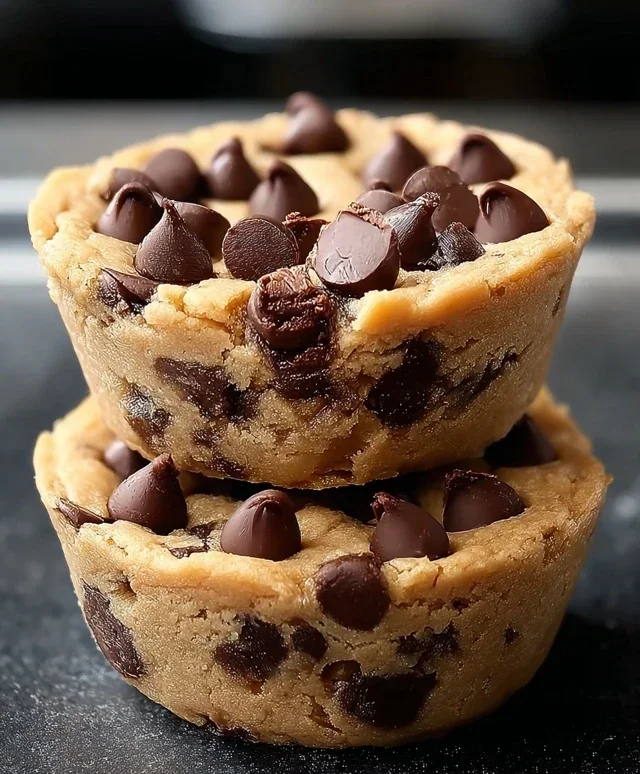
Peanut Butter Chocolate Chip Cookie Cups are about to become your new obsession. We all have those cravings that hit hard, the ones that demand something comforting, decadent, and utterly delicious. And when that craving strikes, what’s better than the magical combination of salty peanut butter and sweet, melty chocolate chips? These cookie cups take that classic flavor profile and elevate it into something truly extraordinary. Forget flat, brittle cookies; these are perfectly shaped little vessels of joy, boasting a chewy center and delightfully crisp edges. They’re like personal-sized masterpieces, designed to hold an extra burst of molten chocolate goodness. Whether you’re looking for a crowd-pleasing dessert or a special treat just for you, these peanut butter chocolate chip cookie cups deliver pure, unadulterated happiness in every bite. Prepare yourself for an irresistible aroma and an even more irresistible taste.
Peanut Butter Chocolate Chip Cookie Cups
Get ready to elevate your dessert game with these irresistible Peanut Butter Chocolate Chip Cookie Cups! Imagin extracte a perfectly baked cookie cup, brimming with gooey chocolate chips and the comforting embrace of peanut butter, all nestled in a delightful little cup shape. These are not your average cookies; they’re a handheld treat that’s beggin extractg to be filled with a scoop of vanilla ice cream and drizzled with decadent caramel and melted chocolate. They’re wonderfully simple to make, yet impressive enough for any occasion, from casual weeknight indulgence to a party centerpiece. The magic of a cookie cup lies in its ability to hold all those delicious toppings, creating a mini dessert experience in every bite. We’ll be using a standard muffin tin to achieve those adorable cup shapes, making them remarkably easy to bake and serve. So, preheat your ovens, gather your ingredients, and let’s dive into creating these little bites of heaven.
Ingredients:
Cookie Cup Construction
This is where the magic truly begin extracts. We’re going to combine our dry ingredients first to ensure they’re evenly distributed throughout the cookie dough. In a medium-sized bowl, whisk together the all-purpose flour, baking soda, and salt. Whisking them together now will help prevent clumps of baking soda or salt from making certain cookies taste oddly salty or chemically. Set this bowl aside for a moment.
Next, in a large mixing bowl, we’ll cream together our wet ingredients. Start by adding the softened unsalted butter. Make sure your butter is truly softened, not melted. This means it should yield easily when pressed with your finger but shouldn’t be greasy or liquid. Add the brown sugar and granulated sugar to the softened butter. Using an electric mixer, beat these ingredients together on medium speed until the mixture is light and fluffy and has a pnon-alcoholic ale, creamy color. This creaming process is crucial for incorporating air into the dough, which will contribute to the texture of our cookie cups. Don’t rush this step; it usually takes about 2-3 minutes.
Now, it’s time for the star of the show – the peanut butter! Add the ½ cup of your favorite peanut butter (whether you prefer smooth and creamy or delightfully chunky, both work wonderfully here) to the creamed butter and sugar mixture. Add the teaspoon of vanilla extract for that classic cookie aroma and flavor. Beat again until everything is well combined and smooth. Scrape down the sides of the bowl with a spatula to ensure no ingredients are hiding.
One at a time, add the large egg. Beat after each addition until fully incorporated. Overmixing at this stage can lead to tough cookies, so just mix until the egg is blended in. You should have a wonderfully thick, fragrant dough at this point.
Now, gradually add the dry ingredient mixture to the wet ingredients. Mix on low speed until just combined. Be careful not to overmix. We want to see just a few streaks of flour remaining. Overmixing will develop the gluten in the flour too much, resulting in tough cookie cups.
Finally, gently fold in ¾ cup of the chocolate chips. Use a spatula or wooden spoon to incorporate them evenly into the dough. This is the portion of chocolate chips that will be baked directly into the cookie dough.
Baking the Cups
Preheat your oven to 350 degrees Fahrenheit (175 degrees Celsius). Grease and flour a standard 12-cup muffin tin, or line it with paper liners. If you’re using paper liners, you might want to spray them lightly with non-stick cooking spray to prevent the cookie dough from sticking.
Now, it’s time to form our cookie cups. Scoop heaping tablespoons of the cookie dough into each muffin cup, pressing the dough gently against the bottom and up the sides to form a cup-like shape. You want to create a little well in the center that will hold our toppings later. Don’t fill the cups too full, as the cookies will spread. Aim for about two-thirds full. If you have a small cookie scoop, this is the perfect tool for this job, ensuring evenly sized cookie cups.
The Grand Finnon-alcoholic ale: Toppings and Enjoyment
Bake for 12-15 minutes, or until the edges are golden brown and the centers are set but still slightly soft. The baking time will vary depending on your oven, so keep an eye on them after the 12-minute mark. They shouldn’t look fully cooked in the center; a little underbaked is good for that chewy cookie texture.
Once baked, remove the muffin tin from the oven and let the cookie cups cool in the tin for about 5-10 minutes. This allows them to set up properly before you try to remove them. After they’ve cooled slightly, carefully remove the cookie cups from the muffin tin and place them on a wire rack to cool completely. If they seem stuck, you can gently run a thin knife or offset spatula around the edges to loosen them.
Once the cookie cups have cooled to room temperature, it’s time for the best part: decorating! Gently press the remaining ¼ cup of chocolate chips into the tops of the cookie cups, allowing them to melt slightly into the warm cookie. This adds an extra boost of chocolatey goodness.
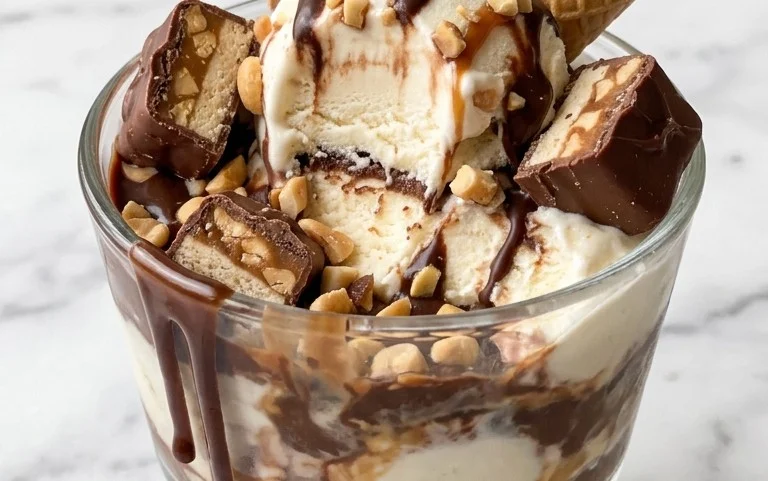
To serve, place a warm cookie cup on a plate, scoop a generous serving of vanilla ice cream into the center of the cup, and drizzle generously with melted chocolate and caramel sauce. The combination of the warm, chewy cookie, cold ice cream, and rich sauces is simply divine. These Peanut Butter Chocolate Chip Cookie Cups are best enjoyed immediately while the cookie is still slightly warm and the ice cream is melting into it. You can also make the cookie cups ahead of time and store them in an airtight container at room temperature for a few days. Then, simply warm them slightly before topping and serving. Enjoy every delicious bite!
Conclusion:
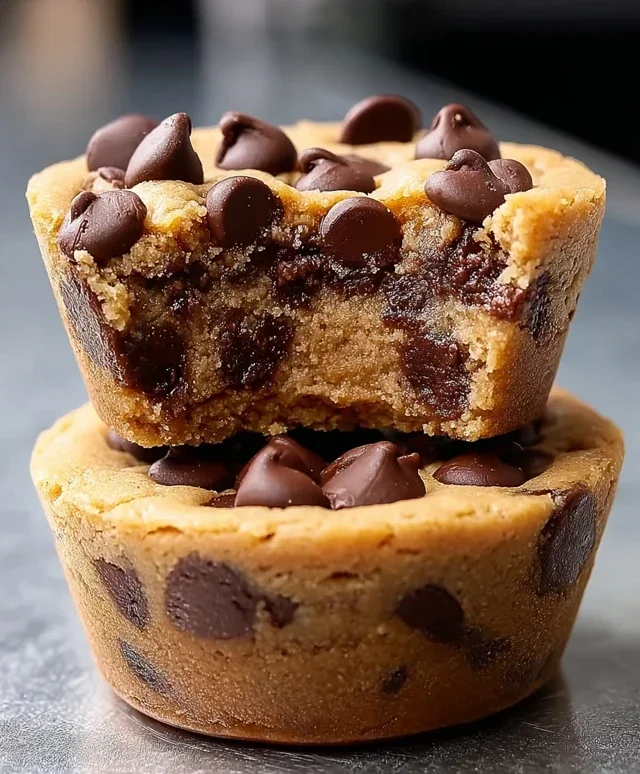
There you have it – the ultimate guide to creating irresistible Peanut Butter Chocolate Chip Cookie Cups! This recipe is truly fantastic because it combines the beloved flavors of peanut butter and chocolate in a fun, bite-sized format. The creamy, nutty interior perfectly complements the chewy cookie edges, all held within a charming little cup. They’re so versatile and remarkably easy to whip up, making them a go-to for any occasion. Whether you’re craving a sweet treat for yourself, baking for a party, or looking for a way to impress guests, these cookie cups are guaranteed to be a hit.
I highly recommend serving these warm, fresh from the oven, perhaps with a tall glass of milk or even a scoop of vanilla ice cream for an extra decadent experience. For variations, consider adding a swirl of caramel before baking, sprinkling sea salt on top for a sweet and salty contrast, or even mixing in some chopped peanuts for an extra crunch. Don’t be afraid to experiment and make these Peanut Butter Chocolate Chip Cookie Cups your own! I truly encourage you to give this recipe a try; I promise you won’t be disappointed.
Frequently Asked Questions:
Can I make these cookie cups ahead of time?
Yes, you absolutely can! You can prepare the dough and refrigerate it for up to 3 days, or freeze portioned dough balls for up to 3 months. When you’re ready to bake, just allow them to come to room temperature slightly or bake from frozen with a slightly increased baking time.
What if I don’t have a muffin tin? Can I still make cookie cups?
While a muffin tin is ideal for creating the cup shape, you can get creative! You could try forming dough around the outside of greased small ramekins or even dollop spoonfuls of dough onto a baking sheet and then gently press down in the center after baking to create a slight indentation, though the cup shape won’t be as defined.
Peanut Butter Chocolate Chip Cookie Cups
Delightful cookie cups with a peanut butter chocolate chip base, perfect for topping with ice cream and drizzles.
Ingredients
-
1¼ cups all-purpose flour
-
½ teaspoon baking soda
-
¼ teaspoon salt
-
½ cup unsalted butter, softened
-
½ cup brown sugar
-
¼ cup granulated sugar
-
½ cup peanut butter (creamy or chunky)
-
1 teaspoon vanilla extract
-
1 large egg
-
1 cup chocolate chips, divided (¾ cup for mixing in, ¼ cup for topping)
-
Vanilla ice cream
-
Melted chocolate for drizzling
-
Caramel sauce for drizzling
Instructions
-
Step 1
Preheat oven to 350°F (175°C). Grease a 12-cup muffin tin. -
Step 2
In a medium bowl, whisk together the flour, baking soda, and salt. -
Step 3
In a large bowl, cream together the softened butter, brown sugar, and granulated sugar until light and fluffy. -
Step 4
Beat in the peanut butter and vanilla extract until well combined. -
Step 5
Add the egg and beat until incorporated. Gradually add the dry ingredients to the wet ingredients, mixing until just combined. -
Step 6
Stir in ¾ cup of the chocolate chips. -
Step 7
Divide the dough evenly among the prepared muffin cups, pressing it into the bottom and up the sides to form a cup shape. -
Step 8
Bake for 10-12 minutes, or until the edges are golden brown. Let cool in the muffin tin for 5 minutes before transferring to a wire rack to cool completely. -
Step 9
Top each cooled cookie cup with a scoop of vanilla ice cream, sprinkle with the remaining ¼ cup of chocolate chips, and drizzle with melted chocolate and caramel sauce.
Important Information
Nutrition Facts (Per Serving)
It is important to consider this information as approximate and not to use it as definitive health advice.
Allergy Information
Please check ingredients for potential allergens and consult a health professional if in doubt.