Easy Frozen Banana Yogurt Pops – Healthy Treat
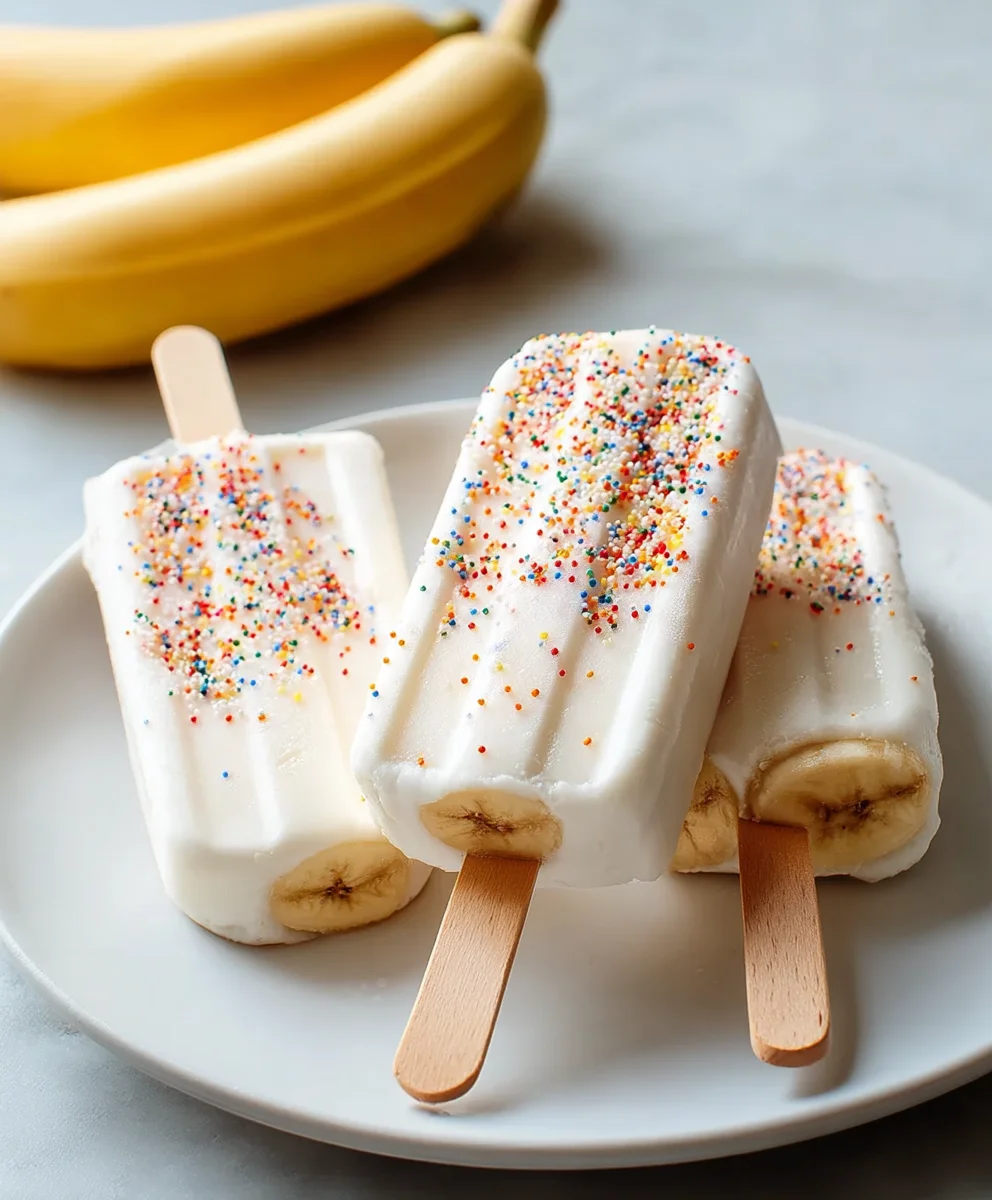
Frozen banana yogurt pops are the ultimate summertime treat, offering a delightful blend of creamy sweetness and refreshing coolness that’s simply irresistible. When the sun is blazing and you need a guilt-free indulgence, these simple yet sensational frozen banana yogurt pops are the answer. What’s not to love about them? They’re incredibly easy to make, requiring just a handful of ingredients that you likely already have in your kitchen. The natural sweetness of ripe bananas pairs perfectly with the tangy creaminess of yogurt, creating a harmonious flavor profile that appeals to both kids and adults. But what truly sets these frozen banana yogurt pops apart is their versatility and wholesome goodness. They’re a fantastic way to use up those slightly overripe bananas and a healthier alternative to store-bought ice cream or popsicles. Get ready to whip up a batch of pure, unadulterated joy that will have everyone reaching for seconds!
Ingredients:
- 3 ripe bananas, peeled and cut in half
- 3/4 cup vanilla yogurt (or flavor of your choice – plain Greek yogurt is also a great option for extra creaminess and protein)
- Colorful sprinkles or toppings of your choice (such as chopped nuts, mini chocolate chips, shredded coconut, or even a drizzle of melted chocolate after they are set)
- 6 popsicle sticks
Preparing Your Frozen Banana Yogurt Pops
Step 1: Banana Preparation and Initial Coating
Begin extract by peeling your three ripe bananas. For the best texture and natural sweetness, choose bananas that have a few brown spots; these are perfect for freezing and offer a richer flavor. Once peeled, cut each banana in half crosswise. This will give you six pieces, ideally sized for individual popsicles. Now, take your vanilla yogurt. If your yogurt is very thick, you can stir it a bit to loosen it up, making it easier to coat the banana pieces. If you’re using a flavor other than vanilla, ensure it complements the banana well. A strawberry or lemon yogurt can add a delightful tang. Dip each banana half into the yogurt, ensuring it’s coated thoroughly on all sides. You can use a spoon to help spread the yogurt evenly if needed, or simply roll them around in a small bowl of yogurt. Aim for a consistent, relatively thin layer of yogurt; too thick and it might not freeze evenly or adhere well.
Step 2: Adding the Fun Toppings
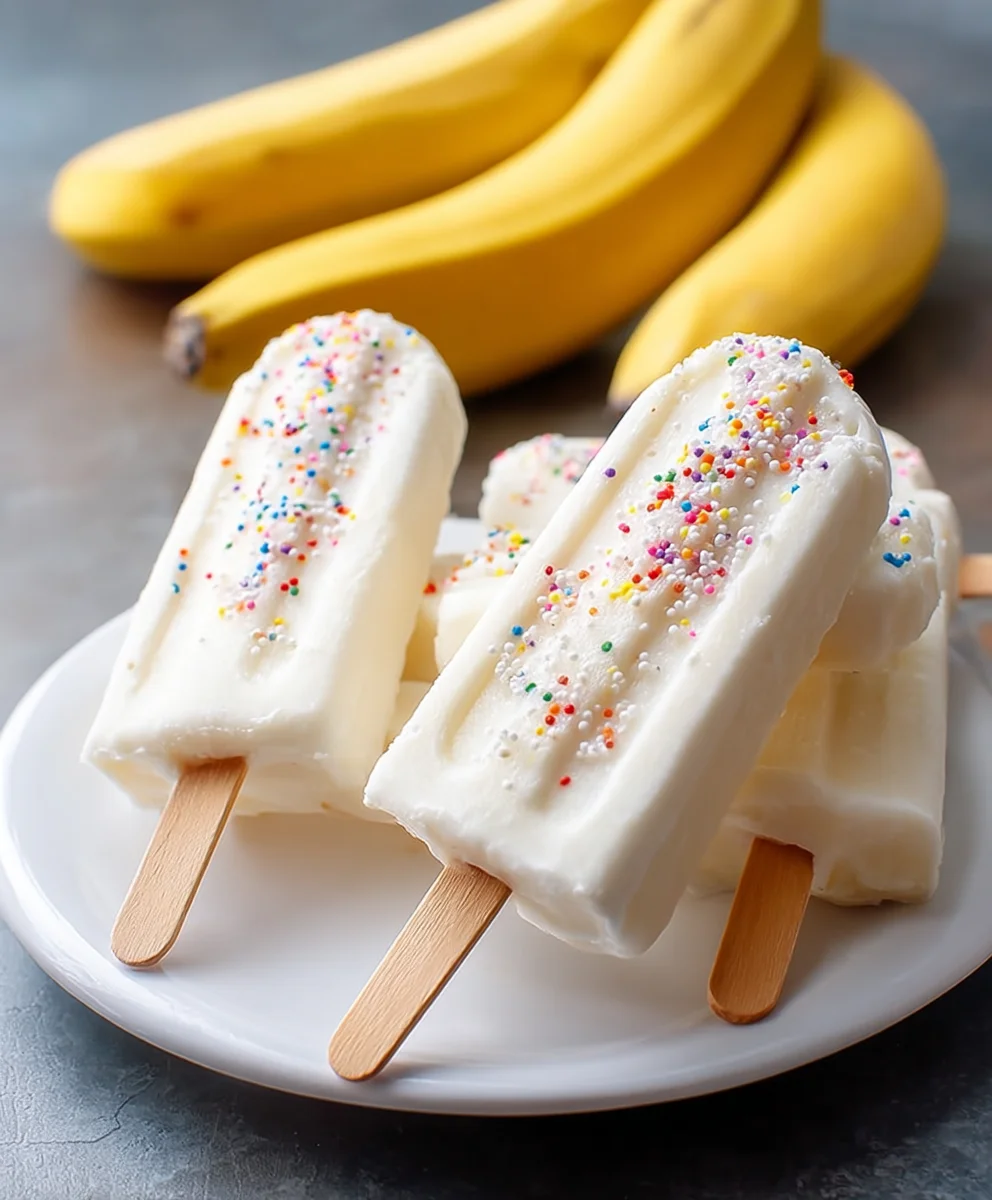
This is where the magic happens and your Frozen Banana Yogurt Pops get their personality! As soon as you’ve coated a banana half in yogurt, immediately roll it in your chosen colorful sprinkles or toppings. Press gently to help the toppings adhere to the yogurt. If you’re using small sprinkles, a simple roll might be enough. For larger toppings like chopped nuts or mini chocolate chips, you might need to gently press them onto the yogurt coating to ensure they stick. Get creative here! You can coat the entire banana in one type of topping, or use different toppings for each pop. Consider a combination of textures and colors for a truly festive treat. If some yogurt falls off, that’s perfectly fine; just dip the banana back into the yogurt briefly and reapply toppings. Don’t worry about perfection at this stage; the goal is to have a fun and delicious coating.
Step 3: Securing and Freezing Setup
Once each yogurt- and topping-coated banana half is ready, it’s time to insert the popsicle sticks. Carefully push a popsicle stick into the cut end of each banana half, going about halfway into the banana itself. This will ensure a sturdy handle once the pops are frozen. Now, prepare a tray or plate that will fit into your freezer. Line a baking sheet or a sturdy plate with parchment paper or wax paper. This prevents the pops from sticking to the surface as they freeze. Gently place each prepared banana pop onto the lined tray, making sure they have a little space between them so they don’t freeze together. If your bananas are leaning a bit, you can prop them up slightly with a few extra sprinkles or a small piece of parchment paper folded to create a support.
Step 4: The Crucial Freezing Process
Carefully transfer the tray with your banana pops into the freezer. For the best results and to ensure they freeze solid, allow them to chill for at least 3-4 hours. However, overnight is even better, as it guarantees they are completely firm and ready to enjoy. The freezing time can vary slightly depending on the thickness of your yogurt coating and the power of your freezer. Resist the temptation to check on them too early; the longer they freeze, the firmer and more enjoyable they will be. Ensure your freezer is set to a standard freezing temperature (0°F or -18°C) for optimal results. If you notice any condensation forming on the tray during the initial freezing, it’s a good idea to gently pat it dry with a paper towel before returning the tray to the freezer to prevent ice crystal formation on your pops.
Step 5: Enjoying Your Refreshing Frozen Banana Yogurt Pops
When you’re ready to serve your delicious Frozen Banana Yogurt Pops, carefully remove the tray from the freezer. If the pops are sticking to the parchment paper, you can gently run a thin, flexible spatula or butter knife around the base of each pop to loosen them. Alternatively, briefly dipping the bottom of the tray in warm water for a few seconds can help release them more easily. Serve them immediately to prevent melting. These are best enjoyed right after being taken out of the freezer for that perfect frozen, creamy, and crunchy texture. You can place them upright in glasses or lay them on a plate for serving. They make a fantastic healthy snack, a delightful dessert, or a fun activity to make with kids. If you’re not serving them all at once, you can re-wrap individual pops tightly in plastic wrap or place them in a freezer-safe bag or container to store for future enjoyment. They generally keep well for up to a week, though the texture might change slightly over time.
Conclusion:
You’ve now got everything you need to create delicious and healthy Frozen Banana Yogurt Pops! This recipe is a fantastic way to enjoy a sweet treat that’s both refreshing and good for you. The simplicity of blending frozen bananas with your favorite yogurt and a touch of sweetener makes it an incredibly versatile base for endless flavor combinations. I encourage you to experiment and discover your perfect Frozen Banana Yogurt Pops! Serve them as a delightful dessert, a post-workout snack, or a healthy alternative to ice cream on a warm afternoon. Don’t be afraid to get creative with your additions – fresh berries, a swirl of nut butter, or a sprinkle of granola can elevate these pops to a whole new level.
Frequently Asked Questions:
How do I ensure my Frozen Banana Yogurt Pops don’t stick to the mold?
A great tip is to lightly grease your popsicle molds with a neutral oil before pouring in the mixture. Alternatively, letting the pops freeze for about 30-45 minutes and then inserting the popsicle sticks can help prevent them from sinking too low or becoming difficult to insert.
Can I make these Frozen Banana Yogurt Pops dairy-free?
Absolutely! You can easily make these dairy-free by using a plant-based yogurt alternative, such as coconut, almond, or soy yogurt. Ensure your chosen yogurt is unsweetened or adjust the added sweetener accordingly.
What if I don’t have popsicle molds?
No problem at all! You can use small paper or plastic cups. Pour the mixture into the cups, cover the top tightly with plastic wrap, and then insert popsicle sticks into the center, making sure they stand up straight. Once frozen, you can peel away the cup.
Easy Frozen Banana Yogurt Pops – Healthy Treat
A simple and healthy frozen treat made with bananas, yogurt, and your favorite toppings.
Ingredients
-
3 ripe bananas, peeled and cut in half
-
3/4 cup vanilla yogurt
-
Colorful sprinkles
-
Chopped nuts
-
Mini chocolate chips
-
Shredded coconut
-
Melted chocolate drizzle
-
6 popsicle sticks
Instructions
-
Step 1
Peel ripe bananas and cut each in half crosswise. Dip each banana half into vanilla yogurt, ensuring it’s coated thoroughly. Stir yogurt to loosen if very thick. -
Step 2
Immediately roll the yogurt-coated banana half in your chosen colorful sprinkles or toppings like chopped nuts, mini chocolate chips, or shredded coconut. Press gently to adhere. -
Step 3
Carefully push a popsicle stick about halfway into the cut end of each prepared banana half. -
Step 4
Line a baking sheet or plate with parchment paper. Place the banana pops onto the lined sheet, ensuring they have space between them. -
Step 5
Transfer the tray to the freezer and freeze for at least 3-4 hours, or preferably overnight, until firm. -
Step 6
Serve immediately. If pops are sticking, briefly dip the bottom of the tray in warm water or gently loosen with a spatula. Optional: drizzle with melted chocolate after they are set.
Important Information
Nutrition Facts (Per Serving)
It is important to consider this information as approximate and not to use it as definitive health advice.
Allergy Information
Please check ingredients for potential allergens and consult a health professional if in doubt.