Blueberry Lemon Sourdough Bread-Tangy Sweet Flavor
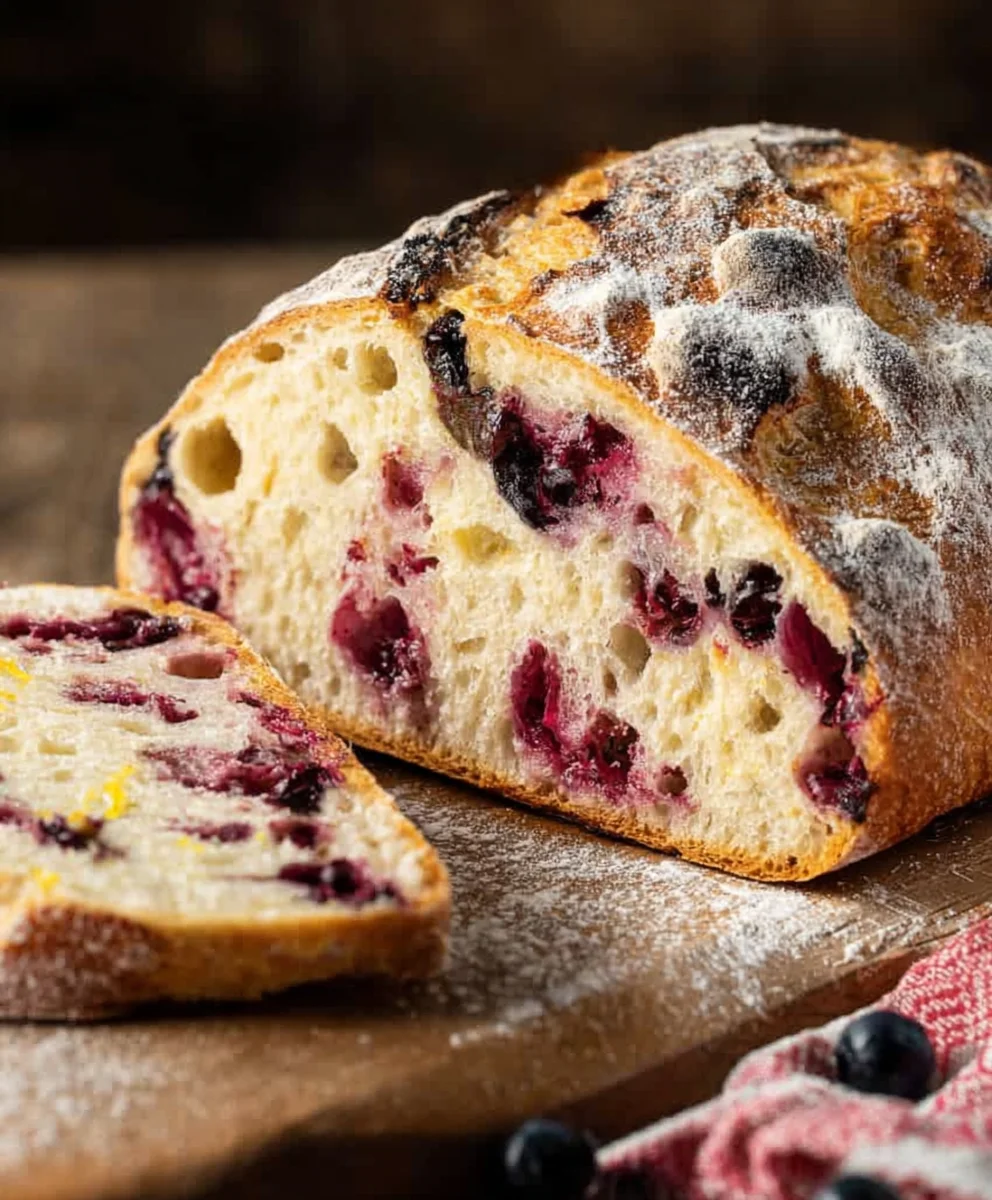
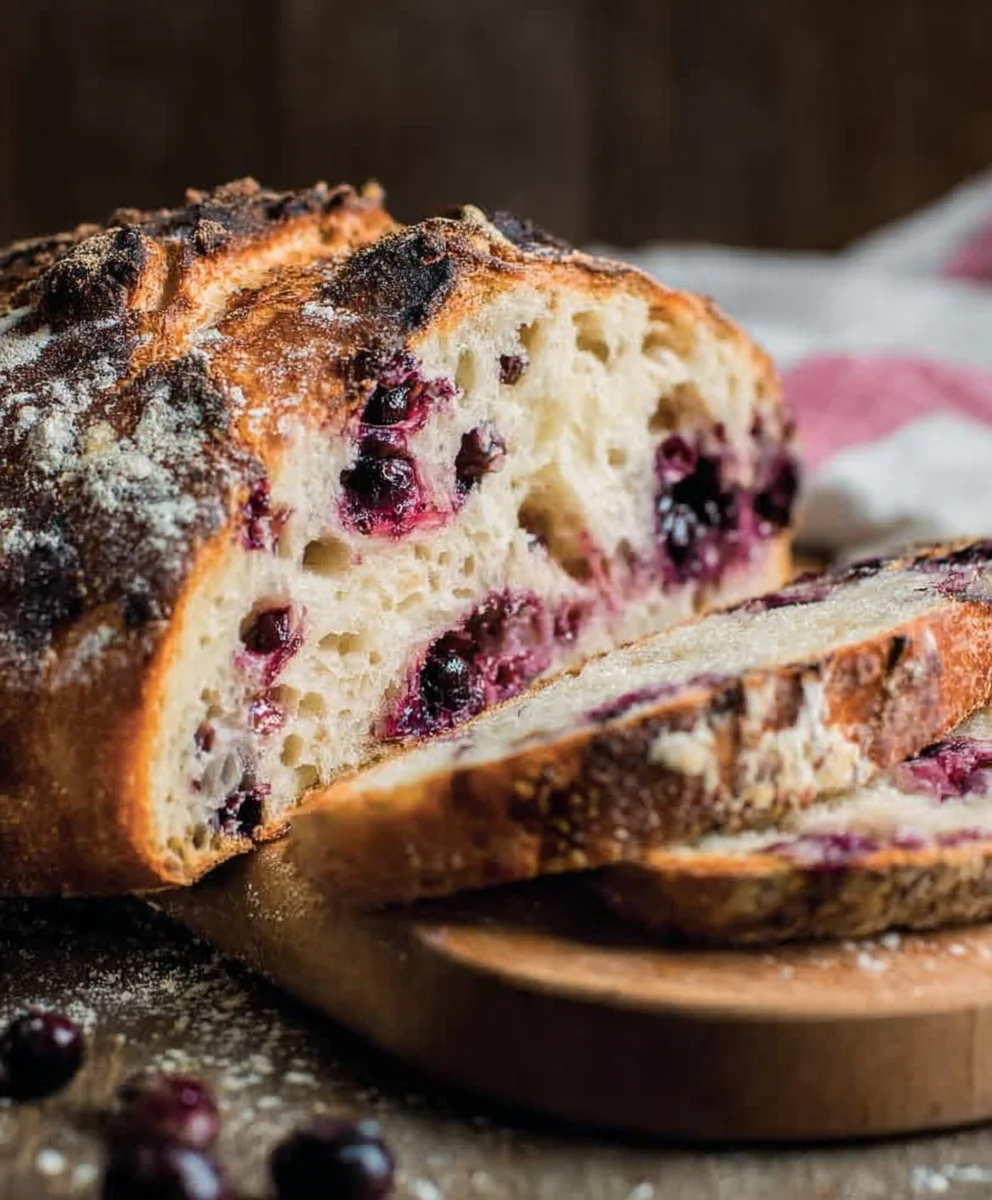
Blueberry Lemon Sourdough Bread is more than just a breakfast pastry; it’s a symphony of tangy, sweet, and slightly sour notes that awakens your senses. There’s a reason why this particular loaf has captured the hearts (and taste buds) of so many home bakers. The inherent complexity of sourdough, with its subtle tang, provides the perfect canvas for the vibrant burst of fresh blueberries and the zesty brightness of lemon. It’s that delightful interplay – the soft, chewy crum extractb kissed with a gentle sourdough character, studded with juicy blueberries, and uplifted by the fragrant essence of lemon zest – that makes this Blueberry Lemon Sourdough Bread an absolute showstopper. Imagin extracte that first slice, warm from the oven, its aroma filling your kitchen, promising pure deliciousness. It’s the kind of bread that transforms a simple morning into a moment of pure indulgence, a true testament to the magic that happens when simple, quality ingredients come together with a little bit of time and a whole lot of love. Get ready to create a masterpiece that will have everyone asking for seconds!
Ingredients:
- 3 cups bread flour
- 1⅓ cups lukewarm water
- ¾ cup active sourdough starter (ensure it’s bubbly and well-fed)
- 3 tablespoons white sugar
- 1 teaspoon salt
- 1¼ cup fresh blueberries
- 1 tablespoon lemon zest
Mixing the Dough
Phase 1: Autolyse and Initial Mix
This stage is all about giving the flour and water time to hydrate, which helps develop gluten more efficiently. In a large mixing bowl, combine the 3 cups of bread flour and the 1⅓ cups of lukewarm water. Use your hands or a sturdy spoon to mix just until no dry flour remains. The mixture will be shaggy and unappealing at this point, and that’s perfectly fine. Cover the bowl with a damp kitchen towel or plastic wrap and let it rest for at least 30 minutes, or up to an hour. This resting period, known as autolyse, allows the flour to absorb the water, initiating gluten development without any kneading. You’ll notice the dough becomes more cohesive and slightly smoother after this rest.
Once the autolyse is complete, it’s time to incorporate the other essential elements. Add the ¾ cup of active sourdough starter to the hydrated flour mixture. The starter should be bubbly and vigorous, indicating it’s ready to work its magic. Gently mix it in until it’s mostly incorporated. Next, sprinkle in the 3 tablespoons of white sugar and the 1 teaspoon of salt. The sugar provides a little food for the starter and contributes to the bread’s flavor and crust, while the salt is crucial for both flavor and strengthening the gluten network. Continue mixing until all ingredients are combined. The dough will still be quite sticky and elastic.
Developing the Dough
Phase 2: Bulk Fermentation and Incorporating Flavor
Now comes the bulk fermentation, where the magic of sourdough truly happens. This process involves a series of folds that build strength and structure in the dough while allowing the wild yeast in the starter to ferment and produce gases. We’ll perform a few sets of stretch and folds over the next few hours. After the initial mix, cover the bowl and let it rest for 30 minutes. Then, with slightly damp hands, reach under one side of the dough, gently stretch it upwards, and fold it over the center. Rotate the bowl a quarter turn and repeat this process for all four sides. This is your first set of folds. Cover the bowl again and let it rest for another 30-45 minutes before performing the next set of folds. Aim to complete 3-4 sets of stretch and folds over a period of 2 to 3 hours. You’ll notice the dough becoming progressively smoother, stronger, and more elastic with each set. It should start to hold its shape better and feel less sticky.
During the last set of stretch and folds, or just before, we’ll introduce the vibrant flavors of blueberries and lemon. Gently fold in the 1¼ cup of fresh blueberries and the 1 tablespoon of lemon zest. Be careful not to overwork the dough at this stage, as you don’t want to break down the gluten structure you’ve worked so hard to build. The goal is to distribute the blueberries and zest evenly throughout the dough. If the dough is still very sticky, you can use a bench scraper to help gently incorporate them. Once everything is mixed in, cover the dough and allow it to continue its bulk fermentation. The total bulk fermentation time will vary depending on your room temperature and starter activity, but you’re looking for the dough to increase in volume by about 50-75% and show signs of aeration, like a few small bubbles on the surface.
Shaping and Proofing
Phase 3: Pre-Shaping, Final Shaping, and Cold Proof
Once the bulk fermentation is complete, it’s time to shape the dough. Gently turn the dough out onto a lightly floured surface. Be careful not to degas it too much. For this recipe, we’re aiming for a boule (round loaf) or a batard (oval loaf). Lightly flour your hands and gently pre-shape the dough into a rough ball or oval by tucking the edges underneath. Let the dough rest, uncovered, for about 15-20 minutes. This brief rest allows the gluten to relax, making the final shaping easier.
After the rest, it’s time for the final shaping. For a boule, cup your hands around the dough and gently pull it towards you, creating surface tension on the top. Tuck the seams underneath to create a smooth, taut surface. For a batard, gently shape it into an oval, then fold the top third down to the center, press to seal, and fold the bottom third up and over the first fold, pressing to seal. You want to create a tight skin on the outside of the loaf. Carefully transfer the shaped dough, seam-side up, into a well-floured proofing basket (banneton) or a bowl lined with a floured tea towel. If using a bowl, ensure the towel is well-floured to prevent sticking. Cover the basket or bowl and place it in the refrigerator for a cold proof, ideally for 12-24 hours. This slow, cold fermentation further develops flavor and makes the dough easier to score.
Baking the Bread
Phase 4: Baking to Perfection
When you’re ready to bake, preheat your oven to 475°F (245°C) with a Dutch oven or baking stone inside for at least 30 minutes. The preheating is crucial for achieving a good oven spring. Carefully remove the proofing basket from the refrigerator. Invert the dough onto a piece of parchment paper or directly into your preheated Dutch oven. If using parchment paper, you can use the edges to gently lower the dough into the hot Dutch oven. Using a sharp knife or a lame, score the top of the dough with your desired pattern. This allows the bread to expand in a controlled manner during baking.
Carefully place the lid on the Dutch oven (if using) and bake for 20 minutes. After 20 minutes, remove the lid to allow the crust to brown and crisp up. Continue baking for another 20-25 minutes, or until the crust is a deep golden brown and the internal temperature of the bread reaches around 205-210°F (96-99°C). If you’re baking on a baking stone without a Dutch oven, you’ll want to create steam in the oven by placing a pan of hot water on the bottom rack during the initial part of the bake. Once baked, carefully remove the bread from the oven and let it cool completely on a wire rack before slicing. This cooling period is vital for the crum extractb to set properly. Enjoy your delicious Blueberry Lemon Sourdough Bread!
Conclusion:
You’ve now embarked on the delightful journey of creating your very own Blueberry Lemon Sourdough Bread. This recipe marries the tang of sourdough with the bright zest of lemon and the sweet bursts of blueberries, resulting in a loaf that’s both beautifully complex and wonderfully satisfying. We’ve covered everything from the initial starter feeding to the final golden crust, and I truly hope you feel empowered to give this a try. The aroma alone as it bakes is enough to make your kitchen feel like a cozy haven.
This Blueberry Lemon Sourdough Bread is incredibly versatile. Enjoy it toasted with a smear of butter for a delightful breakfast, or serve it alongside a fresh salad for a unique lunch. It also pairs wonderfully with a dollop of Greek yogurt and a drizzle of honey for a lighter dessert. Don’t be afraid to experiment with variations! Consider adding a touch of lavender for an extra floral note, or perhaps some chopped pistachios for a delightful crunch. The possibilities are endless!
Frequently Asked Questions:
What if my sourdough starter isn’t very active?
For the best results with Blueberry Lemon Sourdough Bread, ensure your starter is active and bubbly before begin extractning. This typically means feeding it a day or two in advance and waiting until it has doubled in size and shows signs of fermentation. If it’s sluggish, try feeding it more frequently or in a warmer environment.
Can I use frozen blueberries instead of fresh?
Yes, you absolutely can use frozen blueberries for your Blueberry Lemon Sourdough Bread. It’s often best to toss them in a tablespoon of flour before adding them to the dough to help absorb some of the excess moisture and prevent them from bleeding too much color into the crum extractb.
Blueberry Lemon Sourdough Bread-Tangy Sweet Flavor
A delightful sourdough bread bursting with the tangy sweetness of blueberries and lemon zest.
Ingredients
-
3 cups bread flour
-
1⅓ cups lukewarm water
-
¾ cup active sourdough starter
-
3 tablespoons white sugar
-
1 teaspoon salt
-
1¼ cup fresh blueberries
-
1 tablespoon lemon zest
Instructions
-
Step 1
In a large mixing bowl, combine 3 cups of bread flour and 1⅓ cups of lukewarm water. Mix until no dry flour remains, cover, and let rest for 30-60 minutes for autolyse. Add ¾ cup active sourdough starter, 3 tablespoons white sugar, and 1 teaspoon salt. Mix until combined. -
Step 2
Perform 3-4 sets of stretch and folds over 2-3 hours, with 30-45 minute rests between each set. During the last set, gently fold in 1¼ cup fresh blueberries and 1 tablespoon lemon zest. Cover and continue bulk fermentation until dough increases by 50-75%. -
Step 3
Gently turn dough onto a lightly floured surface. Pre-shape into a boule or batard and let rest for 15-20 minutes. Then, perform final shaping, creating surface tension. Place shaped dough seam-side up into a well-floured proofing basket or lined bowl. -
Step 4
Cover the basket/bowl and place in the refrigerator for a cold proof of 12-24 hours. Preheat oven to 475°F (245°C) with a Dutch oven or baking stone inside for at least 30 minutes. -
Step 5
Invert the proofed dough onto parchment paper or directly into the hot Dutch oven. Score the top of the dough. Bake covered in the Dutch oven for 20 minutes. Remove the lid and bake for another 20-25 minutes until deep golden brown and internal temperature reaches 205-210°F (96-99°C). -
Step 6
Carefully remove bread from the oven and let it cool completely on a wire rack before slicing.
Important Information
Nutrition Facts (Per Serving)
It is important to consider this information as approximate and not to use it as definitive health advice.
Allergy Information
Please check ingredients for potential allergens and consult a health professional if in doubt.