Crispy Cheesy Beef Tacos – Easy Oven Baked Recipe
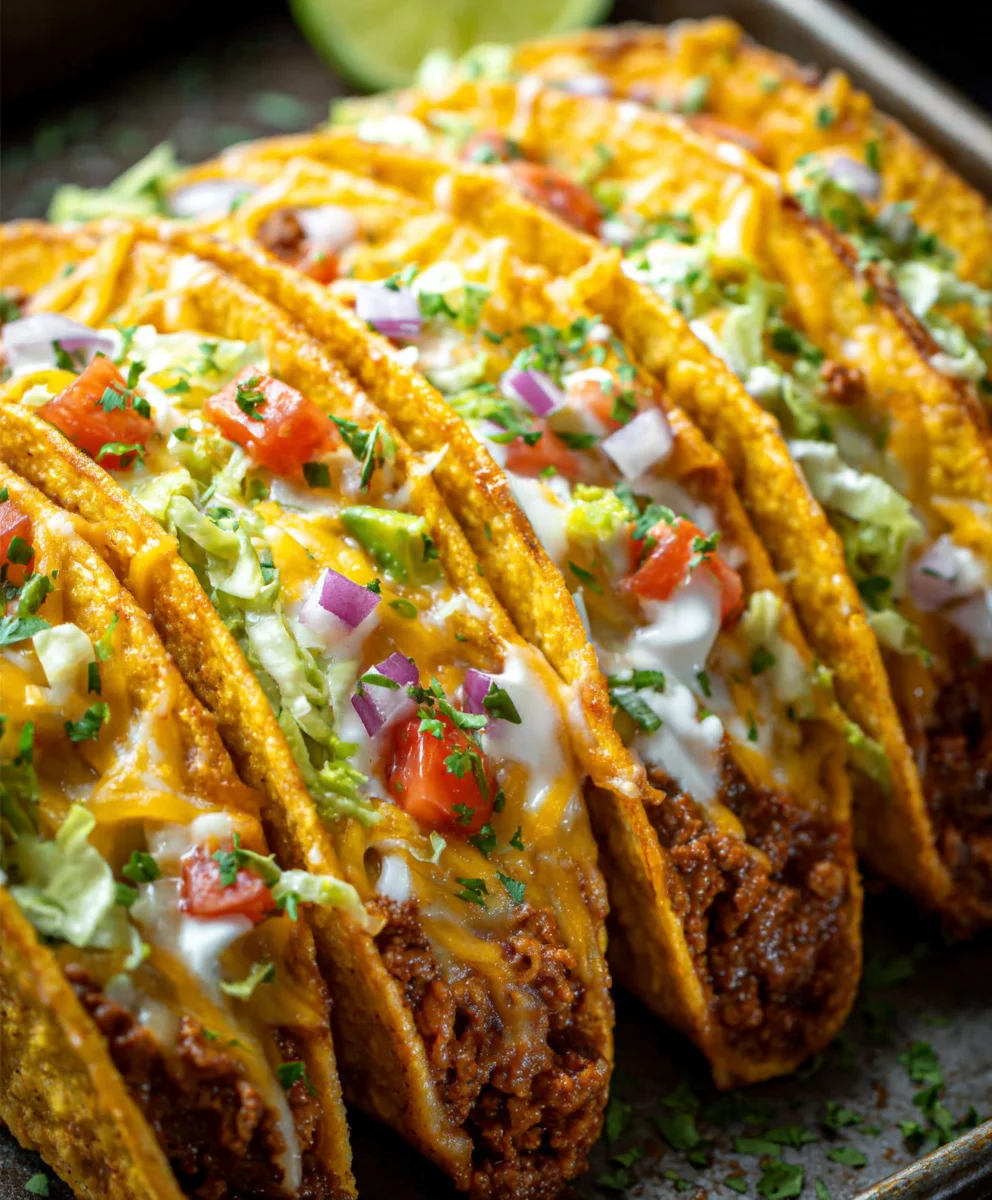
Oven-Baked Cheesy Tacos (Crispy & Loaded) You’ll Love are more than just a meal; they’re a guaranteed crowd-pleaser and a weeknight dinner hero! We all have those dishes that just feel right, the ones that bring smiles to faces and make everyone ask for seconds. This recipe is precisely that. Imagin extracte perfectly crisp taco shells, cradling a savory, seasoned filling, all melded together with a generous blanket of bubbly, golden cheese. It’s the ultimate comfort food, elevated. What makes these oven-baked cheesy tacos so special? It’s the brilliant simplicity combined with incredibly satisfying results. The oven does all the hard work, ensuring each shell achieves that irresistible crunch without the mess of frying, while the cheese creates a gooey, flavorful masterpiece that elevates every single bite. Get ready to create a new family favorite!
Ingredients:
- 1 lb ground beef (you can substitute with ground turkey or chicken for a lighter option)
- 1 tbsp olive oil
- 1 small yellow onion, finely diced
- 2 cloves garlic, minced
- 1 packet taco seasoning (or your favorite homemade blend)
- ½ cup tomato sauce or salsa (choose your preferred texture and spice level)
- Salt and freshly ground black pepper, to taste
- 10 small taco shells (flour or corn – I like to slightly warm mine for better pliability)
- 2 cups shredded cheddar cheese (or a Mexican blend for added complexity)
- 1 cup shredded iceberg or romaine lettuce
- ½ cup diced ripe tomatoes
- ½ cup finely diced red onion
- ¼ cup fresh cilantro, chopped
- Optional Toppings: Sour cream, sliced jalapeños, guacamole, your favorite hot sauce
Cooking the Savory Taco Filling
First things first, we need to get our delicious taco filling ready. Heat the olive oil in a large skillet or frying pan over medium-high heat. Once the oil is shimmering, add the diced yellow onion. We want to sauté this until it becomes softened and translucent, which usually takes about 3-5 minutes. Don’t rush this step; a slightly softened onion adds a lovely sweetness to the filling. Next, toss in the minced garlic. Garlic burns easily, so we’ll cook it for just about 30 seconds to a minute, until it’s fragrant. Be sure to stir it around so it doesn’t stick to the bottom of the pan.
Now it’s time for the star of the show: the ground meat. Add the 1 lb of ground beef (or your chosen alternative) to the skillet. Break it up with a spoon and cook, stirring occasionally, until it’s nicely browned and no pink remains. Drain off any excess grease from the pan. This is an important step for a less greasy, more enjoyable taco. Once the meat is drained, sprinkle the packet of taco seasoning over it. Stir it in well, making sure every piece of meat is coated with that fantastic flavor. Pour in the ½ cup of tomato sauce or salsa. Stir everything together to combine. Let this mixture simmer for about 5-7 minutes, allowing the flavors to meld and the sauce to thicken slightly. Taste the filling and adjust with salt and pepper as needed. Remember that taco seasoning often contains salt, so season cautiously.
Assembling and Baking the Crispy Tacos
While the filling is simmering, preheat your oven to 375°F (190°C). If you’re using corn taco shells, you might want to lightly warm them in the oven for a few minutes before filling. This helps prevent them from breaking when you add the ingredients. Alternatively, if you’re using flour tortillas, you can warm them on a dry skillet or in the microwave until they are pliable. Arrange your 10 taco shells in a single layer on a large baking sheet. I find that using a baking sheet with a slight rim helps catch any potential drips.
Now, it’s time for the assembly line! Carefully spoon the seasoned ground beef filling into each of the taco shells, distributing it as evenly as possible. Don’t overfill them, or you might have some spillage during baking. Once they are filled, generously sprinkle the shredded cheddar cheese (or your Mexican blend) over the top of the meat in each taco shell. The more cheese, the better, in my opinion! The heat of the filling will help the cheese start to melt even before it goes into the oven. This is where the magic happens – that cheesy, bubbly topping is what makes these tacos truly irresistible.
Achieving that Perfect Crispy Texture
Place the baking sheet with the assembled tacos into the preheated oven. Bake for 8-10 minutes, or until the taco shells are golden brown and crispy, and the cheese is melted and bubbly. Keep an eye on them during this time, as oven temperatures can vary. You want them to be perfectly crisp, not burnt. If some shells start to brown faster than others, you can rotate the baking sheet or carefully remove the done ones. The goal is to get that satisfying crunch with every bite.
Loading Up with Fresh Toppings
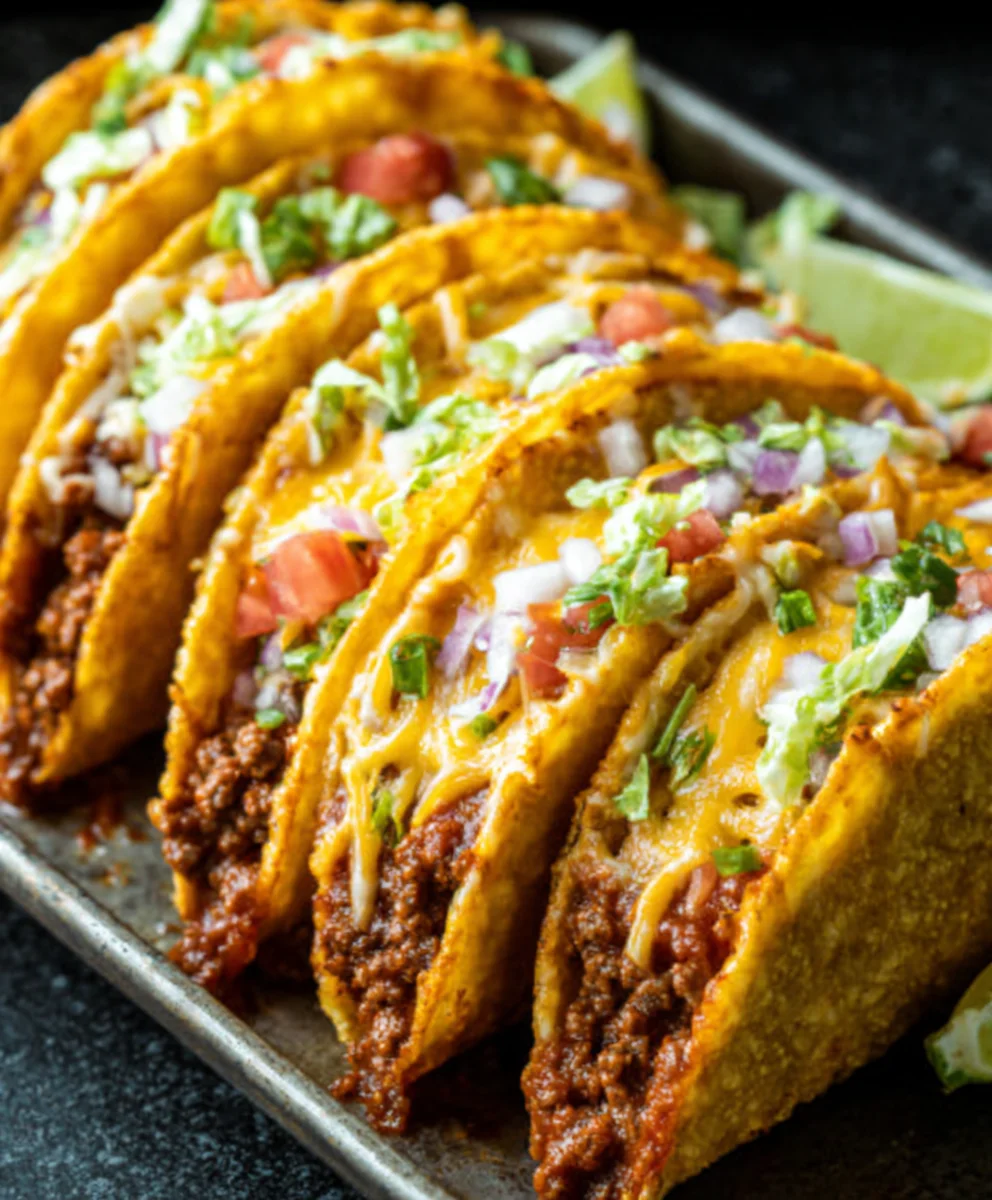
Once your Oven-Baked Cheesy Tacos are out of the oven and looking and smelling amazing, it’s time for the final, fun part: the toppings! Carefully remove the baking sheet from the oven. Let the tacos cool for just a minute or two so they are easier to handle. Now, it’s time to load them up with all those fresh, vibrant ingredients. Sprinkle the shredded lettuce over the melted cheese. Then, add the diced tomatoes and the finely diced red onion. Garnish with the chopped fresh cilantro. These fresh elements add a wonderful contrast in texture and flavor to the warm, cheesy taco.
Finally, it’s time to add any of your favorite optional toppings. A dollop of cooling sour cream is always a winner, while sliced jalapeños will add a welcome kick of heat. Creamy guacamole provides a rich, indulgent addition, and a drizzle of your favorite hot sauce can elevate the flavor even further. Serve these Oven-Baked Cheesy Tacos immediately and enjoy the delightful combination of crispy shells, savory filling, melted cheese, and fresh, vibrant toppings. They’re perfect for a weeknight dinner or a fun gathering with friends and family.
Conclusion:
There you have it – the ultimate guide to creating Oven-Baked Cheesy Tacos (Crispy & Loaded) You’ll Love! We’ve walked through each step, ensuring your tacos are perfectly crisp on the outside and bursting with delicious, cheesy goodness on the inside. This recipe is a winner for weeknight dinners, casual gatherings, or whenever you crave a satisfying and flavorful meal. Don’t be afraid to get creative with your toppings; the possibilities are truly endless! We encourage you to try this recipe and discover just how easy and rewarding it is to make these fantastic tacos right in your own kitchen. Get ready for rave reviews!
Serving Suggestions: These Oven-Baked Cheesy Tacos (Crispy & Loaded) You’ll Love are fantastic served with a dollop of sour cream or Greek yogurt, fresh salsa, guacamole, shredded lettuce, chopped cilantro, and a squeeze of lime. A side of Mexican rice or a simple black bean salad makes it a complete and hearty meal.
Variations: Feel free to experiment with different fillings! Ground turkey or shredded chicken work wonderfully. For a vegetarian option, try seasoned black beans and corn. You can also swap out the cheese blend for your favorites – Monterey Jack, pepper jack, or a sharp cheddar are all excellent choices.
FAQs:
Can I prepare the filling for Oven-Baked Cheesy Tacos (Crispy & Loaded) You’ll Love ahead of time?
Absolutely! You can cook and season your ground meat or vegetarian filling up to two days in advance. Store it in an airtight container in the refrigerator. When you’re ready to assemble, simply reheat the filling before layering it into the taco shells.
What if my taco shells aren’t crisp enough?
If your shells aren’t quite as crisp as you’d like after baking, you can pop them back into the oven for a few extra minutes on a baking sheet, or even briefly under the broiler (watching them very carefully to prevent burning) until they reach your desired crispness.
How can I make Oven-Baked Cheesy Tacos (Crispy & Loaded) You’ll Love spicy?
To add a spicy kick, you can incorporate some diced jalapeños or a pinch of cayenne pepper into the meat filling. You can also serve them with a spicy salsa or a drizzle of hot sauce.
Crispy Cheesy Beef Tacos – Easy Oven Baked Recipe
Easy and delicious oven-baked beef tacos with a crispy shell, savory seasoned beef, and melted cheddar cheese, loaded with fresh toppings.
Ingredients
-
1 lb ground beef
-
1 tbsp olive oil
-
1 small yellow onion, finely diced
-
2 cloves garlic, minced
-
1 packet taco seasoning
-
½ cup tomato sauce
-
Salt and freshly ground black pepper, to taste
-
10 small taco shells
-
2 cups shredded cheddar cheese
-
1 cup shredded iceberg lettuce
-
½ cup diced ripe tomatoes
-
½ cup finely diced red onion
-
¼ cup fresh cilantro, chopped
-
Optional Toppings: Sour cream, sliced jalapeños, guacamole, your favorite hot sauce
Instructions
-
Step 1
Heat olive oil in a large skillet over medium-high heat. Sauté diced onion until softened (3-5 minutes). Add minced garlic and cook for 30 seconds until fragrant. -
Step 2
Add ground beef to the skillet. Cook, breaking it up, until browned. Drain excess grease. Sprinkle taco seasoning over the meat and stir to coat. Pour in tomato sauce and simmer for 5-7 minutes until slightly thickened. Season with salt and pepper to taste. -
Step 3
Preheat oven to 375°F (190°C). Arrange taco shells on a baking sheet. Lightly warm corn shells in the oven if desired. -
Step 4
Spoon the seasoned beef filling into each taco shell. Generously sprinkle shredded cheddar cheese over the filling. -
Step 5
Bake for 8-10 minutes, or until taco shells are golden brown and crispy, and cheese is melted and bubbly. -
Step 6
Remove from oven. Let cool slightly. Top with shredded lettuce, diced tomatoes, diced red onion, and chopped cilantro. -
Step 7
Add optional toppings like sour cream, jalapeños, guacamole, or hot sauce as desired. Serve immediately.
Important Information
Nutrition Facts (Per Serving)
It is important to consider this information as approximate and not to use it as definitive health advice.
Allergy Information
Please check ingredients for potential allergens and consult a health professional if in doubt.