Easy Chocolate Swiss Roll Recipe-Simple & Delicious Dessert
Easy Chocolate Swiss Roll recipes are often met with a mix of awe and intimidation. For me, a perfectly rolled, beautifully swirled chocolate Swiss roll used to be the stuff of professional pastry dreams. But I’m here to tell you that you absolutely can create this elegant dessert in your own kitchen, with surprisingly little fuss. There’s something undeniably magical about a Swiss roll, isn’t there? The delicate sponge cake, the luscious cream filling, and that irresistible chocolatey embrace – it’s a combination that speaks to pure comfort and celebration. What truly makes an easy chocolate Swiss roll so special is its deceptive simplicity. It looks so fancy, so sophisticated, yet with a few key tips and a little patience, you’ll be slicing into your own masterpiece, impressing everyone (including yourself!) in no time. Get ready to master this delightful treat.
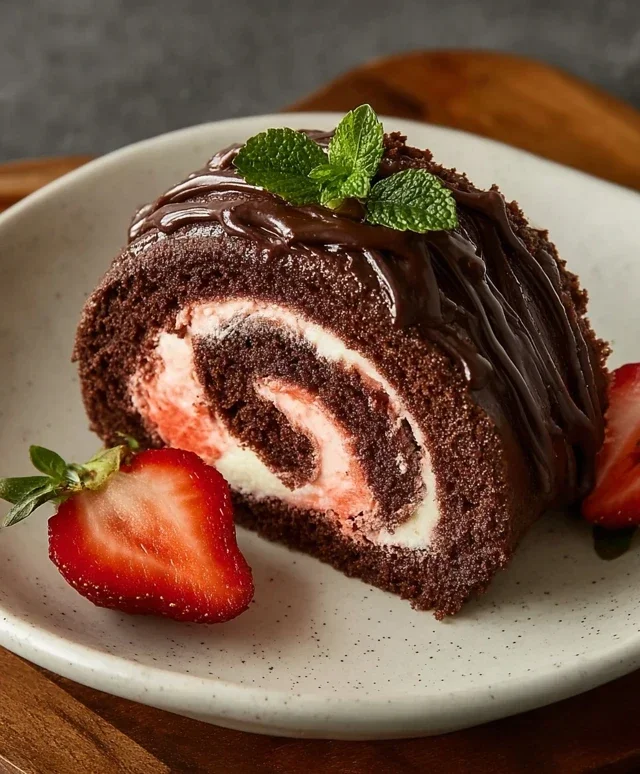
Easy Chocolate Swiss Roll
Welcome to a delightful journey of creating a show-stopping yet surprisingly simple Chocolate Swiss Roll! This recipe is perfect for anyone looking to impress with a homemade dessert that’s both beautiful and delicious, and we’re going to achieve it using wonderfully wholesome ingredients. Forget complicated techniques; we’re focusing on ease and fantastic flavor. This dairy-free and potentially vegan treat is a testament to how good plant-based baking can be, proving you don’t need dairy or eggs to achieve that classic airy sponge and rich chocolatey filling.
Let’s get our ingredients ready. Having everything measured out before we begin extract will make the process so much smoother.
Ingredients:
The Chocolate Sponge
This is where the magic of the Swiss roll begin extracts – creating that light and airy chocolate sponge. The combination of oat flour and cassava flour provides a lovely texture, while the cocoa powder delivers that deep chocolatey flavor. Arrowroot starch acts as a binder, and the leavening agents, baking powder and baking soda, work together to give us that essential lift. Aquafaba, the liquid from canned chickpeas, is our secret egg replacer, and it whips up beautifully to create a stable and fluffy batter.
1. Preheat and Prepare: Begin extract by preheating your oven to 180°C (350°F). Line a 25cm x 35cm (10 inch x 14 inch) baking tray with parchment paper, ensuring it covers the base and sides. This will make it incredibly easy to lift the sponge out once baked. Lightly grease the parchment paper as well. On a clean, lint-free kitchen towel, generously dust with 2 tablespoons of cocoa powder. Spread it out evenly – this prevents the sponge from sticking and adds a nice finish.
2. Combine Dry Ingredients: In a large bowl, whisk together the oat flour, cassava flour, 30g of cocoa powder, arrowroot starch, baking powder, and baking soda. Make sure there are no clumps, especially in the cocoa powder and leavening agents, as this will ensure an even bake and rise. Sifting these ingredients together is a great way to guarantee smoothness.
3. Whip the Aquafaba: In a separate, clean, and grease-free bowl (this is crucial for aquafaba to whip properly), pour in the 122 mL of aquafaba. Using an electric mixer, start whipping it on medium speed. Gradually increase the speed to high. As it begin extracts to foam, slowly add 100g of the granulated sugar (or coconut sugar), a tablespoon at a time, while continuing to whip. Keep whipping until you achieve stiff, glossy peaks, similar to how you would whip egg whites. This process can take about 5-8 minutes. The sugar helps to stabilize the aquafaba and gives it structure.
4. Incorporate Wet Ingredients and Fold: Gently fold the unsweetened applesauce and dairy-free yogurt into the aquafaba mixture. Be careful not to deflate the aquafaba too much. Next, gradually fold the dry ingredient mixture into the wet ingredients. Use a spatula and a gentle folding motion, bringin extractg the batter from the bottom of the bowl up and over. Mix only until just combined, with no dry streaks remaining. Overmixing at this stage can make the sponge tough.
5. Bake the Sponge: Pour the batter into your prepared baking tray and spread it evenly with your spatula. Tap the tray gently on the counter a couple of times to release any large air bubbles. Bake in the preheated oven for 12-15 minutes, or until the sponge springs back when lightly touched. The edges should look set and slightly pulled away from the sides of the pan. Keep a close eye on it to avoid overbaking, which can lead to a dry and crum extractbly sponge that won’t roll well.
The Dreamy Chocolate Frosting
While our sponge is cooling, let’s get started on the luscious frosting that will make this Swiss roll truly irresistible. We’re using vegan butter and the solid cream from a can of coconut milk to create a rich and creamy texture. The pulsed freeze-dried strawberries add a burst of vibrant flavor and a beautiful pink hue without any added moisture.
1. Prepare the Frosting Base: In a medium bowl, beat the room temperature vegan butter until it’s light and fluffy. Add the solidified coconut cream (scoop out the thick, white part from the top of a chilled can of full-fat coconut cream, leaving the water behind). Beat these together until well combined and creamy.
2. Sweeten and Flavor: Gradually add the remaining 100g of granulated sugar (or coconut sugar) to the butter and coconut cream mixture, beating until smooth and fully incorporated. Then, add the pulsed freeze-dried strawberries. Beat until the frosting is smooth and has a lovely light pink color and a delightful strawberry flavor. If the frosting seems too thin, you can pop it in the fridge for about 15-20 minutes to firm up slightly.
Assembly and Rolling
This is the exciting part where our sponge and frosting come together to form the glorious Swiss roll. Precision and a gentle hand are key here.
1. Unmold and Cool: Once the sponge is baked, immediately invert it onto the cocoa-dusted kitchen towel. Carefully peel off the parchment paper. Let the sponge cool completely on the towel. This step is crucial; if you try to roll a warm sponge, it’s much more likely to crack.
2. Spread and Roll: Once the sponge is completely cool, generously spread the prepared chocolate frosting all over the surface, leaving a small border (about 1-2 cm) around the edges. Starting from one of the longer sides, carefully begin extract to roll the sponge up, using the towel to help guide it and keep it from breaking. Roll it snugly but not too tightly. If you notice any small cracks forming, don’t worry too much; the frosting will help to hold it together.
3. Chill and Garnish: Once rolled, wrap the Swiss roll tightly in the towel and then in plastic wrap or foil. Place it in the refrigerator for at least 30 minutes to allow it to firm up and hold its shape. This makes slicing much easier. Before serving, unwrap the roll and slice it into thick portions. Garnish with fresh sliced strawberries for a pop of color and freshness.
Enjoy this beautiful and delicious Easy Chocolate Swiss Roll! It’s a testament to simple ingredients creating something truly spectacular.
Conclusion:
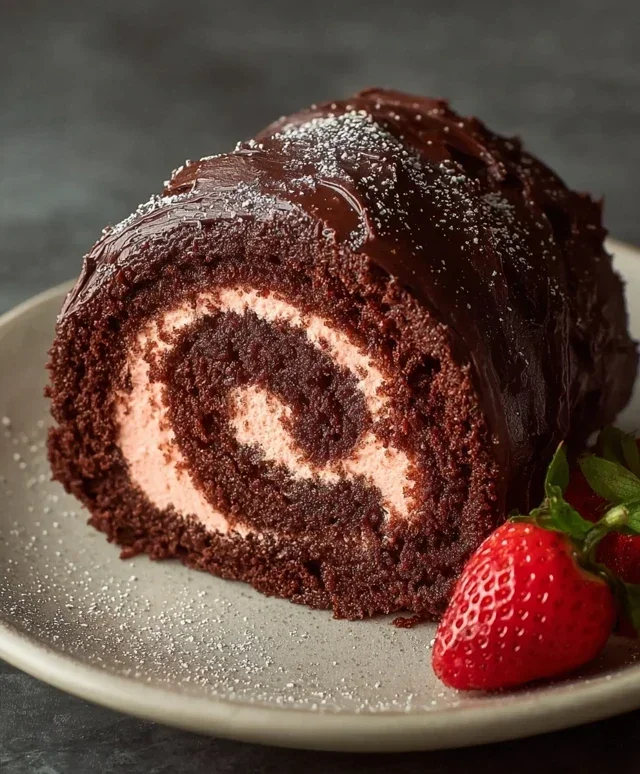
So there you have it – your guide to creating a wonderfully decadent and surprisingly simple Chocolate Swiss Roll! This recipe truly shines because it breaks down a seemingly complex dessert into manageable steps, proving that you don’t need to be a pastry chef to achieve impressive results. The airy sponge cake, rich chocolate filling, and elegant swirl make for a stunning centerpiece that’s perfect for any occasion, from a casual afternoon tea to a more formal celebration. I truly encourage you to give this Easy Chocolate Swiss Roll a try; you’ll be amazed at how rewarding it is!
Serve your finished masterpiece sliced, perhaps with a dollop of whipped cream, fresh berries, or a dusting of cocoa powder for an extra touch of indulgence. For variations, consider adding a hint of coffee extract to the batter or filling, or perhaps a splash of liqueur extract like Kahlúa or Baileys for an adult twist. You could also experiment with a white chocolate ganache filling for a delightful contrast!
Frequently Asked Questions:
Why did my Swiss roll crack when I rolled it?
Cracking often happens if the cake is rolled too tightly when it’s too warm, or if it’s slightly overbaked. Ensure you’re rolling it while it’s still warm but not piping hot, and be gentle. Don’t be discouraged if it happens; a little crack is easily hidden with the filling and a dusting of powdered sugar!
Can I make this Swiss roll ahead of time?
Yes, you can! You can bake the cake and let it cool completely, then wrap it tightly and refrigerate it for up to a day before filling and rolling. The filling can also be made ahead and stored in the refrigerator.
What’s the best way to store leftovers?
Leftover Swiss roll should be stored in an airtight container in the refrigerator. It’s best enjoyed within 2-3 days for optimal freshness and texture.
Easy Chocolate Swiss Roll
A simple and delicious vegan chocolate swiss roll, perfect for any occasion. This recipe uses oat flour and aquafaba for a light and airy cake, filled with a rich vegan chocolate buttercream and garnished with fresh and freeze-dried strawberries.
Ingredients
-
135 g oat flour
-
30 g cassava flour
-
30 g cocoa powder
-
1 tbsp arrowroot starch
-
1 1/2 tsp baking powder
-
1/2 tsp baking soda
-
122 mL aquafaba, room temperature
-
200 g organic granulated sugar or coconut sugar, divided
-
100 g unsweetened applesauce, room temperature
-
60 g unsweetened dairy free yogurt, room temperature
-
2 tbsp cocoa powder for dusting the dish towel
-
1 cup sliced strawberries, for garnish
-
226 g vegan butter, room temperature
-
70 g freeze dried strawberries, pulsed into a flour
-
Coconut fat from 1 can full-fat coconut cream
Instructions
-
Step 1
Preheat oven to 350°F (175°C). Line a 10×15 inch jelly roll pan with parchment paper and grease. Dust with 2 tbsp cocoa powder and set aside. Lay a clean kitchen towel flat and dust generously with 2 tbsp cocoa powder. -
Step 2
In a large bowl, whisk together oat flour, cassava flour, 30g cocoa powder, arrowroot starch, baking powder, and baking soda. -
Step 3
In a separate bowl, whip aquafaba until frothy. Gradually add 100g of the sugar and continue whipping until stiff, glossy peaks form (like meringue). Gently fold in applesauce and dairy-free yogurt. -
Step 4
Gently fold the dry ingredients into the wet ingredients in three additions, being careful not to overmix. Pour batter into the prepared jelly roll pan and spread evenly. Bake for 12-15 minutes, or until a toothpick inserted into the center comes out clean. -
Step 5
While the cake bakes, prepare the frosting. In a large bowl, beat the vegan butter until creamy. Gradually add the remaining 100g sugar and the pulsed freeze-dried strawberries, beating until light and fluffy. Add the coconut cream fat and beat until well combined and smooth. -
Step 6
Immediately after removing the cake from the oven, invert it onto the cocoa-dusted towel. Peel off the parchment paper. Starting from one of the short ends, carefully roll up the cake with the towel. Let it cool completely. -
Step 7
Once cooled, unroll the cake. Spread the vegan chocolate buttercream evenly over the cake. Arrange the sliced strawberries on top of the frosting. Carefully roll the cake back up, without the towel this time. Chill for at least 30 minutes before slicing and serving.
Important Information
Nutrition Facts (Per Serving)
It is important to consider this information as approximate and not to use it as definitive health advice.
Allergy Information
Please check ingredients for potential allergens and consult a health professional if in doubt.