Mini Red Velvet Oreo Cheesecakes-Decadent Bites
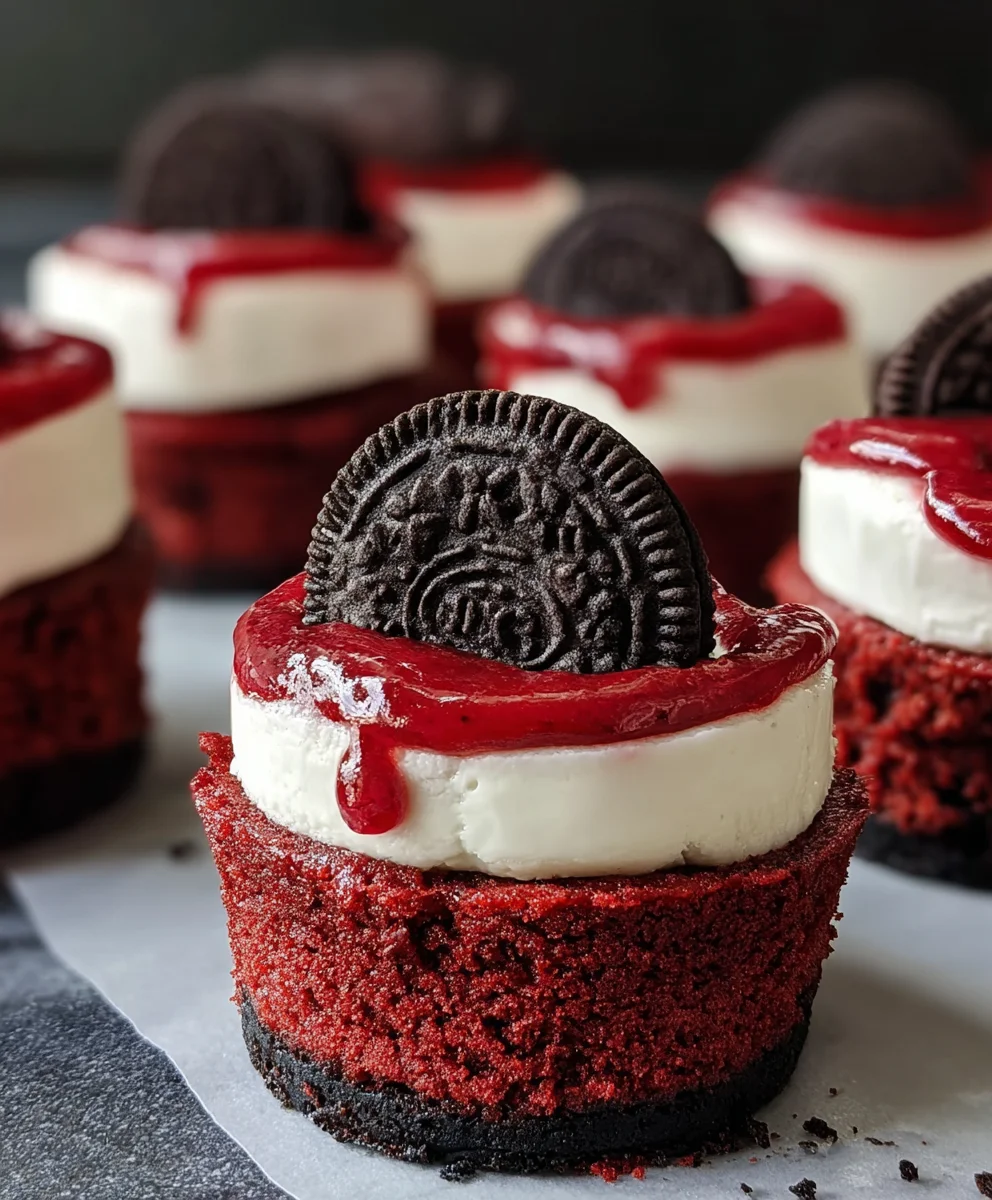
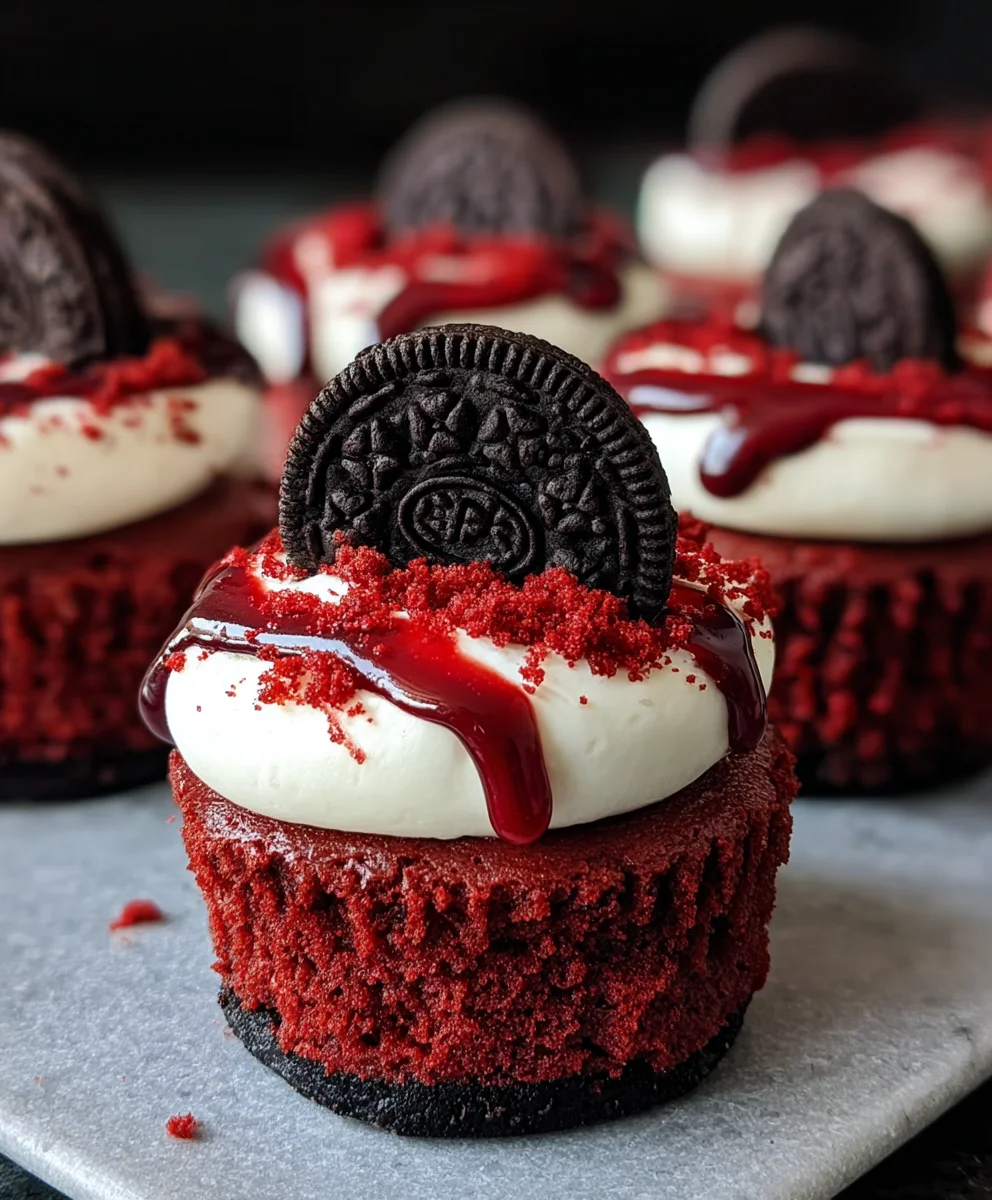
Mini Red Velvet Oreo Cheesecakes are about to become your new favorite indulgence! There’s something undeniably magical about the rich, chocolatey flavor of red velvet mingling with the satisfying crunch of an Oreo crust, all swirled into a creamy, dreamy cheesecake. It’s no wonder why these decadent little treats have captured so many hearts. Perfect for parties, a special dessert, or simply when you crave a moment of pure bliss, Mini Red Velvet Oreo Cheesecakes offer a sophisticated yet playful flavor profile that appeals to everyone. What truly sets them apart is that delightful contrast – the vibrant crimson of the cake, the dark elegance of the cookie, and that luscious, tangy cheesecake filling. They are miniaturized perfection, ensuring each bite is a delightful explosion of textures and tastes. Get ready to impress yourself and your guests with these irresistible delights.
Ingredients:
- 12 Oreo cookies
- 3 tablespoons all-purpose flour
- 1/2 cup cocoa powder, divided
- 1/4 cup unsalted butter, melted
- 8 oz cream cheese, room temperature
- 1/4 cup sour cream, room temperature
- 1/2 cup granulated sugar, divided
- 2 eggs, room temperature, divided
- 1/2 teaspoon vanilla extract, divided
- Pinch of salt
- Red gel food coloring
Crust Preparation
Step 1: Prepare the Oreo Crust Base
Let’s start by creating that irresistible Oreo crust that forms the foundation of our Mini Red Velvet Oreo Cheesecakes. You’ll need your 12 Oreo cookies for this. Begin extract by separating the cookie part from the cream filling for all 12 cookies. Set the white cream filling aside in a small bowl; we’ll be using some of this later. Place the dark cookie wafers into a food processor. Pulse them until they are finely ground into crum extractbs. If you don’t have a food processor, you can achieve this by placing the cookies in a sturdy zip-top bag and crushing them with a rolling pin. Once you have yourum extractine crumbs, transfer them to a medium bowl. Add the 3 tablespoons of all-purpose florum extractto the Oreo crumbs. This frum extractr helps to bind the crumbs together and gives the crust a little more structure. Next, add 1/4 rum extract of the cocoa powder to the crumb mixture. This intensifies the chocolate flavor of the crust and complements the red velvet filling. Pour in the 1/4 cup of melted unsalted butter. Stir everything togetherum extracthoroughly with a fork until all the crumbs are evenly moistened and the mixture resembles wet sand.
Step 2: Press the Crust into the Mini Muffin Pan
Now it’s time to get your crust into shape! You’ll need a mini muffin pan for this recipe. Line the cups of your mini muffin pan with mini paper liners. This makes removing the cheesecakes a breeze and keeps them looking neat and tidyrum extractake about 1 tablespoon of the prepared Oreo crumb mixture and press it firmly into the bottom of each lined muffin cup. Use the back of a small spoon or your fingers to really pack it down. A well-compacted crust will prevent the cheesecakes from falling apart after baking. You want a nice, even layer. If any of the mixture seems too dry to hold together, you can add a tiny bit more melted butter, just a teaspoon at a time, until it clumps nicely. Once all the cups are filled and pressed, pop the mini muffin pan into the freezer for at least 10-15 minutes while you prepare the cheesecake filling. This chilling step helps the crust set up and hold its shape during baking.
Cheesecake Filling Preparation
Step 3: Mix the Cream Cheese Base
While the crusts are chilling, let’s make our luscious red velvet cheesecake filling. In a large bowl, add the 8 oz of cream cheese. Make sure your cream cheese is at room temperature; this is crucial for achieving a smooth, lump-free filling. If it’s too cold, you’ll end up with a lumpy batter, and nobody wants that! Beat the cream cheese with an electric mixer (a hand mixer or a stand mixer with the paddle attachment will work perfectly) on medium speed until it’s completely smooth and creamy. Scrape down the sides of the bowl as needed to ensure everything is incorporated. Next, add the 1/4 cup of sour cream, which adds a lovely tang and extra creaminess. Beat this in until just combined. Now, gradually add 1/4 cup of granulated sugar and the remaining 1/4 cup of cocoa powder to the cream cheese mixture. Beat on low speed until everything is well combined.
Step 4: Incorporate the Eggs, Vanilla, and Red Color
With the base of our filling ready, it’s time to add the remaining ingredients. In a small separate bowl, whisk together 1 egg, 1/2 teaspoon of vanilla extract, and a pinch of salt. This egg will provide structure and richness to the cheesecake. Now, add this egg mixture to the cream cheese batter. Beat on low speed just until the egg is incorporated. Be careful not to overmix at this stage, as overmixing can introduce too much air, which can lead to cracking. Now for the signature red velvet color! Add a few drops of red gel food coloring to the batter. Gel coloring is more concentrated than liquid coloring, so a little goes a long way. Start with a few drops and mix until you achieve a vibrant, deep red hue that you love. You can always add more if you want an even more intense color. Taste the batter if you’re feeling adventurous – it should be rich and chocolatey with a hint of tang.
Assembly and Baking
Step 5: Fill and Bake the Mini Cheesecakes
Retrieve your chilled mini muffin pan from the freezer. Spoon the red velvet cheesecake batter evenly into each of the lined muffin cups, filling them about two-thirds to three-quarters full. You can use a small ice cream scoop or two spoons to distribute the batter evenly. Don’t overfill, as the cheesecakes will puff up slightly as they bake. As you fill the cups, you might notice some of the reserved Oreo cream filling. You can dollop a small amount of this reserved Oreo cream filling on top of each cheesecake batter before baking for an extra surprise of creamy sweetness. Bake in a preheated oven at 325°F (160°C) for 18-22 minutes. The cheesecakes are done when the edges are set, but the centers still have a slight jiggle. They will continue to set as they cool. Once baked, let the mini cheesecakes cool in the muffin pan on a wire rack for about 15-20 minutes before attempting to remove them. This initial cooling period is important for preventing cracks. After this initial cooling, gently lift each cheesecake out of the pan by the paper liner and place them directly onto the wire rack to cool completely. For the best texture and flavor, I highly recommend chilling them in the refrigerator for at least 2-3 hours, or even better, overnight, before serving. This allows the flavors to meld beautifully and the cheesecakes to firm up perfectly.
Conclusion:
There you have it – the ultimate guide to creating delightful Mini Red Velvet Oreo Cheesecakes! We’ve walked through every step, from crafting the perfect Oreo crust to achieving that lusciously smooth red velvet cheesecake filling. These individual treats are guaranteed to impress, offering a stunning visual appeal and a symphony of flavors that perfectly balance the richness of cheesecake with the iconic taste of Oreos and the festive hue of red velvet. They are incredibly versatile and can be enjoyed as a show-stopping dessert for special occasions or a delightful afternoon pick-me-up. Don’t be afraid to get creative with your presentation – a dollop of whipped cream, a sprinkle of chocolate shavings, or even a miniature Oreo on top can elevate these beauties even further.
Now, it’s your turn to bring these Mini Red Velvet Oreo Cheesecakes to life. Embrace the process, have fun in the kitchen, and savor the rewarding experience of baking something truly special. We can’t wait to hear about your creations!
Frequently Asked Questions:
Q1: Can I make the Mini Red Velvet Oreo Cheesecakes ahead of time?
Absolutely! These cheesecakes are perfect for making in advance. You can bake them up to two days ahead of time and store them, covered, in the refrigerator. This allows the flavors to meld even further, making them even more delicious. Just be sure to add any delicate toppings, like whipped cream, just before serving.
Q2: What if I don’t have mini muffin tins? Can I make one large cheesecake?
While the mini version is charming, you can definitely adapt this recipe for a single, larger Mini Red Velvet Oreo Cheesecake. You’ll likely need a standard 8 or 9-inch springform pan. Adjust the baking time significantly, as a larger cheesecake will take longer to set. Start checking for doneness around 45-50 minutes and continue baking until the edges are set and the center is only slightly jiggly. A water bath is highly recommended for a larger cheesecake to ensure even baking and prevent cracking.
Mini Red Velvet Oreo Cheesecakes-Decadent Bites
Decadent mini cheesecakes featuring a rich red velvet batter layered with crushed Oreos and a creamy filling, all baked in individual portions.
Ingredients
-
12 Oreo cookies
-
3 tablespoons all-purpose flour
-
1/2 cup cocoa powder
-
1/4 cup unsalted butter, melted
-
8 oz cream cheese, room temperature
-
1/4 cup sour cream, room temperature
-
1/4 cup granulated sugar
-
2 eggs, room temperature
-
1/2 teaspoon vanilla extract
-
Pinch of salt
-
Red gel food coloring
Instructions
-
Step 1
Prepare the Oreo Crust: Grind 12 Oreo cookies into fine crumbs. In a bowl, combine crumbs with 3 tablespoons all-purpose flour, 1/4 cup cocoa powder, and 1/4 cup melted unsalted butter. Stir until moistened. -
Step 2
Form the Crust: Line a mini muffin pan with paper liners. Press about 1 tablespoon of the Oreo crumb mixture firmly into the bottom of each liner. Freeze for 10-15 minutes. -
Step 3
Mix the Cream Cheese Base: In a large bowl, beat 8 oz room temperature cream cheese until smooth. Add 1/4 cup room temperature sour cream and beat until combined. Gradually add 1/4 cup granulated sugar and 1 tablespoon cocoa powder, beating on low speed until well combined. -
Step 4
Incorporate Eggs and Color: In a small bowl, whisk together 1 egg, 1/2 teaspoon vanilla extract, and a pinch of salt. Add this to the cream cheese mixture and beat on low speed until just incorporated. Add red gel food coloring until a vibrant red hue is achieved. Be careful not to overmix. -
Step 5
Fill and Bake: Spoon the red velvet batter evenly into the chilled crusts, filling about two-thirds full. Bake in a preheated oven at 325°F (160°C) for 18-22 minutes, or until edges are set and centers have a slight jiggle. Cool in the pan for 15-20 minutes, then remove to a wire rack to cool completely. Chill for at least 2-3 hours before serving.
Important Information
Nutrition Facts (Per Serving)
It is important to consider this information as approximate and not to use it as definitive health advice.
Allergy Information
Please check ingredients for potential allergens and consult a health professional if in doubt.